Tag: skincare

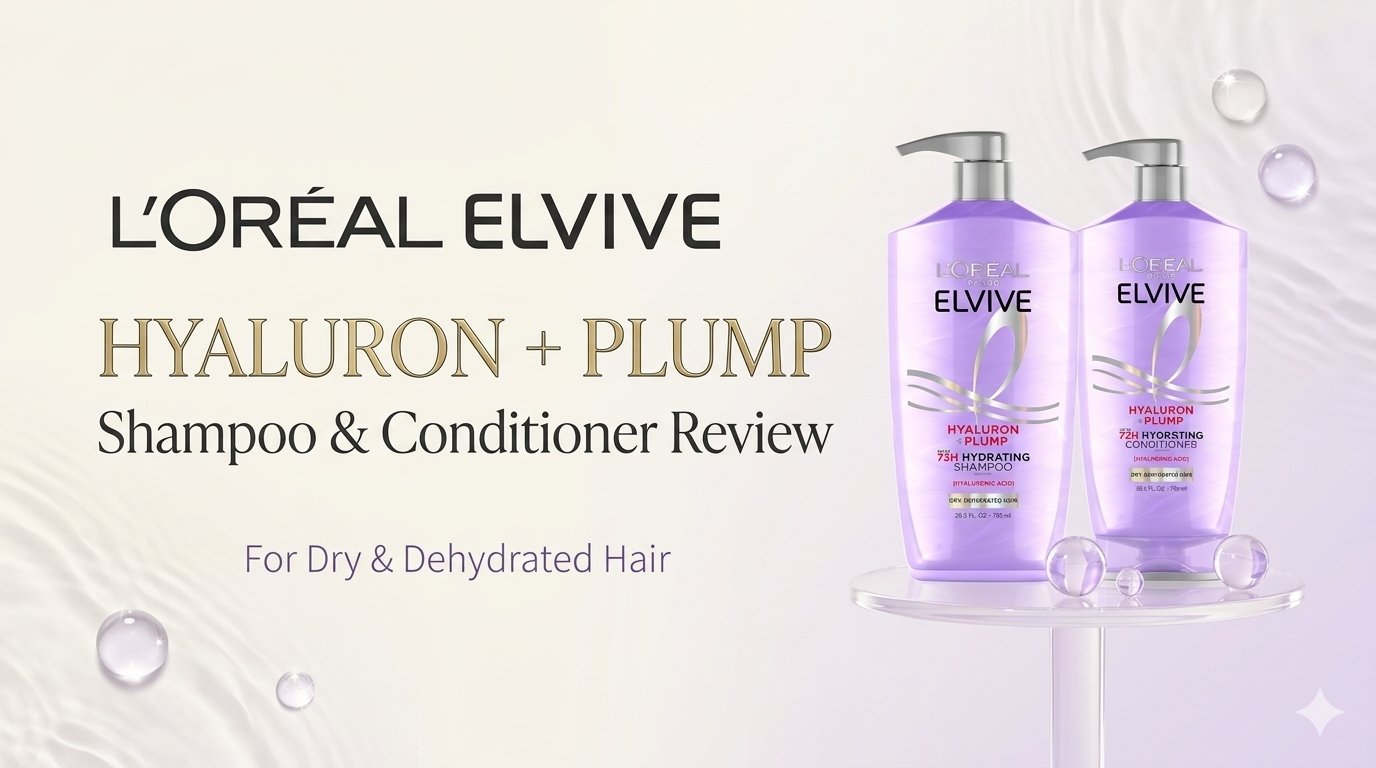
  • L’Oréal Paris Elvive Hyaluron + Plump Shampoo & Conditioner Review

    L’Oréal Paris Elvive Hyaluron + Plump Shampoo & Conditioner Review

    Dry, dull, or dehydrated-feeling hair can benefit from a routine focused on moisture and conditioning. L’Oréal Paris Elvive Hyaluron + Plump Shampoo & Conditioner takes inspiration from skincare and uses a Hyaluronic Acid Care Complex as part of a hydration-focused hair-care routine.

    The current Amazon listing describes this 53-fluid-ounce shampoo and conditioner set as being designed for dry and dehydrated hair, with benefits including hydration, moisturizing, detangling, nourishment, and a plumper-looking finish.

    The product listing also highlights up to 72 hours of moisture when used as directed.

    But is this set actually worth trying?

    This guide covers what it is, how to use it, who it may suit, its pros and cons, and what you can realistically expect.

    Quick Take

    L’Oréal Paris Elvive Hyaluron + Plump Shampoo & Conditioner is a practical option for people who want a simple moisture-focused routine for dry, dull, or dehydrated-feeling hair.

    The current product listing highlights:

    • Hyaluronic Acid Care Complex
    • Up to 72-hour moisture
    • Hydrating and moisturizing benefits
    • Detangling
    • Soft, manageable hair
    • A lightweight feel
    • Shiny, bouncy-looking hair
    • Paraben-free formula
    • Suitability for all hair types according to the listing
    • Fresh berry, cherry blossom, vanilla, and sandalwood fragrance notes

    Its biggest appeal is the straightforward shampoo + conditioner routine, making it easy to add to a regular wash day.


    What Is L’Oréal Elvive Hyaluron + Plump?

    L’Oréal Paris Elvive Hyaluron + Plump is a skincare-inspired hair-care range designed around hydration.

    The set contains:

    1. Hyaluron + Plump Hydrating Shampoo
    2. Hyaluron + Plump Hydrating Conditioner

    The range is designed for dry and dehydrated-feeling hair and is marketed to leave strands feeling softer, smoother, more manageable, and visibly fuller or bouncier.

    The current Amazon listing identifies the set for dry, dull, and all hair types.


    Why Is Hyaluronic Acid Used in Hair Care?

    Hyaluronic acid is best known as a skincare ingredient associated with moisture.

    In hair care, it is used in formulations designed to help dry hair feel more conditioned, soft, and manageable.

    L’Oréal positions the Hyaluron + Plump range as skincare-inspired and uses a Hyaluronic Acid Care Complex as part of its hydration-focused formula.

    It is important to keep expectations realistic, though. A hair-care product containing hyaluronic acid isn’t necessarily going to work in exactly the same way as a hyaluronic acid skincare serum.

    The complete formula, your hair type, and your existing hair condition all matter.


    Key Benefits of L’Oréal Elvive Hyaluron + Plump

    1. Hydration for Dry Hair

    Hydration is the main focus of this range.

    The current product listing claims up to 72 hours of moisture.

    That makes the set particularly relevant if your hair often feels:

    • Dry
    • Rough
    • Dull
    • Dehydrated
    • Frizzy from dryness
    • Difficult to manage

    The 72-hour figure is a product claim, not a guarantee that every person’s hair will remain hydrated for exactly 72 hours.


    2. Softer-Feeling Hair

    The conditioner is designed to moisturize and detangle the hair.

    That can help the lengths feel softer and easier to manage after washing.

    For dry-feeling hair, improved softness can be one of the most noticeable benefits of adding a conditioner to your routine.


    3. Easier Detangling

    The current Amazon listing specifically identifies detangling as one of the product benefits.

    This can be particularly helpful if your hair tends to knot after shampooing.

    Apply conditioner mainly to the mid-lengths and ends and gently work through the hair rather than aggressively pulling through tangles.


    4. Smoother, Shinier-Looking Hair

    Well-conditioned hair can look smoother and more polished.

    The current listing describes the system as producing shiny, bouncy, free-flowing strands.

    Your individual result can vary depending on your hair texture, condition, styling routine, and how your hair responds to the formula.


    5. Lightweight Moisture

    Another selling point is moisture without weigh-down.

    This can appeal to people who want conditioning without using an extremely rich hair mask every wash.

    However, “lightweight” is subjective. The amount you use and your individual hair type can affect how the product feels.


    How to Use L’Oréal Elvive Hyaluron + Plump Shampoo & Conditioner

    The routine is simple.

    Step 1: Wet Your Hair

    Thoroughly wet your hair before applying shampoo.

    Step 2: Apply the Shampoo

    Apply the Hyaluron + Plump shampoo to wet hair and gently massage the scalp.

    Rinse thoroughly.

    Step 3: Apply the Conditioner

    Apply the conditioner mainly to the mid-lengths and ends.

    If your scalp becomes oily quickly, there is usually no need to apply a large amount directly to the roots.

    Step 4: Leave the Conditioner On

    The current product directions indicate leaving the conditioner on for approximately 1–2 minutes.

    Follow the instructions on your current bottle because packaging directions can change.

    Step 5: Rinse Thoroughly

    Rinse the conditioner completely.

    Your hair should feel conditioned and manageable without feeling excessively coated.


    How Often Should You Use It?

    The current Amazon listing describes the formula as gentle enough for daily use.

    That doesn’t mean you need to wash your hair every day.

    Your ideal washing schedule depends on:

    • Scalp oiliness
    • Hair texture
    • Hair density
    • Exercise
    • Styling habits
    • Climate
    • Personal preference

    If you normally wash your hair two or three times a week, you can simply use the set during those wash days.

    If your scalp becomes oily quickly, you may prefer more frequent washing.

    If your hair is dry and your scalp is comfortable with less frequent washing, you may prefer a less frequent schedule.


    Who Should Try L’Oréal Elvive Hyaluron + Plump?

    This set may be a good option if your main concern is dryness, dullness, or lack of softness.

    It may suit people with:

    • Dry-feeling hair
    • Dehydrated-feeling hair
    • Dull hair
    • Frizz associated with dryness
    • Rough-feeling lengths
    • Hair that tangles easily
    • Hair that needs additional conditioning
    • Hair that looks flat or lacks bounce

    The current product listing identifies the set for dry, dull, and all hair types.


    Who May Want a Different Routine?

    Very Oily Scalp

    If your scalp becomes oily quickly, a highly moisturizing routine may not be your only priority.

    You may prefer a more scalp-focused shampoo while keeping conditioner on the lengths and ends.

    Very Fine Hair

    Fine hair can sometimes become weighed down by too much conditioner.

    Start with a smaller amount and focus on the ends.

    Heavily Damaged Hair

    If your hair is heavily bleached, chemically processed, or severely damaged, a basic shampoo and conditioner may not be enough for your preferred routine.

    You may want to add an occasional conditioning mask or another targeted treatment.


    L’Oréal Elvive Hyaluron + Plump Pros & Cons

    Pros

    • Hydration-focused routine
    • Shampoo and conditioner included together
    • Hyaluronic Acid Care Complex
    • Designed for dry and dehydrated-feeling hair
    • Helps with detangling
    • Soft, manageable finish
    • Designed to feel lightweight
    • Paraben-free according to the current listing
    • Large 53-fluid-ounce set
    • Easy two-step routine
    • Suitable for all hair types according to the listing

    Cons

    • The 72-hour hydration claim is a product claim and individual results can vary
    • Fragrance may not appeal to everyone
    • Fine hair may need a smaller amount of conditioner
    • Very damaged hair may need additional treatments
    • Moisturizing products are not necessarily the best choice for every scalp type

    Is It Sulfate-Free?

    If you’re specifically looking for a sulfate-free shampoo, this is an important consideration.

    The current ingredient information for the Hyaluron + Plump shampoo includes Sodium Laureth Sulfate (SLES) and Sodium Lauryl Sulfate (SLS).

    So this shampoo should not be described as sulfate-free.

    If avoiding sulfates is important to you, check the current ingredient list before purchasing because formulas can change.


    Is It Paraben-Free?

    Yes.

    The current Amazon listing identifies the set as paraben-free.

    Always check the current packaging if you have specific ingredient requirements.


    Can It Repair Damaged Hair?

    It is better to keep expectations realistic.

    A moisturizing shampoo and conditioner can improve the feel, appearance, smoothness, and manageability of dry or damaged-looking hair.

    That does not mean the products permanently reverse all structural hair damage.

    If you have split ends, trimming is still the reliable way to remove the split portion.

    For heavily processed hair, a broader routine may be more useful than relying on one shampoo and conditioner.


    Can You Use a Hair Mask With It?

    Yes.

    If your hair needs additional conditioning, you can occasionally add a hair mask to your routine.

    For example:

    Regular wash day:
    Shampoo → Conditioner → Rinse

    Treatment day:
    Shampoo → Hair Mask → Rinse

    You don’t necessarily need a rich mask every time you wash.

    If your hair starts feeling heavy, reduce the amount or frequency of richer products.


    What Does It Smell Like?

    The current Amazon listing describes the fragrance as featuring:

    • Bright berries
    • Cherry blossom
    • Sweet vanilla
    • Sandalwood

    This gives the range a fresh, sweet, floral-fruity fragrance profile.

    Whether you enjoy it will depend on your personal preference.


    Current Product Details

    According to the current Amazon listing:

    • Brand: L’Oréal Paris
    • Product: Elvive Hyaluron + Plump Shampoo & Conditioner Set
    • Set: Shampoo + Conditioner
    • Total Size: 53 fluid ounces
    • Number of Items: 2
    • Hair Type: Dry, Dull, All Hair Types
    • Product Benefits: Detangle, Hydrating, Moisturizing, Nourishing, Plump
    • Formula Highlight: Hyaluronic Acid Care Complex
    • Hydration Claim: Up to 72 hours
    • Paraben-Free: Yes
    • Item Form: Liquid
    • Manufacturer: L’Oréal Paris
    • Current Amazon Rating: 4.7 out of 5 stars
    • Current Reviews Shown: 7,117
    • Current Amazon Best Sellers Rank: #524 in Beauty & Personal Care
    • Current Category Rank: #5 in Shampoo & Conditioner Sets

    Amazon ratings, review counts, rankings, prices, availability, packaging, and product information can change. Check the current Amazon listing before purchasing.


    Quick Product Box

    L’Oréal Paris Elvive Hyaluron + Plump Shampoo & Conditioner Set, 53 Fl Oz

    A hydration-focused shampoo and conditioner set with a Hyaluronic Acid Care Complex, designed for dry and dehydrated-feeling hair. The current listing highlights moisture, detangling, softness, shine, and a lightweight feel.

    View on Amazon

    #ad Affiliate link — I may earn a commission from qualifying purchases. As an Amazon Associate I earn from qualifying purchases. Product availability, price and details may change on Amazon. Product sizes, ingredients, packaging, availability, sellers, and delivery information can change. Check current Amazon listing before purchasing.


    Is L’Oréal Elvive Hyaluron + Plump Worth Trying?

    If your main goal is simple, moisture-focused hair care, this set is worth considering.

    Its biggest advantage is the straightforward routine: shampoo, condition, rinse, and style.

    The Hyaluronic Acid Care Complex gives the range a clear hydration-focused identity, while the conditioner is designed to help soften and detangle the hair.

    I wouldn’t choose this set because you expect it to permanently repair severely damaged hair.

    Instead, consider it if you want hair that feels softer, looks smoother and shinier, and is easier to manage after washing.

    For dry, dull, or dehydrated-feeling hair, that can be exactly what you want from an everyday hair-care routine.


    Final Verdict

    L’Oréal Paris Elvive Hyaluron + Plump Shampoo & Conditioner is a practical choice for a moisture-focused hair-care routine.

    The current product information emphasizes hydration, detangling, softness, shine, and a lightweight finish, making it particularly relevant for dry and dull-feeling hair.

    The most realistic way to approach this set is as a hydrating and conditioning routine, rather than a permanent solution for damaged hair.

    If your hair responds well to moisturizing products and you want a simple shampoo-and-conditioner combination, this set could be a useful addition to your wash-day routine.

    Save This for Later

    Thinking about trying a hydration-focused hair routine?

    Save this guide to Pinterest so you can come back to the product details, usage tips, pros and cons, and buying information when you’re ready.

    Visit Beauty Glow Guide for more practical hair, skincare, beauty, and self-care guides.
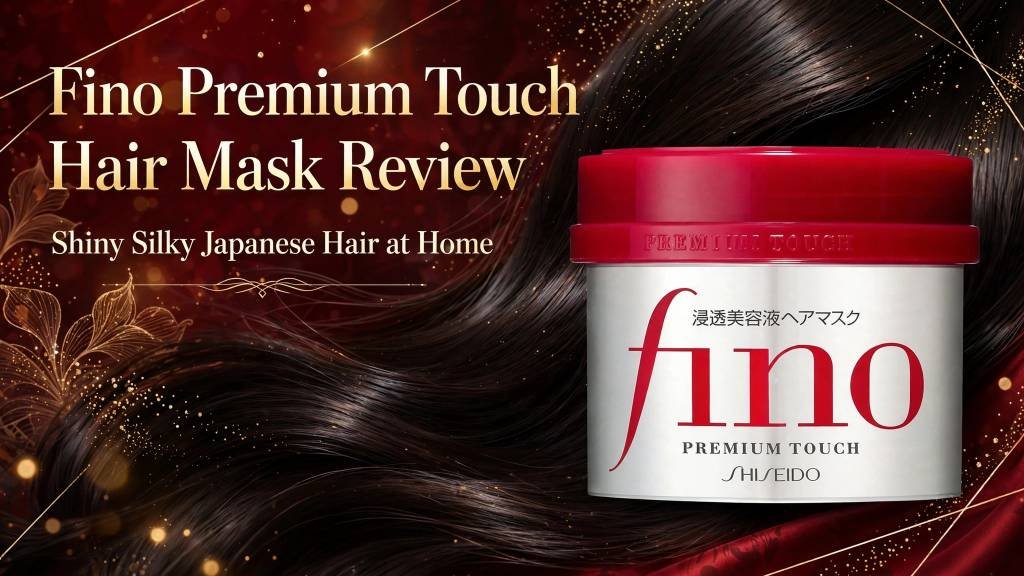
  • Fino Premium Touch Hair Mask Review: How to Use It & Who It’s For

    Fino Premium Touch Hair Mask Review: How to Use It & Who It’s For

    If your hair feels dry, rough, frizzy, or difficult to manage, a rich hair mask can be a useful addition to your routine. Fino Premium Touch Hair Mask is a Japanese hair-conditioning treatment that has become popular among people looking for softer, smoother, shinier-looking hair at home.

    The current Amazon listing describes this version as an 8.1 oz cream hair-conditioning mask with eight serum ingredients and benefits including moisturizing, nourishing, smoothing, shine, and improved manageability.

    But is it right for your hair?

    This guide explains what Fino Premium Touch Hair Mask is, how to use it, how often to use it, what to expect, and who may benefit most from adding it to a hair-care routine.

    Quick Take

    Fino Premium Touch Hair Mask is a rich rinse-out conditioning treatment designed for hair that feels dry, damaged, rough, frizzy, or difficult to manage.

    The current product listing highlights:

    • Eight serum ingredients
    • Moisturizing and nourishing properties
    • Smoothing and shine benefits
    • A rich cream texture
    • Floral fragrance
    • Use as a hair-conditioning mask
    • Suitability for all hair types according to the current listing

    The main reason to consider it is simple: it can help hair feel softer, smoother, more conditioned, and easier to manage.

    However, a hair mask should not be treated as a permanent solution for split ends or severely damaged hair. Cosmetic conditioning can improve the way damaged hair looks and feels, but trimming is still the dependable way to remove split ends.


    What Is Fino Premium Touch Hair Mask?

    Fino Premium Touch Hair Mask is a Japanese rinse-out hair treatment designed to provide intensive conditioning.

    The current Amazon product listing describes it as:

    Fino Premium Touch Hair Mask, Deep Repair Japanese Hair Treatment, 8.1 oz

    It is listed as a cream-format hair-conditioning mask with eight serum ingredients and a floral fragrance.

    The product is particularly positioned toward people with dry or damaged-feeling hair who want a smoother, softer, more polished finish.

    Rather than thinking of it as a miracle repair treatment, it is more useful to think of Fino as a rich conditioning step designed to improve the feel, appearance, and manageability of the hair.


    What Are the Main Benefits?

    1. Softer-Feeling Hair

    One of the biggest reasons to use a hair mask is to improve how the hair feels.

    Fino’s rich conditioning formula can help rough-feeling hair feel softer and more comfortable to handle after washing.

    This can be particularly useful if your hair feels dry after:

    • Heat styling
    • Frequent washing
    • Coloring
    • Bleaching
    • Chemical treatments
    • Environmental exposure

    Results can vary depending on your hair’s condition and routine.

    2. Smoother-Looking Hair

    Conditioning can help hair look more polished and less rough.

    Fino is especially appealing if your goal is hair that looks:

    • Smooth
    • Glossy
    • Soft
    • Well-conditioned
    • Easier to style

    The current Fino product information also emphasizes smoothness and shine as key benefits.

    3. Easier Detangling

    Dry or rough hair can be harder to comb.

    A conditioning mask can make the lengths feel more slippery and manageable, which may make detangling easier.

    For long or thick hair, this can be one of the most noticeable practical benefits of using a rich conditioner or mask.

    4. A More Hydrated Feel

    Fino is marketed toward dry and damaged hair, and its conditioning formula is intended to improve the hair’s moisturized feel.

    Keep expectations realistic, though. A cosmetic hair mask can improve the feel and appearance of the hair without permanently changing damaged hair structure.

    5. Added Shine

    Conditioned hair can reflect light more evenly, making it appear shinier.

    If your hair looks dull after frequent styling or coloring, a conditioning treatment may help create a more polished-looking finish.


    What Are the 8 Serum Ingredients?

    The current product positioning emphasizes eight serum ingredients.

    Rather than treating every ingredient claim as a guaranteed result, it is better to understand the overall purpose of the formula: the ingredients are intended to support conditioning, moisture, smoothness, and the appearance of healthier-looking hair.

    The official Japanese Fino site describes eight beauty-serum ingredients and highlights functions including moisture, manageability, cuticle conditioning, and internal conditioning.

    Because formulas and packaging can change, always check the current ingredient list on the product packaging or current retailer listing before purchasing, particularly if you have known ingredient sensitivities.


    How to Use Fino Premium Touch Hair Mask

    Using a rich hair mask correctly can make a big difference.

    Step 1: Shampoo Your Hair

    Wash your hair with your normal shampoo and rinse thoroughly.

    You want the hair to be clean before applying the treatment.

    Step 2: Remove Excess Water

    Gently squeeze excess water from your hair.

    You don’t want the hair dripping wet because excessive water can dilute the product.

    Step 3: Apply the Mask

    Apply Fino primarily through the mid-lengths and ends.

    If your roots become oily easily or your hair is very fine, you may prefer keeping the richer mask away from the scalp.

    Concentrate on the areas that feel:

    • Dry
    • Rough
    • Tangled
    • Frizzy
    • Damaged from styling

    Step 4: Leave It According to the Current Directions

    Follow the instructions on your current packaging.

    Fino’s official Japanese site shows several possible approaches, including using it as a conditioner and leaving it on for a few minutes before rinsing.

    There is no need to assume that leaving a hair mask on dramatically longer will automatically produce better results.

    Step 5: Rinse Thoroughly

    Rinse your hair well until the product has been removed.

    Your hair should feel conditioned but not coated with a heavy residue.


    How Often Should You Use Fino Hair Mask?

    There isn’t one frequency that works perfectly for everyone.

    The current product information presents the mask as flexible enough to be used as part of regular conditioning or as a more intensive treatment.

    For a simple starting point, try it about once a week.

    Then adjust according to your hair.

    If Your Hair Is Thick or Very Dry

    You may prefer using a rich conditioning treatment more regularly if your hair responds well to it.

    If Your Hair Is Fine

    Start less frequently.

    A rich mask may make fine hair feel heavy or flat if too much product is used.

    If Your Hair Gets Oily Quickly

    Focus the product on the mid-lengths and ends rather than applying a large amount near the roots.

    The goal is conditioned hair—not hair that feels coated.


    Fino Hair Mask vs. Regular Conditioner

    A regular conditioner is usually designed to be a convenient part of everyday washing.

    A hair mask is generally chosen when you want a more intensive conditioning step.

    You can think about the difference like this:

    Regular ConditionerFino Hair Mask
    Convenient everyday conditioningRicher conditioning treatment
    Usually lighterMore substantial cream texture
    Quick routine stepCan be used as a deeper conditioning step
    Good for routine maintenanceUseful when hair feels especially dry or rough

    You don’t necessarily need both every time you wash your hair.

    If Fino already gives your hair enough conditioning, you can adjust the rest of your routine accordingly.


    Who May Like Fino Premium Touch Hair Mask?

    Fino may be worth considering if your hair frequently feels:

    • Dry
    • Rough
    • Frizzy
    • Tangled
    • Dull
    • Difficult to manage
    • Stressed from heat styling
    • Dry after coloring or other chemical treatments

    It may also appeal to people who simply prefer a rich conditioning treatment that leaves the hair feeling softer and smoother.


    Who Should Be More Careful With It?

    A rich hair mask isn’t automatically better for every hair type.

    Very Fine Hair

    Fine hair can sometimes become weighed down by rich conditioning products.

    Start with a small amount and focus on the ends.

    Oily Roots

    If your scalp becomes oily quickly, avoid applying a heavy amount directly to the roots.

    Fragrance Sensitivity

    The current listing describes Fino as having a floral fragrance.

    If you are sensitive to fragranced hair products, check the current ingredient list before use.

    Product Buildup

    Using too much of a rich conditioning product too frequently can leave some hair types feeling coated or heavy.

    If your hair starts feeling flat or weighed down, reduce the amount or frequency.


    Can Fino Hair Mask Repair Split Ends?

    This is an important distinction.

    A hair mask can make dry or damaged-looking ends feel smoother and look more polished, but it cannot permanently rejoin a split hair strand.

    If you have visible split ends, trimming is the reliable way to remove the split portion.

    Think of Fino as a conditioning and appearance-enhancing treatment rather than a permanent replacement for a haircut.

    That distinction is especially important when evaluating products marketed with words such as “repair” or “rebuild.”


    Can You Use Fino With Other Hair Products?

    Yes. A hair mask can fit into a broader routine.

    A simple routine could look like:

    Shampoo → Fino Hair Mask → Rinse → Leave-In Product if Needed

    Depending on your hair, you can also use:

    • Heat protectant before heat styling
    • Leave-in conditioner
    • Hair oil
    • Styling products

    The important thing is to avoid layering too many heavy products if your hair becomes weighed down easily.


    What About Using Fino With Clarifying Shampoo?

    If you regularly use styling products, oils, dry shampoo, or other products that can build up, an occasional clarifying wash may be useful as part of your broader routine.

    You can then follow with your normal conditioning routine.

    However, you don’t need to clarify simply because you use Fino.

    Let your hair’s response guide your routine.


    Current Fino Premium Touch Hair Mask Product Details

    According to the current Amazon listing you provided, the product details include:

    • Brand: Fino
    • Product: Fino Premium Touch Hair Mask
    • Size: 8.1 oz
    • Format: Cream
    • Hair Type: All hair types
    • Hair Conditioner Type: Hair Conditioning Mask
    • Highlighted Formula: 8 serum ingredients
    • Listed Benefits: Repairing, moisturizing, smoothing, shine
    • Additional Features: Moisturizing, nourishing, smoothing, strengthening
    • Fragrance: Floral
    • Manufacturer: FineToday Co., Ltd.
    • Current Amazon Rating: 4.5 out of 5
    • Current Reviews Shown: 215
    • Current Amazon Popularity Indicator: 9K+ bought in the past month
    • Current Best Sellers Rank: #3,065 in Beauty & Personal Care and #16 in Hair Treatment Masks

    Amazon ratings, review counts, rankings, sales indicators, prices, availability, packaging, and product information can change. Always check the current Amazon listing before purchasing.


    Quick Product Box

    Fino Premium Touch Hair Mask, 8.1 oz

    A rich Japanese hair-conditioning mask featuring eight serum ingredients and designed for dry and damaged-feeling hair. The current listing highlights moisturizing, nourishing, smoothing, shine, and manageability benefits.

    View on Amazon

    #ad Affiliate link — I may earn a commission from qualifying purchases. As an Amazon Associate I earn from qualifying purchases. Product availability, price and details may change on Amazon. Product sizes, ingredients, packaging, availability, sellers, and delivery information can change. Check current Amazon listing before purchasing.


    Our Fall Hair Guide

    If you’re also looking for simple seasonal hairstyles to pair with a healthy-looking hair-care routine, check out our guide:

    15 Fall Hair Ideas for Women That Look Chic and Easy to Style

    It includes easy fall hairstyle inspiration for women who want polished looks without overly complicated styling.


    Is Fino Premium Touch Hair Mask Worth Trying?

    For someone who wants a richer conditioning treatment, Fino Premium Touch Hair Mask is worth considering.

    Its strongest appeal is not that it can magically reverse every type of hair damage. Instead, the practical benefit is the possibility of softer-feeling, smoother, shinier, and easier-to-manage hair after conditioning.

    It may be especially appealing if your hair feels dry, rough, tangled, or stressed from regular styling.

    The main consideration is your hair type.

    If your hair is thick, dry, or coarse, a rich mask may fit comfortably into your routine. If your hair is very fine or easily weighed down, start with a small amount and use it less frequently.


    Final Thoughts

    Fino Premium Touch Hair Mask is best viewed as a rich conditioning treatment rather than a permanent repair solution.

    The current product listing highlights eight serum ingredients, moisturizing and nourishing properties, smoothing, shine, and conditioning benefits.

    For dry or damaged-feeling hair, the biggest practical advantages may be improved softness, smoother feel, easier detangling, and a more polished appearance.

    Use it according to the current product directions, start with a manageable frequency, and adjust depending on how your hair responds.

    And remember: healthy-looking hair isn’t only about one product. A simple routine that includes gentle cleansing, appropriate conditioning, careful heat styling, and regular trims can make a bigger difference over time.

    Visit Beauty Glow Guide for more practical beauty, hair, skincare, and self-care guides.

    Save This for Later

    Planning to try Fino Premium Touch Hair Mask?

    Save this guide to Pinterest so you can come back to the application tips, frequency guide, and hair-care notes when you need them.

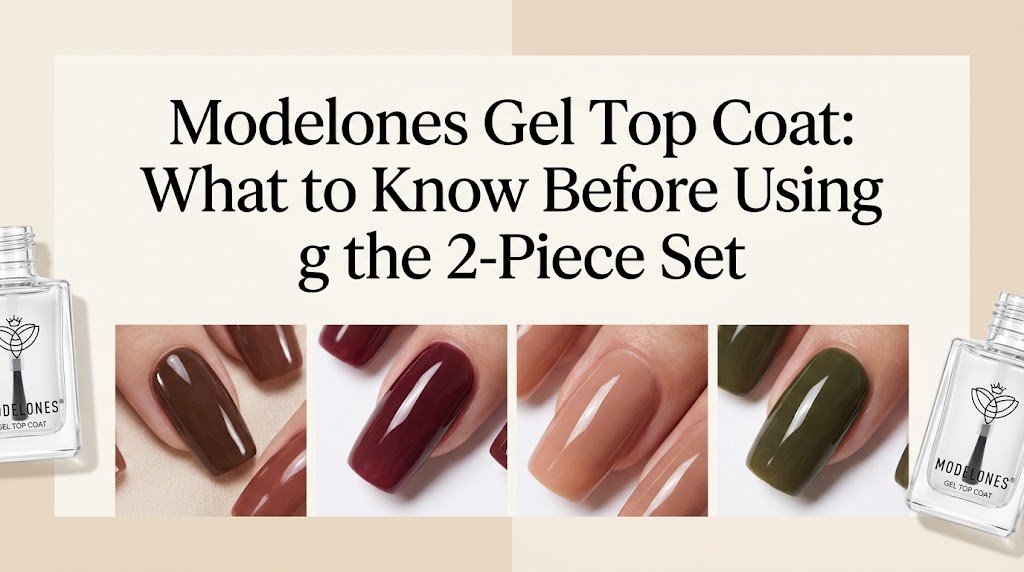
  • Modelones Gel Top Coat: A Practical Guide

    Modelones Gel Top Coat: A Practical Guide

    A top coat is the finishing layer of a gel manicure, helping create the final appearance of the nails. The Modelones Gel Top Coat 2-Piece Set is a clear gel top coat with a glossy finish and no-wipe design.

    The set contains two 10 mL bottles. According to the product listing, the top coat is designed to be cured with a UV/LED nail lamp and can be used for several gel manicure and nail-art applications.

    If you are considering adding a clear gel top coat to your home manicure routine, here is what to know before using it.

    What Comes in the Modelones Gel Top Coat Set?

    The set includes:

    • 2 bottles of clear gel top coat
    • 10 mL per bottle
    • Clear color
    • Glossy finish
    • No-wipe design
    • Gel formula
    • UV/LED lamp curing

    The two-bottle format can be useful if you regularly do gel manicures and want a second bottle available as a backup.

    What Is a No-Wipe Gel Top Coat?

    A no-wipe gel top coat is designed to be cured without requiring the usual cleansing step used with some gel products that leave a tacky residue.

    This can make the final stage of a gel manicure more convenient.

    However, curing requirements vary between products, so it is important to follow the instructions supplied with the top coat and the nail lamp you are using.

    What Does the Modelones Top Coat Look Like?

    The Modelones top coat is clear with a glossy finish.

    Because it is transparent, it can be used over many different gel colors without adding another visible color layer.

    A glossy clear top coat can work particularly well with simple manicures because it adds a polished finishing appearance without requiring additional nail art.

    How to Use a Gel Top Coat

    The exact instructions for your product should always take priority, but a typical gel manicure finishing process includes the following steps.

    1. Finish Your Gel Color

    Apply your gel color according to its instructions.

    Make sure the previous layer has been properly cured before applying the top coat.

    2. Apply the Top Coat

    Apply a controlled, even layer of the Modelones top coat over the nail.

    Try to avoid flooding the cuticle area or getting uncured gel onto surrounding skin.

    3. Check the Nail

    Before curing, check the sides and free edge of the nail.

    Look for uneven areas or excess product and correct them before placing the hand under the lamp.

    4. Cure With a UV/LED Lamp

    The product listing states that the top coat requires a UV/LED nail lamp.

    Follow the curing instructions supplied with the product and use the lamp according to its own instructions.

    5. Complete the Finish

    Because the product is marketed as a no-wipe top coat, the listing indicates that a separate wipe step is not required after proper curing.

    What Can You Use It With?

    The product listing describes the top coat as compatible with several manicure applications, including:

    • Gel nail polish
    • Acrylic nails
    • Dip powder
    • Press-on nails
    • Chrome powder
    • Gel-X-style applications
    • Nail art

    Compatibility can vary depending on the products being combined, so follow the instructions for each nail system.

    Why Use a Clear Gel Top Coat?

    A clear top coat is versatile because it can be used with many colors and manicure styles.

    For a home gel manicure, it can provide the final glossy layer over colors such as:

    • Chocolate brown
    • Burgundy
    • Deep red
    • Warm nude
    • Beige
    • Milky neutral
    • Olive
    • Seasonal fall shades

    This makes a clear top coat particularly useful if you regularly change your nail colors.

    Glossy Nails Without Complicated Nail Art

    You do not need elaborate designs to create an attractive gel manicure.

    A single gel color followed by a clear glossy top coat can create a simple everyday look.

    For example, try:

    • Solid chocolate brown nails
    • Burgundy short nails
    • Warm nude gel nails
    • Deep olive nails
    • Neutral nails with one shimmer accent
    • Simple fall-colored manicures

    For a low-maintenance beauty routine, keeping the color simple can make the manicure easier to create while still giving it a finished appearance.

    Important Application Considerations

    Gel products require more care than conventional air-drying nail polish.

    Keep Uncured Gel Off the Skin

    Avoid getting uncured gel on the surrounding skin.

    The product listing advises users to perform a skin test and discontinue use if discomfort or an allergic reaction occurs.

    If gel gets onto the surrounding skin during application, clean it up rather than intentionally curing it onto the skin.

    Use a Compatible Lamp

    The Modelones listing states that the product requires a UV/LED nail lamp.

    Do not assume that every gel product has identical curing requirements. Follow the instructions for the top coat and the lamp you are using.

    Apply Controlled Layers

    Avoid applying unnecessarily thick amounts of top coat.

    A controlled application can make it easier to create an even-looking finish and reduce the chance of product spreading toward the cuticle.

    Protect the Product From Unnecessary Light

    Keep the bottle closed when it is not being used and follow the manufacturer’s storage instructions.

    Gel products can be sensitive to light, so leaving the bottle open unnecessarily during a manicure is best avoided.

    Modelones Gel Top Coat: What to Consider Before Buying

    The two-piece format may appeal to people who regularly perform gel manicures at home.

    The clear color is also versatile because it can be paired with many different gel shades.

    However, this is not a conventional air-dry nail-polish top coat.

    It is a gel product that requires UV/LED curing, so you need the appropriate equipment and should be comfortable following a gel-manicure application and removal routine.

    Who Might Like This Type of Top Coat?

    The Modelones Gel Top Coat may be worth considering if you:

    • Regularly do gel manicures at home
    • Prefer a glossy finish
    • Want a clear finishing layer
    • Enjoy nail art
    • Use gel nail enhancements
    • Already own a compatible UV/LED nail lamp
    • Want two bottles in one set

    If your routine uses only traditional air-dry nail polish, a conventional top coat would be a different type of product.

    Quick Product Pick

    Modelones Gel Top Coat — 2-Piece Clear No-Wipe Set

    The set contains two 10 mL bottles of clear glossy gel top coat. The product listing states that it is designed for UV/LED lamp curing and can be used for several gel manicure and nail-art applications.

    Modelones Gel Top Coat — 2-Piece Set on Amazon

    Quick Product Box

    Modelones Gel Top Coat — 2-Piece Clear Glossy No-Wipe Set

    Includes: 2 × 10 mL bottles of clear gel top coat.

    Finish: Glossy

    Type: No-wipe gel top coat

    Curing: UV/LED nail lamp

    Use: Gel manicures and various nail-art applications listed by the manufacturer

    Check the current Amazon listing

    Final Thoughts

    The Modelones Gel Top Coat is a straightforward option for someone looking for a clear, glossy gel finishing layer.

    Its main features are the two-bottle format, clear color, glossy finish, no-wipe design and UV/LED curing requirement.

    The product listing also describes it for use with several manicure and nail-art applications, although compatibility should always be considered alongside the instructions for the other products in your routine.

    The main distinction to remember is that this is a gel top coat rather than a conventional air-dry top coat. That means proper application, curing, skin-contact precautions and removal are all important parts of using it.

    For a simple home gel manicure, a clear glossy top coat can be a useful finishing step when you want a polished-looking result without complicated nail art.

    Save This for Later

    Planning your next gel manicure? Save this guide to Pinterest so you can return to it when choosing a clear gel top coat.

    #ad Affiliate link — I may earn a commission from qualifying purchases. As an Amazon Associate I earn from qualifying purchases. Product availability, price and details may change on Amazon. Product sizes, ingredients, packaging, availability, sellers, and delivery information can change. Check current Amazon listing before purchasing.

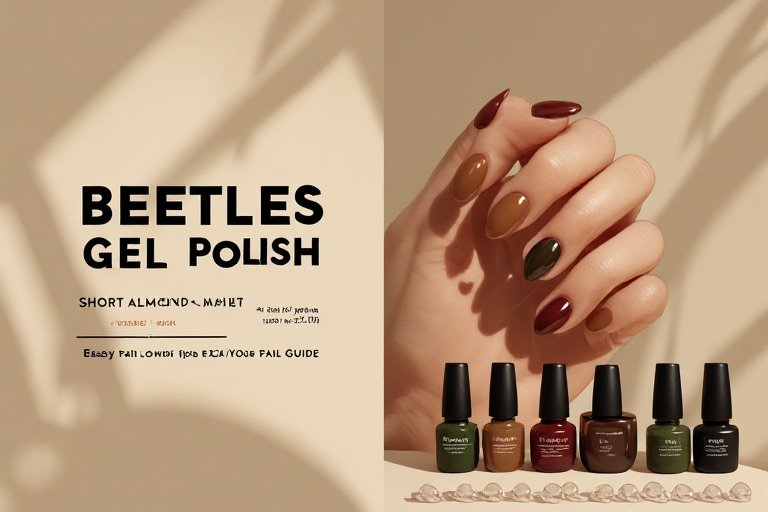
  • Beetles Fall Gel Polish & Short Almond Nail Tips: What to Know

    Beetles Fall Gel Polish & Short Almond Nail Tips: What to Know

    Creating a fall manicure at home can be as simple or as creative as you want it to be. A coordinated color collection gives you plenty of seasonal shades to work with, while short almond nail tips can provide an extension option when you want a different shape or length.

    The Beetles bundle featured here combines two separate products: a 23-bottle fall gel polish collection and a 288-piece extra-short almond nail extension kit.

    They serve different purposes, but they can be used as part of the same at-home manicure routine depending on the look you want to create.

    Here is what to know before using or buying the set.

    What’s Included in the Beetles Bundle?

    The Amazon listing identifies this as a two-item bundle.

    1. Beetles Fall Gel Nail Polish Collection

    The first product is a seasonal gel polish collection containing:

    • 20 fall-inspired gel colors
    • 1 base coat
    • 1 glossy top coat
    • 1 matte top coat

    The palette includes a mixture of warm and deeper shades, including colors described in the listing as orange, yellow, red, burgundy, green, blue, brown, neutral and glitter shades.

    This gives you several ways to build a fall manicure without purchasing each color individually.

    2. Beetles Extra-Short Almond Nail Extension Kit

    The second product contains:

    • 288 clear extra-short almond nail tips
    • 12 sizes
    • Pre-etched, half-matte interiors
    • Nail adhesive
    • Mini UV lamp

    The short almond shape gives the extension look a more compact silhouette than a long almond nail.

    That can make it particularly relevant if you like the almond shape but prefer a shorter overall appearance.

    The Two Products Have Different Jobs

    It is helpful to think of the bundle as two separate parts rather than one traditional nail-polish kit.

    The gel polish collection is primarily about color and finishing.

    The nail-tip kit is about creating an extension shape.

    You can use the fall gel colors on your natural nails, or use the colors with appropriately prepared nail extensions.

    You do not necessarily need extensions to enjoy the fall color collection.

    Exploring the Fall Gel Polish Colors

    The color variety is one of the most useful parts of the collection for seasonal manicures.

    Fall nails do not have to mean one specific shade. You can build looks around different color families.

    Chocolate Brown

    Brown is an easy choice for an autumn manicure because it works well with neutral outfits and can be worn as a single-color manicure.

    A glossy chocolate brown can also create a richer evening look.

    Burgundy and Deep Red

    Burgundy and deep red shades can give a manicure a more dramatic fall appearance without requiring nail art.

    They also work well as accent colors when paired with beige, brown or neutral shades.

    Warm Orange and Mustard

    Orange and mustard shades can bring more obvious autumn color into a manicure.

    For a softer look, use one of these colors on an accent nail rather than all ten nails.

    Green

    Deep or muted green can provide an alternative to the more traditional brown and burgundy fall palette.

    Pairing green with a warm neutral can keep the overall manicure balanced.

    Neutral Shades

    Warm neutral colors are useful when you want a manicure that feels seasonal without being strongly themed.

    They can also work as a base for simple nail art or contrasting accent nails.

    Glitter and Shimmer

    The collection also includes glitter shades.

    Rather than using glitter across every nail, try one or two accent nails for a more understated finish.

    Glossy or Matte?

    One advantage of the collection is that it includes both a glossy and a matte top-coat option.

    That means the same color can look quite different depending on the final finish.

    Glossy Fall Nails

    A glossy finish works especially well with:

    • Chocolate brown
    • Burgundy
    • Deep red
    • Dark green
    • Warm nude shades

    It creates a classic polished appearance.

    Matte Fall Nails

    A matte finish can make the same autumn colors feel softer and more understated.

    Matte brown, muted green, warm beige and burgundy can all work particularly well with a simple short-nail look.

    How the Color Collection Can Fit Into a Fall Routine

    If you prefer simple manicures, you do not need to use multiple colors at once.

    Try a one-color manicure first.

    For example:

    Simple:
    One shade on all nails.

    Two-tone:
    Use a neutral on most nails and a deeper fall shade on two accent nails.

    Tonal:
    Combine different shades from the brown or neutral family.

    Accent:
    Use one glitter or shimmer shade on a single nail.

    Finish change:
    Try the same color with a glossy finish one week and a matte finish the next.

    This approach gives you more variety without requiring complicated nail art.

    What Are the Short Almond Nail Tips Like?

    The second part of the bundle contains 288 extra-short almond nail tips in 12 sizes.

    The tips are designed to provide a ready-shaped extension base.

    Their extra-short length is different from the long, dramatic extension styles often seen in nail-art inspiration.

    For someone who likes an almond silhouette but wants a more compact manicure, the shorter shape may be worth considering.

    Why the 12 Sizes Matter

    Nail tips need to fit the natural nail as closely as possible.

    The included 12 sizes give you more options when choosing a tip for each nail.

    Instead of immediately selecting a tip that is too narrow, compare the available sizes and choose the closest appropriate fit.

    Do not force a tip onto the natural nail simply because the shape looks attractive.

    A properly selected size is an important part of creating a neat-looking extension.

    The Pre-Etched Interior

    The product listing describes the tips as having a pre-etched, half-matte interior.

    This is intended to simplify preparation compared with manually etching a completely smooth tip.

    Even with pre-etched tips, proper nail preparation and careful application remain important.

    Follow the instructions supplied with the specific extension product rather than assuming every nail-tip system uses the same process.

    A Simple Fall Extension Workflow

    If you want to combine the extension tips with the fall colors, the general workflow can look like this:

    Step 1: Prepare the Natural Nails

    Clean and prepare the nails according to the extension product’s instructions.

    Keep the surrounding skin clean and avoid unnecessary product contact.

    Step 2: Select the Tip Sizes

    Compare the 12 available sizes and select the closest fit for each nail.

    Arrange the selected tips in order before starting application.

    Step 3: Apply the Tips

    Follow the supplied instructions for applying the adhesive and positioning each tip.

    Work carefully rather than rushing the placement.

    Step 4: Check the Shape

    Once the extensions are positioned, check that the tips are sitting evenly and that the overall almond shape looks balanced.

    Step 5: Apply Your Fall Color

    Once the extension system is ready for color, you can choose from the fall shades in the Beetles collection.

    A simple chocolate brown or burgundy can work particularly well with a short almond shape.

    Step 6: Choose Your Finish

    Finish with either the glossy or matte top coat included with the gel collection, following the appropriate curing instructions.

    5 Easy Fall Looks to Try

    You can keep the manicure simple even with a large color collection.

    1. Chocolate Brown Almonds

    Use one rich brown shade across all nails and finish with gloss.

    This is one of the easiest ways to create a seasonal manicure without additional nail art.

    2. Burgundy With One Shimmer Accent

    Use burgundy across most nails and add a coordinating shimmer shade to one or two accent nails.

    3. Warm Neutral + Brown

    Use a warm neutral on most nails and chocolate brown on the remaining nails.

    The contrast stays subtle while still feeling autumnal.

    4. Matte Olive

    Try a muted green shade with a matte finish for an understated fall manicure.

    5. Brown and Burgundy Mix

    Alternate brown and burgundy across the nails for a simple two-color manicure.

    No detailed nail art is necessary.

    Important Gel Manicure Considerations

    Gel manicures require more equipment and care than conventional nail polish.

    A UV/LED Lamp Is Required

    The gel polish collection is designed for curing with a compatible UV/LED nail lamp.

    Follow the curing instructions for the specific gel products and your lamp.

    Do not assume that all lamps or gel products require identical curing times.

    Avoid Skin Contact With Uncured Gel

    Try to keep uncured gel on the nail rather than the surrounding skin.

    If gel repeatedly contacts the skin, stop and clean up the application rather than intentionally curing product onto the surrounding skin.

    If you experience irritation or an allergic reaction, discontinue use and follow appropriate product-safety guidance.

    Use Thin, Controlled Layers

    Gel polish is generally easier to control when applied in thin layers.

    Avoid flooding the cuticle area or applying unnecessarily thick amounts of product.

    Follow the manufacturer’s application instructions for the specific products.

    Removal Matters Too

    Do not simply peel or force gel products or extensions from the natural nail.

    Use the removal method recommended for the particular product system.

    Gentle removal can help avoid unnecessary damage to the natural nail surface.

    Is This Bundle Right for a Low-Maintenance Fall Manicure?

    That depends on what you mean by low-maintenance.

    If you mean simple-looking nails, the collection offers plenty of ways to create uncomplicated fall manicures.

    A single brown, burgundy or neutral shade can produce a polished look without detailed nail art.

    If you mean the least amount of equipment and effort, a conventional nail-polish manicure is a simpler setup because this bundle involves gel products, curing and, if you use the extensions, additional preparation and application.

    So the biggest benefit here is variety, rather than necessarily having the simplest possible manicure routine.

    What to Consider Before Buying

    Before purchasing, consider these points:

    • You will need a compatible UV/LED lamp for the gel products.
    • The extension tips are a separate component from the gel color collection.
    • The bundle contains many color options, which may be more than you need if you normally wear one or two shades.
    • Extensions require additional preparation and application compared with painting natural nails.
    • Proper sizing matters when using nail tips.
    • Gel products should be used according to their instructions and kept off surrounding skin.
    • Product availability, packaging and included components can change, so check the current listing before purchasing.

    Quick Product Pick

    Beetles 20 Colors Brown Gel Nail Polish Set With 288pcs Short Almond Soft Gel Nail Tips

    This bundle combines a 23-bottle fall gel polish collection with a 288-piece extra-short almond nail-tip extension kit.

    The polish collection includes 20 seasonal colors plus a base coat, glossy top coat and matte top coat. The extension kit includes 288 tips in 12 sizes, adhesive and a mini UV lamp.

    Shop the current Beetles bundle on Amazon

    Quick Product Box

    Beetles Fall Gel Polish + Short Almond Nail Tip Bundle

    Includes:

    • 20 fall gel polish colors
    • Base coat
    • Glossy top coat
    • Matte top coat
    • 288 extra-short almond nail tips
    • 12 tip sizes
    • Nail adhesive
    • Mini UV lamp

    Best for: Creating different fall gel manicure looks at home, with the option to use short almond extensions.

    Check the current Amazon listing and availability

    How This Fits With Simple Fall Nail Ideas

    If you prefer short, wearable autumn manicures, you do not have to use the extension tips at all.

    The fall colors can also be used as inspiration for simple natural-nail looks.

    For more ideas focused specifically on short, low-maintenance autumn manicures, see our guide:

    13 Easy Fall Manicure Ideas for Short Nails That Are Low-Maintenance

    You can also explore more specific short fall nail inspiration in our earlier guide:

    15 Short Fall Nail Ideas That Look Chic and Easy to Wear

    Final Thoughts

    The Beetles bundle brings together two different parts of an at-home fall manicure setup: a broad seasonal gel-color collection and a short almond nail-tip extension system.

    The 20-color gel collection gives you plenty of room to experiment with brown, burgundy, neutral, green, orange and other autumn-inspired shades. The included glossy and matte top coats also let you change the appearance of the same colors.

    The 288-piece short almond tip set is a separate option for creating an extension manicure when you want the almond shape without choosing a longer nail style.

    The main thing to remember is that gel manicures and extensions require more preparation, equipment and careful removal than ordinary nail polish. Follow the individual product instructions, use a compatible curing lamp, and avoid getting uncured gel on the surrounding skin.

    #ad Affiliate link — I may earn a commission from qualifying purchases. As an Amazon Associate I earn from qualifying purchases. Product availability, price and details may change on Amazon. Product sizes, ingredients, packaging, availability, sellers, and delivery information can change. Check current Amazon listing before purchasing.

    Save This for Later

    Save this guide to Pinterest if you are planning an autumn gel manicure and want to come back to the color combinations, short almond nail ideas and application considerations later.

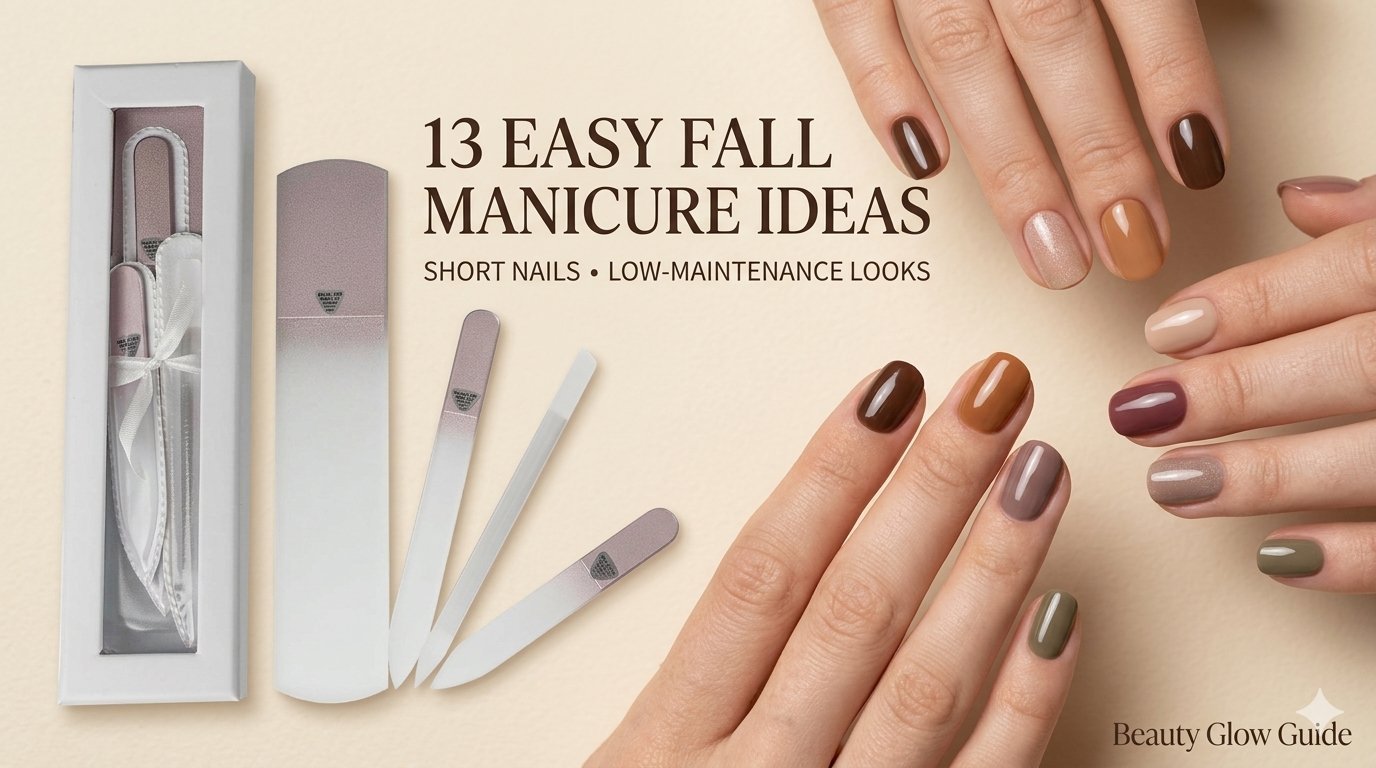
  • 13 Easy Fall Manicure Ideas for Short Nails That Are Low-Maintenance

    13 Easy Fall Manicure Ideas for Short Nails That Are Low-Maintenance

    Fall nails do not have to mean complicated nail art, long extensions, or a time-consuming salon appointment. If you prefer keeping your nails short, a beautiful autumn color, clean shape, and simple finish can create a polished manicure that is easy to wear every day.

    Short nails are also incredibly versatile. They look beautiful with warm neutrals, chocolate brown, burgundy, caramel, olive, plum, and subtle shimmer. And when you keep your manicure uncomplicated, it is easier to maintain, refresh, or recreate at home.

    If you want more specific short-nail design inspiration, see our companion guide: 15 Short Fall Nail Ideas That Look Chic and Easy to Wear.

    Here are 13 easy fall manicure ideas for short nails that combine seasonal color with a practical, low-maintenance approach.


    1. One-Color Glossy Manicure

    Sometimes the simplest manicure is the most polished.

    Choose one autumn-inspired color and apply it across every nail. Finish with a glossy top coat for a clean, classic look.

    Good fall color families include:

    • Chocolate brown
    • Deep burgundy
    • Muted red
    • Plum
    • Caramel
    • Olive green

    The biggest advantage is simplicity. There is no detailed artwork to maintain, and you can easily refresh the color when you are ready for a new manicure.


    2. Warm Neutral Manicure

    If you prefer understated nails, try a manicure built entirely around warm neutrals.

    Think:

    • Soft cream
    • Warm beige
    • Taupe
    • Caramel
    • Sandy tan
    • Light mocha

    These shades can work well with casual outfits, workwear, and dressier looks without requiring you to change your nail color for every occasion.

    For an especially clean finish, use one warm neutral across all of your short nails with a glossy top coat.


    3. Two Coordinating Fall Colors

    You do not need nail art to create variation.

    Choose two complementary shades and alternate them across your nails. Keeping the colors within the same autumn palette helps the manicure look coordinated without adding complicated details.

    Try:

    • Cream + caramel
    • Beige + mocha
    • Taupe + muted burgundy
    • Olive + soft cream
    • Caramel + chocolate brown

    This is a simple way to make a basic manicure more interesting while keeping it easy to recreate.


    4. Sheer Autumn Color

    Sheer polish is a beautiful option if you want something subtle.

    A translucent beige, soft pink, sheer brown, or berry-toned polish allows some of the natural nail to remain visible while adding a soft wash of color.

    Because the contrast between the polish and natural nail can be relatively subtle, this style can also be forgiving as the manicure grows out.

    For fall, try a sheer caramel, warm beige, or soft berry shade with a glossy finish.


    5. Soft Matte Brown

    One of the easiest ways to change a manicure is to change the finish.

    Choose a chocolate brown, warm taupe, burgundy, or olive shade and add a matte top coat.

    The color remains simple, but the texture gives the manicure a completely different appearance.

    This is particularly useful if you normally wear glossy polish and want an autumn look that feels slightly more sophisticated without adding nail art.


    6. Neutral Nails With One Accent Nail

    If you enjoy minimalist manicures but still want a seasonal detail, try one accent nail on each hand.

    Keep most of your nails in cream, beige, or another warm neutral, then choose burgundy, chocolate brown, olive, or plum for the accent.

    The result is subtle but still gives your manicure a little personality.

    For an understated look, use the same accent finger on both hands. For something less symmetrical, place the accent on different fingers.


    7. Tonal Brown Manicure

    Brown offers plenty of room for variation.

    Instead of choosing only one brown, create a tonal manicure using several shades from the same color family.

    For example:

    • Light beige
    • Warm caramel
    • Medium brown
    • Chocolate
    • Deep espresso

    Use one shade per nail or repeat your favorite shades.

    Because the colors remain within a similar palette, the manicure can look cohesive without any additional decorations.


    8. Low-Contrast Autumn Manicure

    Fall nails do not always need to be dark.

    For a softer autumn look, choose colors that have only a small amount of contrast.

    Try:

    • Cream + light beige
    • Caramel + taupe
    • Light brown + mocha
    • Soft tan + warm nude

    This approach works especially well if you like quiet, neutral beauty looks but still want your manicure to feel seasonal.


    9. Glossy Dark Neutral

    If you want something more dramatic while keeping the manicure simple, choose one deep neutral.

    Consider:

    • Espresso brown
    • Deep plum
    • Dark taupe
    • Burgundy
    • Very deep chocolate

    A glossy top coat can emphasize the richness of the color.

    There is no need for glitter, gems, patterns, or detailed artwork. A strong seasonal shade can create enough impact on its own.


    10. Warm Autumn Nude

    Nude nails do not have to look pale or summery.

    For fall, choose nude shades with warmer undertones such as:

    • Caramel
    • Warm tan
    • Peachy beige
    • Soft terracotta
    • Warm mocha

    These colors retain the versatility of a nude manicure while giving the overall look a more autumn-inspired feel.

    They are also easy to coordinate with different clothing colors throughout the season.


    11. Minimal Shimmer

    If you want a little sparkle without complicated nail art, choose a polish with a fine shimmer.

    Look for shades such as:

    • Champagne
    • Bronze
    • Shimmering taupe
    • Mauve
    • Warm chestnut
    • Soft gold

    Fine shimmer adds movement when it catches the light while keeping the manicure relatively simple.

    It is a good option when you want something a little more noticeable than a plain neutral but do not want chunky glitter.


    12. One Color With Different Finishes

    You can create contrast without changing the color.

    For example, apply glossy chocolate brown to most of your nails and use a matte finish on one accent nail.

    Another option is to experiment with different finishes within the same color family.

    The result stays coordinated because the color remains consistent while the change in texture adds subtle visual interest.


    13. The Simple Salon-Save Manicure

    Sometimes the easiest manicure is the one you can describe to your nail technician in a single sentence.

    Try:

    Short practical shape + one classic autumn color + clean finish.

    Some combinations to consider:

    • Short rounded nails + glossy burgundy
    • Short squoval nails + warm caramel
    • Short natural nails + sheer beige
    • Short nails + glossy chocolate brown
    • Short oval nails + muted olive

    You can always add detail later, but starting with a simple foundation keeps the manicure practical.


    How to Choose a Fall Manicure That Fits Your Routine

    The most practical manicure is one that works with your everyday activities.

    If You Work With Your Hands

    If you type frequently, cook, exercise, or regularly use your hands, a short nail length can be easier to manage.

    Sheer, neutral, and low-contrast colors can also make small amounts of growth less noticeable.

    If You Want Maximum Wardrobe Versatility

    Warm taupe, cream, caramel, brown, and burgundy are useful choices when you want your nails to work with many different outfits.

    A simple solid color is particularly versatile because it does not compete with prints or statement accessories.

    If You Change Your Polish Often

    If you enjoy doing your nails at home and changing colors regularly, simple manicures can make the process easier.

    A solid manicure does not require you to recreate detailed designs every time you change your polish.

    If You Prefer Minimalist Beauty

    Choose one color, a short shape, and a clean finish.

    Minimalist nails can still look luxurious. The difference comes from thoughtful color selection, neat application, and keeping the overall look intentional.


    How to Make Short Nails Look More Polished

    You do not need a complicated nail routine to make short nails look neat.

    Keep the Length Consistent

    File your nails so the lengths are reasonably even. Consistency helps create a more finished appearance.

    Choose a Shape That Works With Your Nails

    Rounded and squoval shapes are practical options for short nails, but your natural nail shape and personal preference should guide the final choice.

    Apply Thin Polish Coats

    When doing your nails at home, thin coats can be easier to control than one thick coat.

    Follow the drying instructions for your particular polish before applying additional layers.

    Use a Top Coat

    A top coat can give your manicure either a glossy or matte finish.

    For classic fall colors such as burgundy, chocolate brown, caramel, and plum, a glossy finish creates a timeless look.

    Moisturize Around the Nails

    Keeping the skin around your nails moisturized can make a simple manicure look more cared for.

    A small amount of cuticle oil or hand cream can easily become part of your evening routine.


    Product Pick: Bona Fide Beauty Czech Glass 4-Piece Nail Care Set

    If you maintain short natural nails at home, a reusable nail file can be a useful addition to a simple manicure routine.

    The Bona Fide Beauty Czech Glass Gift Set is a four-piece glass nail-care set that includes a regular-size glass nail file, travel-size glass nail file, glass cuticle pusher, and glass foot file.

    The product listing also describes the set as including protective cases and sleeves.

    What’s Included?

    Regular-Size Glass Nail File

    The regular-size file can be used for filing and shaping the edges of natural nails.

    For a short-nail routine, it can be useful when you want to maintain a consistent length and shape between manicures.

    Travel-Size Glass Nail File

    The smaller file provides a compact option for a purse, travel bag, or manicure kit.

    It can be useful to have a small nail file available when you are away from home and notice a rough or uneven nail edge.

    Glass Cuticle Pusher

    The set includes a glass cuticle pusher designed for basic cuticle care.

    Use cuticle tools gently and avoid aggressively scraping or damaging the surrounding skin.

    Glass Foot File

    The fourth tool is a glass foot file intended for smoothing the feet and heels.

    This gives the set an additional use beyond basic nail filing.

    Why It Fits a Low-Maintenance Routine

    A short-nail routine does not need a large collection of tools.

    Having a reusable file available for basic shaping can make regular nail maintenance straightforward. The travel file also gives you a compact option when you are away from home, while the cuticle pusher and foot file broaden the set’s uses.

    The protective sleeves and cases are also useful because glass tools need careful handling.

    What to Know Before Buying

    The main consideration with glass nail-care tools is handling.

    The product listing warns that the glass can break if dropped from a height or struck against a hard surface. Store the tools in their protective coverings and handle them carefully.

    The set should also be viewed as a collection of nail-care tools rather than a guarantee of a particular manicure result.


    🛍️ Quick Product Box

    Bona Fide Beauty Czech Glass Gift Set — Rose Gold

    A four-piece reusable Czech glass nail-care set featuring a regular-size glass nail file, travel-size glass nail file, glass cuticle pusher, and glass foot file. Protective cases and sleeves are included.

    Check the current Bona Fide Beauty Czech Glass Gift Set on Amazon


    Why Low-Maintenance Nails Work So Well for Fall

    Fall is a busy season for many people. Between work, school, changing weather, travel, and holiday preparations, a complicated manicure is not always the easiest choice.

    Simple nails offer a different approach.

    Instead of relying on elaborate artwork, you can create a seasonal look with:

    • A beautiful autumn color
    • A short, practical shape
    • A clean finish
    • Subtle texture
    • Coordinating neutral shades

    The result can still feel special without requiring constant attention.

    If you want more design-focused inspiration, visit 15 Short Fall Nail Ideas That Look Chic and Easy to Wear for additional short fall nail looks.


    Final Thoughts

    Short nails can look polished, elegant, and completely seasonal without complicated nail art.

    Start with colors you genuinely enjoy wearing—chocolate brown, burgundy, caramel, taupe, olive, plum, or warm neutrals—and let the color and finish create the personality of your manicure.

    Whether you choose a glossy solid shade, tonal brown manicure, soft matte finish, warm nude, or subtle shimmer, the goal is to find a fall manicure that fits naturally into your routine.

    For at-home maintenance, a reusable glass nail file can also be a practical tool to keep on hand. If you choose a glass set, remember to store and handle the tools carefully.

    Save This for Later: Save this guide to Pinterest when you are ready to choose your next short fall manicure. These simple ideas make it easy to experiment with warm autumn colors and polished finishes without committing to complicated nail art.

    #ad Affiliate link — I may earn a commission from qualifying purchases. As an Amazon Associate I earn from qualifying purchases. Product availability, price and details may change on Amazon. Product sizes, ingredients, packaging, availability, sellers, and delivery information can change. Check current Amazon listing before purchasing.

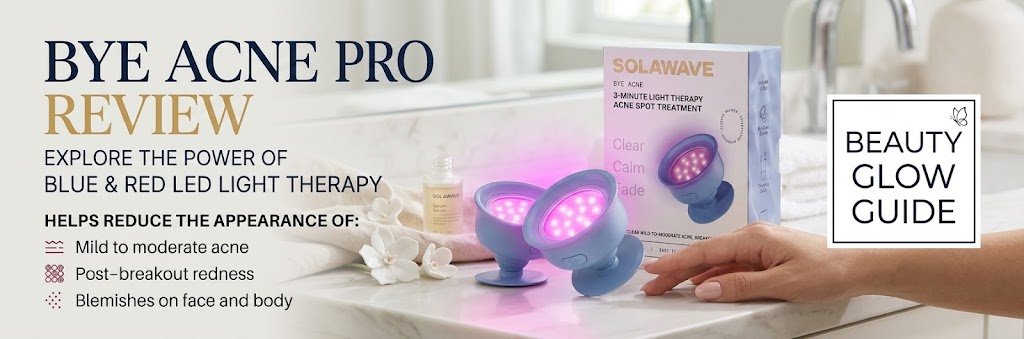
  • Solawave Bye Acne Pro Review: How Blue & Red LED Light Therapy Works

    Solawave Bye Acne Pro Review: How Blue & Red LED Light Therapy Works

    LED light therapy has become an increasingly visible part of skincare routines, particularly for people interested in acne-focused devices.

    Solawave Bye Acne is designed specifically around blue and red LED light.

    According to Solawave, the device uses 415 nm blue LED light and 630 nm red LED light and is intended for mild-to-moderate acne. (Solawave Help Center)

    This review explains what the device is, how it works, how to use it, and what to consider before adding it to your routine.


    What Is Solawave Bye Acne?

    Solawave Bye Acne is an LED light therapy device designed for acne treatment.

    The current manufacturer information describes two main light wavelengths:

    Blue LED — 415 nm

    Red LED — 630 nm

    Solawave describes blue light as targeting acne-causing bacteria associated with existing acne, while red light is described as helping with redness and inflammation. (Solawave Help Center)

    The device is intended for mild-to-moderate acne.


    How Does Blue Light Work?

    The blue-light portion of the device uses a wavelength of approximately 415 nm.

    Solawave describes this light as targeting acne-causing bacteria on the skin. (Solawave Help Center)

    This is why blue light is commonly associated with acne-focused LED devices.

    However, LED therapy should not be treated as a guaranteed solution for every type of acne.


    How Does Red Light Work?

    The red-light portion uses approximately 630 nm.

    According to Solawave, red light is intended to help reduce redness and inflammation and support overall skin tone. (Solawave Help Center)

    The combination of blue and red light gives the device two different treatment functions.


    How Long Do You Use Solawave Bye Acne?

    Solawave’s current instructions describe a three-minute treatment.

    The device automatically switches off after the treatment period.

    The manufacturer explains that the three minutes applies to each treatment spot rather than treating multiple areas simultaneously for only three minutes. (Solawave Help Center)


    How to Use Solawave Bye Acne

    The routine is straightforward.

    Step 1: Clean Your Skin

    Wash the area you want to treat.

    Step 2: Dry Your Skin

    The skin should be completely dry.

    Step 3: Remove Makeup and Other Topicals

    Solawave specifically recommends using the device without makeup, acne medications, serums, or other topical products on the skin before treatment. (Solawave Help Center)

    Step 4: Place the Device on the Treatment Area

    Position the device over the area you want to treat.

    Step 5: Start the Treatment

    The device runs for approximately three minutes.

    Step 6: Continue Your Skincare Routine

    After treatment, you can continue with appropriate skincare products.


    Why Does Solawave Say to Use It Before Skincare Products?

    This is an important part of the manufacturer’s instructions.

    Solawave says Bye Acne works most effectively on clean, dry skin that is free from makeup and other topical products. (Solawave Help Center)

    That means the sequence can be:

    Cleanse → Dry → LED treatment → Hydrating skincare → Moisturizer

    Rather than:

    Serum → Moisturizer → LED treatment

    Follow the current manufacturer instructions for your particular device.


    Solawave Bye Acne and an Acne-Prone Routine

    The device can be considered an additional step rather than the entire routine.

    A simple routine could look like:

    Morning

    Cleanser
    ↓
    Hydrating serum if needed
    ↓
    Moisturizer
    ↓
    Sunscreen

    Evening With LED Treatment

    Cleanser
    ↓
    Gently dry
    ↓
    Solawave Bye Acne
    ↓
    Hydrating serum if needed
    ↓
    Moisturizer

    For a complete routine guide, see:

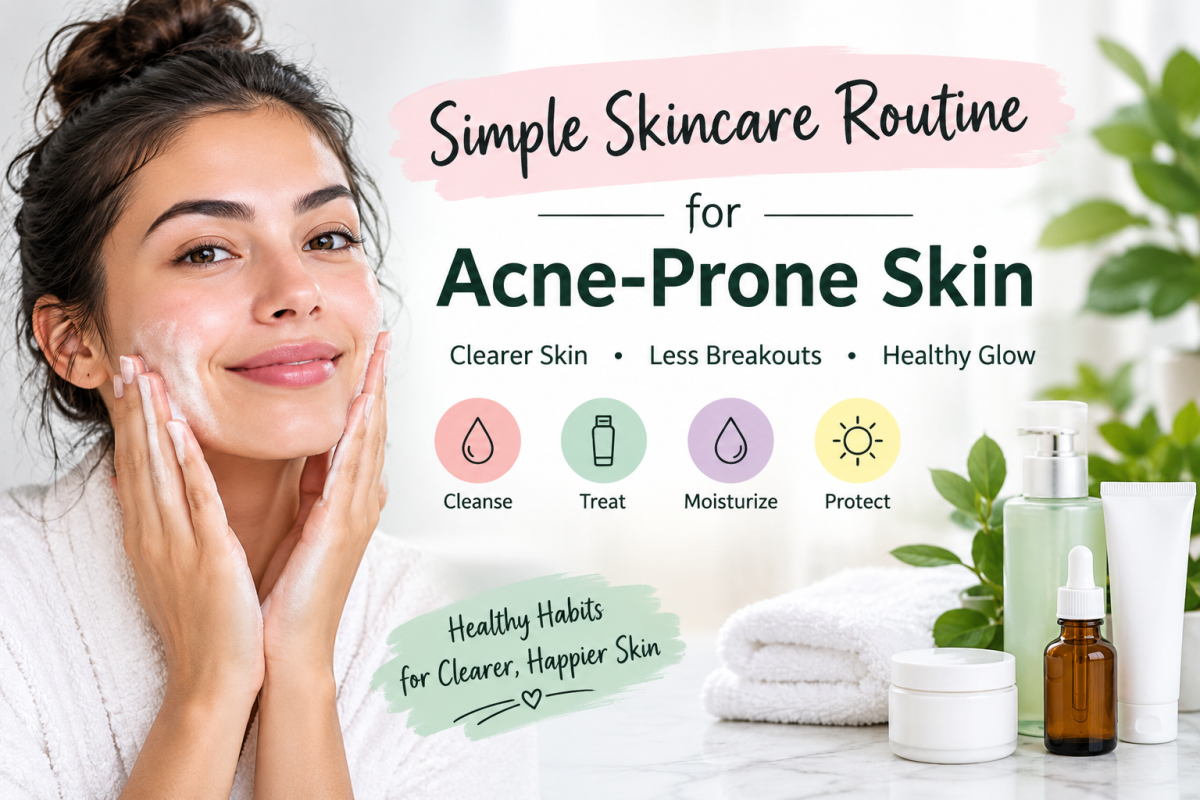
    How to Build a Simple Skincare Routine for Acne-Prone Skin


    Can You Use Solawave With Other Skincare Products?

    The timing matters.

    The manufacturer recommends using Bye Acne on clean, dry skin before applying acne medications, serums, or other topicals. (Solawave Help Center)

    After the LED treatment, you can continue with the appropriate steps of your skincare routine.

    If you use prescription acne medication, follow the directions provided by your healthcare professional.


    Who Should Avoid Solawave Bye Acne?

    This is one of the most important parts of using an LED device.

    Solawave’s current contraindication guidance says Bye Acne should not be used by:

    • People under 18
    • People who are pregnant, planning pregnancy, or breastfeeding
    • People with active cancer or cancerous lesions
    • People with photosensitivity disorders
    • People taking photosensitizing medications
    • People with severe acne
    • People with certain other skin conditions
    • People with light-induced headaches
    • People with a recent sunburn
    • People with certain other medical conditions listed by the manufacturer

    Solawave also advises against using the device for rosacea and says it is intended for mild-to-moderate acne. (Solawave Help Center)

    Because these precautions can change, always check the manufacturer’s current instructions before using the device.


    What About the Eyes?

    Do not shine the LED light directly into the eyes.

    Solawave’s current safety guidance specifically warns against shining the LEDs directly into the eyes. (Solawave Help Center)

    Follow the device instructions carefully.


    What About Sensitive Skin?

    If you have sensitive skin, take a cautious approach.

    Solawave recommends performing a light sensitivity test before the first use.

    Its instructions describe placing the unplugged device on the inner forearm for a treatment and then monitoring the skin for redness or itching over the following 24 hours. (Solawave Help Center)

    If you experience discomfort or a concerning reaction, stop using the device and seek appropriate professional advice.


    Does LED Light Therapy Replace Acne Treatment?

    No.

    An LED device should not be viewed as a replacement for professional acne treatment when you have persistent, severe, painful, or scarring acne.

    It is better to think of LED therapy as one possible addition to a broader skincare approach.

    A basic routine still matters.


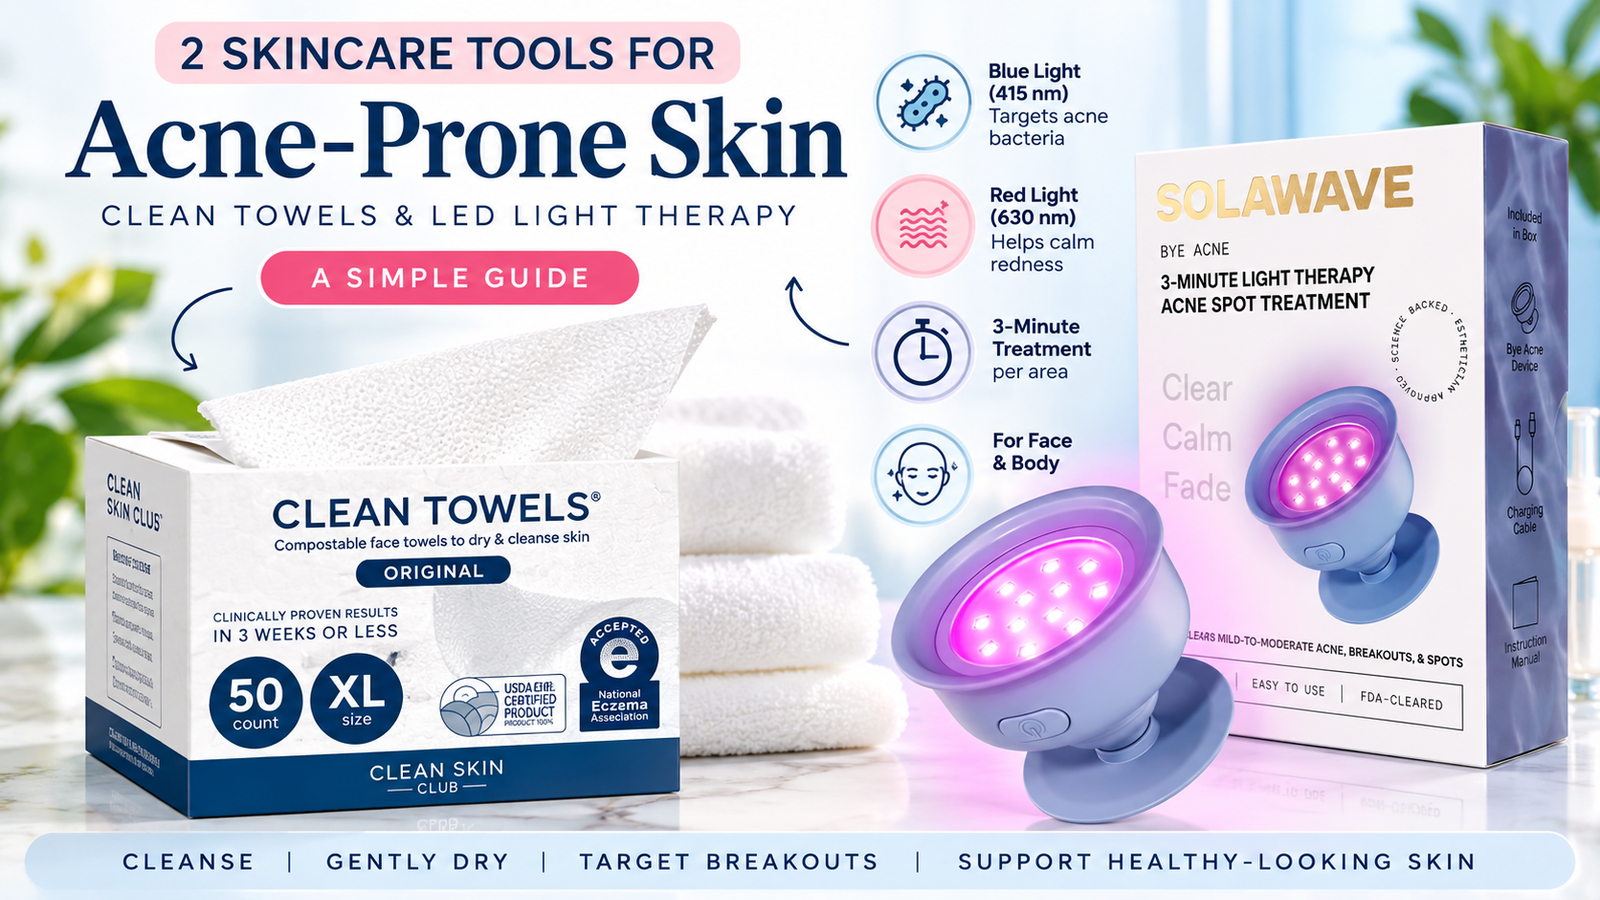
    Solawave Bye Acne vs. Clean Skin Club Clean Towels

    These products have completely different purposes.

    Solawave Bye AcneCLEAN SKIN CLUB Clean Towels
    TypeLED deviceFacial towel
    Primary purposeAcne-focused light therapyDrying the face
    Blue LED415 nmNo
    Red LED630 nmNo
    TreatmentAbout 3 minutes per areaNo treatment time
    Used after cleansingYesYes
    Requires chargingYesNo
    Acne treatmentDesigned for mild-to-moderate acneNo

    For the full comparison, read:

    2 Skincare Tools for Acne-Prone Skin: Clean Towels & LED Light Therapy


    Solawave Bye Acne Product Details

    Solawave Bye Acne Pro

    • Blue LED: 415 nm
    • Red LED: 630 nm
    • Treatment time: 3 minutes per area
    • Intended use: Mild-to-moderate acne
    • Use on clean, dry skin
    • Remove makeup and other topicals before treatment
    • Follow manufacturer safety instructions

    View on Amazon:
    https://www.amazon.com/dp/B0DSPHZQ3K?tag=gulbrother-20

    Amazon availability, price, packaging, sellers, and delivery information can change. Check the current listing before purchasing.


    What I Like About the Approach

    The device has a clear purpose.

    Instead of trying to combine numerous skincare functions into one product, Bye Acne is specifically designed around blue and red LED light for acne-focused use.

    The three-minute treatment also makes it relatively straightforward to understand where the device fits into a routine.

    The main consideration is that LED therapy requires more attention to safety instructions than a basic cleanser or moisturizer.


    Things to Consider Before Buying

    Before purchasing an LED acne device, consider:

    1. Is LED therapy appropriate for you?

    Check the manufacturer’s contraindications.

    2. What type of acne are you dealing with?

    The device is intended for mild-to-moderate acne according to Solawave. (Solawave Help Center)

    3. Are you taking photosensitizing medication?

    If yes, speak with a healthcare professional before using an LED device.

    4. Are you expecting guaranteed results?

    Individual responses vary.

    5. Can you follow the instructions consistently?

    A skincare tool is only useful if it fits realistically into your routine.


    How It Fits Into a Simple Routine

    The most straightforward placement is:

    Cleanse

    ↓

    Dry

    ↓

    Solawave Bye Acne

    ↓

    Hydrating serum, if needed

    ↓

    Moisturizer

    For daytime, sunscreen remains an important final skincare step.

    If you are building your routine from the beginning, read:

    How to Build a Simple Skincare Routine for Acne-Prone Skin


    Final Thoughts

    Solawave Bye Acne is an acne-focused LED device that combines 415 nm blue light and 630 nm red light.

    The manufacturer describes blue light as targeting acne-causing bacteria and red light as helping with redness and inflammation. It is intended for mild-to-moderate acne. (Solawave Help Center)

    The device can fit into a simple skincare routine after cleansing and before other topical products.

    However, LED devices are not suitable for everyone, so reading the current safety information is an essential part of deciding whether to use one.

    For persistent or severe acne, professional medical guidance remains important.


    Save This for Later

    Save this review on Pinterest if you are researching LED light therapy for acne.

    Follow Beauty Glow Guide on Pinterest:
    https://www.pinterest.com/beautyglowguide2/

    Related articles:

    How to Build a Simple Skincare Routine for Acne-Prone Skin

    2 Skincare Tools for Acne-Prone Skin: Clean Towels & LED Light Therapy

    CLEAN SKIN CLUB Clean Towels XL Review


    Affiliate Disclosure

    #ad Affiliate link — I may earn a commission from qualifying purchases. As an Amazon Associate I earn from qualifying purchases. Product availability, price and details may change on Amazon. Product sizes, ingredients, packaging, availability, sellers, and delivery information can change. Check current Amazon listing before purchasing.


  • 2 Skincare Tools for Acne-Prone Skin: Clean Towels & LED Light Therapy

    2 Skincare Tools for Acne-Prone Skin: Clean Towels & LED Light Therapy

    Skincare tools can sometimes make a routine more complicated than it needs to be.

    But some tools have a simple purpose.

    A disposable facial towel can change how you dry your face after cleansing, while an LED acne device is designed for targeted light therapy.

    These two products are very different, so they should not be treated as alternatives to each other.

    In this guide, we will look at:

    • CLEAN SKIN CLUB Clean Towels XL
    • Solawave Bye Acne
    • How each fits into a routine
    • What to consider before using them
    • How they compare
    • How they can fit alongside basic skincare

    Why Consider Skincare Tools for Acne-Prone Skin?

    The foundation of an acne-conscious routine is still basic skincare.

    That means cleansing, moisturizing, sunscreen, and appropriate acne treatment when needed.

    Tools are additional.

    A face towel is primarily related to the cleansing and drying part of your routine.

    LED light therapy is a targeted treatment device.

    Understanding this difference can help you avoid expecting one product to do everything.


    1. CLEAN SKIN CLUB Clean Towels XL

    CLEAN SKIN CLUB Clean Towels XL are single-use facial towels designed for drying the face after cleansing.

    According to the current Amazon listing supplied for this product, the Original version contains 50 towels and is described as fragrance-free, unscented, and suitable for all skin types.

    The product is designed to be used once rather than repeatedly returning to the same bathroom towel.

    Read our detailed review:

    CLEAN SKIN CLUB Clean Towels XL Review: What to Know Before Using Them


    What Are Clean Towels Used For?

    The basic use is simple:

    Cleanse → Rinse → Gently dry

    Instead of using a traditional reusable face towel, you use a fresh facial towel after cleansing.

    This does not make the towel an acne treatment.

    It is simply an alternative way to dry your face.


    How to Use a Single-Use Face Towel

    A simple approach is:

    1. Cleanse your face.
    2. Rinse thoroughly.
    3. Take one clean towel.
    4. Gently pat your skin dry.
    5. Dispose of the towel after use.

    Avoid aggressively rubbing your face.

    Gentle handling is particularly useful when your skin already feels irritated or uncomfortable.


    Why Gentle Drying Matters

    Drying your face is a small part of your routine, but it can affect how comfortable your skin feels.

    Repeated rubbing can be unnecessary.

    If you prefer disposable facial towels, Clean Towels may be one option to consider.

    However, a traditional clean, regularly washed towel can also be suitable depending on your preferences and routine.

    The important point is gentle handling and cleanliness.


    Are Clean Towels an Acne Treatment?

    No.

    A face towel does not treat acne in the same way that an acne medication or acne-focused treatment does.

    The reason someone might choose a single-use towel is related to their cleansing and drying habits.

    Keep expectations realistic.


    2. Solawave Bye Acne

    Solawave Bye Acne is an LED light therapy device designed for acne.

    According to Solawave’s current support information, the device combines:

    • 415 nm blue LED light
    • 630 nm red LED light

    Solawave describes the blue light as targeting existing acne and the red light as helping with redness and inflammation. The device is intended for mild-to-moderate acne. (Solawave Help Center)

    Read our full review:

    Solawave Bye Acne Pro Review: How Blue & Red LED Light Therapy Works


    How Does Blue and Red LED Light Work?

    The two light wavelengths have different intended roles.

    Blue Light — 415 nm

    Solawave describes the blue LED as targeting acne-causing bacteria associated with existing acne. (Solawave Help Center)

    Red Light — 630 nm

    Solawave describes the red LED as helping with redness and inflammation. (Solawave Help Center)

    LED therapy should not be presented as a guaranteed solution for every type of acne.


    How to Use Solawave Bye Acne

    Solawave’s current instructions recommend:

    1. Clean the skin.
    2. Make sure it is completely dry.
    3. Remove makeup and other topical products.
    4. Place the device on the treatment area.
    5. Use the treatment.
    6. The device automatically switches off after three minutes.
    7. Continue your normal skincare routine afterward.

    Solawave specifically advises using Bye Acne on clean, dry skin without makeup or other topicals before treatment. (Solawave Help Center)


    Clean Towels and LED Therapy: How Could They Fit Together?

    These products can appear in different parts of the same routine.

    For example:

    Cleanse → Clean towel → LED treatment → Hydrating skincare → Moisturizer

    The towel is used for drying.

    The LED device is used for light therapy.

    They are not doing the same job.


    Clean Towels vs. LED Light Therapy

    FeatureClean Towels XLSolawave Bye Acne
    Main purposeFacial dryingLED acne treatment
    Product typeDisposable towelLED device
    Used after cleansingYesYes
    Acne treatmentNoDesigned for acne
    Blue lightNo415 nm
    Red lightNo630 nm
    Requires electricityNoYes
    Treatment timeDrying only3 minutes per area
    Routine roleCleansing/dryingTargeted treatment

    Important Things to Know Before Using an LED Acne Device

    LED therapy is not suitable for everyone.

    Solawave’s current safety guidance lists contraindications including:

    • Under 18
    • Pregnancy, planning pregnancy, or breastfeeding
    • Photosensitivity disorders
    • Photosensitizing medications
    • Severe acne
    • Certain skin conditions
    • Certain medical conditions

    The manufacturer also says not to shine the LEDs directly into the eyes. (Solawave Help Center)

    If you have any concern about whether light therapy is appropriate for you, consult a healthcare professional before using the device.


    What About Sensitive Skin?

    Sensitive skin can require a more cautious approach.

    Do not assume that a product described as gentle or suitable for many skin types will work for everyone.

    For an LED device, follow the manufacturer’s sensitivity-testing instructions.

    Solawave recommends performing a light sensitivity test before the first use and monitoring the skin afterward for redness or irritation. (Solawave Help Center)


    Common Mistakes to Avoid

    Expecting a towel to treat acne

    A facial towel is not an acne medication.

    Using LED over makeup

    Solawave’s instructions say the skin should be clean, dry, and free from makeup and other topicals before treatment. (Solawave Help Center)

    Adding too many acne treatments

    More active products are not necessarily better.

    Ignoring contraindications

    Always check the manufacturer’s current safety instructions before using an LED device.

    Scrubbing your skin after cleansing

    Gentle drying is preferable to aggressive rubbing.


    A Simple Acne-Prone Routine

    Morning

    Cleanser → Hydrating product → Moisturizer → Sunscreen

    Evening

    Cleanser → Gently dry → LED treatment if appropriate → Hydrating product → Moisturizer

    If you want to learn more about the overall routine, read:

    How to Build a Simple Skincare Routine for Acne-Prone Skin


    Product 1: CLEAN SKIN CLUB Clean Towels XL

    CLEAN SKIN CLUB Clean Towels XL

    • Version: Original
    • Count: 50 towels
    • Use: Facial drying after cleansing
    • Skin type: All, according to the supplied listing
    • Fragrance: Unscented/fragrance-free, according to the supplied listing
    • Type: Single-use facial towel

    View on Amazon:
    https://www.amazon.com/dp/B07PBXXNCY?tag=gulbrother-20


    Product 2: Solawave Bye Acne Pro

    Solawave Bye Acne Pro

    • LED treatment
    • Blue light: 415 nm
    • Red light: 630 nm
    • Treatment: 3 minutes per area
    • Intended use: Mild-to-moderate acne
    • Use: Clean, dry skin before other topicals

    View on Amazon:

    Amazon availability can change, so check the current listing before purchasing.


    Which One Fits Your Routine?

    These products address different parts of a skincare routine.

    If you are mainly interested in changing how you dry your face after cleansing, a single-use facial towel may be relevant.

    If you are specifically considering an LED device for acne, Solawave Bye Acne is a different type of product that requires more attention to instructions and contraindications.

    Neither replaces appropriate acne treatment or professional medical advice.


    Final Thoughts

    Skincare tools can be useful when they have a clear purpose.

    CLEAN SKIN CLUB Clean Towels XL focuses on the simple step of drying your face after cleansing.

    Solawave Bye Acne is a targeted LED device designed for mild-to-moderate acne using blue and red light.

    They can fit into an acne-conscious routine, but they should be viewed as additions rather than replacements for basic skincare.

    Start with a simple routine and add tools only when they make sense for your needs.


    Save This for Later

    Save this guide on Pinterest if you are building a simple acne-conscious skincare routine.

    Follow Beauty Glow Guide:
    https://www.pinterest.com/beautyglowguide2/

    Related guide:
    How to Build a Simple Skincare Routine for Acne-Prone Skin


  • How to Build a Simple Skincare Routine for Acne-Prone Skin

    How to Build a Simple Skincare Routine for Acne-Prone Skin

    Having acne-prone skin does not mean you need a complicated skincare routine.

    In fact, using too many products at once can make it harder to understand what is helping, what is irritating your skin, and what should be changed.

    A simple routine can focus on a few consistent steps: cleansing, hydration, moisturizing, sun protection, and an appropriate acne treatment when needed.

    This guide explains how to build a practical skincare routine for acne-prone skin while keeping skin comfort and barrier care in mind.


    What Does Acne-Prone Skin Need?

    Acne-prone skin can still need hydration and moisturizer.

    A common mistake is assuming that skin with breakouts should be kept completely dry. That can lead to an unnecessarily harsh routine.

    Instead, consider a balanced approach:

    • Gentle cleansing
    • Comfortable hydration
    • A suitable moisturizer
    • Daily sunscreen
    • One appropriate acne treatment when needed
    • Avoiding unnecessary irritation

    Your routine should also be simple enough that you can use it consistently.

    If you are still learning about your skin type, see our guide on How to Choose Skincare Products for Your Skin Type.


    Step 1: Start With a Gentle Cleanser

    Cleansing removes excess oil, makeup, sunscreen, sweat, and everyday buildup from the skin.

    For acne-prone skin, a gentle cleanser can be a practical starting point.

    You do not need to scrub aggressively or repeatedly wash your face throughout the day.

    A simple morning and evening cleansing routine may be enough for many people, depending on their skin and products used.

    For more information, read our Simple Morning Skincare Routine for Beginners.


    Step 2: Gently Dry Your Face

    After cleansing, gently pat your skin dry instead of rubbing it aggressively.

    Some people prefer using a fresh, single-use facial towel rather than a traditional bathroom towel.

    One option we have reviewed is CLEAN SKIN CLUB Clean Towels XL.

    The current product listing describes these as single-use facial towels designed for drying the face.

    They are not an acne treatment, but they can be used as part of a practical cleansing routine.


    Step 3: Add Hydration

    Acne-prone skin can still become dry or uncomfortable.

    A lightweight hydrating product can be useful when your skin needs additional moisture without adding a heavy-feeling layer.

    Common hydration-focused ingredients include:

    • Hyaluronic acid
    • Glycerin
    • Panthenol
    • Ceramides

    You can learn more about these ingredients in our Beginner’s Guide to Skincare Ingredients.

    For a deeper explanation of hyaluronic acid, see What Is Hyaluronic Acid?.


    Step 4: Use an Appropriate Acne Treatment

    If you are dealing with breakouts, you may consider adding an acne-focused treatment.

    The important point is to avoid adding several strong treatments at the same time.

    Introduce one product at a time and give yourself an opportunity to see how your skin responds.

    If you are using an acne medication or treatment recommended by a dermatologist, follow the instructions provided for that product.


    Step 5: Moisturize

    Moisturizer is not automatically a problem for acne-prone skin.

    A suitable moisturizer can help support comfortable-looking skin and reduce the need for an overly drying routine.

    Look for a moisturizer that feels comfortable on your skin and works with the other products you use.

    If your skin feels tight or uncomfortable after cleansing, that may be a sign that your routine needs more attention to hydration and moisture.

    For more information, read What Is the Skin Barrier? A Beginner’s Guide.


    Step 6: Use Sunscreen in the Morning

    Sunscreen is an important part of a daytime skincare routine.

    After cleansing, hydrating, and moisturizing, apply sunscreen as the final skincare step before makeup.

    Choose a sunscreen that you are comfortable using consistently.

    A routine is easier to maintain when the products fit comfortably into your everyday habits.


    Where Does LED Light Therapy Fit?

    LED light therapy is different from a traditional skincare serum or moisturizer.

    One device designed specifically for acne is Solawave Bye Acne.

    According to Solawave, Bye Acne combines blue and red LED light. The manufacturer describes 415 nm blue light for existing acne and 630 nm red light for redness and inflammation. The device is intended for mild-to-moderate acne.

    Read our full guide:

    Solawave Bye Acne Pro Review: How Blue & Red LED Light Therapy Works

    Solawave recommends using the device on clean, dry skin with makeup and other topicals removed before treatment.


    Important: LED Light Therapy Is Not for Everyone

    Before using an LED acne device, read the manufacturer’s current safety information.

    Solawave currently lists several contraindications, including use by people under 18, pregnancy or breastfeeding, photosensitivity disorders, photosensitizing medications, severe acne, and certain other medical or skin conditions. It also states that the device should not be used directly around the eyes.

    If you have a medical condition, take photosensitizing medication, or are unsure whether LED treatment is appropriate for you, speak with a healthcare professional before use.


    Morning Routine for Acne-Prone Skin

    A simple morning routine can look like this:

    1. Cleanser
    Gently cleanse your face.

    2. Hydrating serum
    Use a lightweight hydration-focused product if needed.

    3. Moisturizer
    Apply a comfortable moisturizer.

    4. Sunscreen
    Finish with sunscreen.

    5. Makeup, if desired
    Apply makeup after your skincare has settled.


    Nighttime Routine for Acne-Prone Skin

    At night:

    1. Cleanse

    2. Gently dry

    3. Acne treatment, if appropriate

    4. Hydrating serum, if needed

    5. Moisturizer

    Keep the routine consistent rather than continuously adding new products.

    You can also read our Simple Nighttime Skincare Routine.


    What About Your Skin Barrier?

    Your skin barrier is part of the reason a balanced routine matters.

    Over-cleansing, aggressive exfoliation, excessive scrubbing, or using too many active products can make a routine feel uncomfortable.

    For a practical introduction, read What Is the Skin Barrier?.


    Common Mistakes to Avoid

    Using too many acne products

    More products do not automatically mean better results.

    Scrubbing breakouts

    Physical scrubbing can be unnecessarily irritating.

    Skipping moisturizer

    Acne-prone skin can still need moisture.

    Changing products too frequently

    Constantly changing your routine makes it difficult to understand what works for you.

    Over-exfoliating

    If you use exfoliating products, introduce them carefully.

    Our guide How to Exfoliate Your Skin Safely explains how to approach exfoliation more carefully.

    Ignoring irritation

    If a product repeatedly causes burning, significant irritation, or other concerning reactions, stop using it and seek appropriate professional advice.


    Keep Your Routine Simple

    A practical acne-prone routine does not need to contain ten or fifteen products.

    Start with:

    Cleanse → Hydrate → Moisturize → Protect

    Then add an appropriate acne treatment if you need one.

    If you want to explore skincare tools, our guide 2 Skincare Tools for Acne-Prone Skin: Clean Towels & LED Light Therapy compares two very different approaches.


    A Beginner Routine at a Glance

    MorningEvening
    Gentle cleanserGentle cleanser
    Hydrating product if neededAcne treatment if appropriate
    MoisturizerHydrating product if needed
    SunscreenMoisturizer

    Keep the routine flexible according to your skin and the products you use.


    When Should You Consider Professional Advice?

    Consider speaking with a dermatologist or other qualified healthcare professional if:

    • Your acne is severe or persistent
    • Breakouts are painful or deep
    • You are developing significant scarring
    • Your skin repeatedly reacts to products
    • You are unsure which acne treatment is appropriate
    • Your current routine is not helping

    A professional can help determine what type of acne you have and which treatment options are appropriate.


    Final Thoughts

    A simple skincare routine for acne-prone skin can focus on consistency rather than complexity.

    Start with gentle cleansing, comfortable hydration, moisturizer, and daytime sun protection. Add targeted acne care only when appropriate.

    Skincare tools such as single-use face towels or LED light therapy may fit into a routine, but they serve different purposes and should not replace appropriate acne treatment or professional advice.

    The goal is a routine that is practical enough to follow consistently and gentle enough to keep your skin comfortable.


    Save This for Later

    Building a skincare routine takes time.

    Save this guide on Pinterest so you can come back to it when you are reviewing your routine.

    Follow Beauty Glow Guide on Pinterest:
    https://www.pinterest.com/beautyglowguide2/

    More skincare guides:
    Beauty Glow Guide — Skincare & K-Beauty


  • Beginner’s Guide to Skincare Ingredients: What They Do and Where They Fit

    Beginner’s Guide to Skincare Ingredients: What They Do and Where They Fit

    Reading a skincare label can feel like trying to understand another language.

    You may see ingredients such as hyaluronic acid, niacinamide, glycerin, ceramides, panthenol, peptides, centella asiatica, and snail mucin — but knowing their names does not always tell you what they actually do or where they belong in your routine.

    The good news is that you do not need to memorize every ingredient on a product label.

    A better approach is to understand a few commonly used skincare ingredients, what role they can play in a routine, and what type of product they are usually found in.

    This beginner-friendly guide covers some of the ingredients already discussed on Beauty Glow Guide and explains how they can fit into a simple skincare routine.


    Why Skincare Ingredients Matter

    The ingredient list tells you what is inside a skincare product.

    But one ingredient rarely tells the whole story.

    Two products can contain the same ingredient while having very different textures, concentrations, supporting ingredients, and intended uses.

    That is why it is useful to look at:

    • The complete formula
    • The product type
    • Your skin’s needs
    • How often the product is intended to be used
    • Whether the product fits your existing routine

    Instead of asking which ingredient is universally “best,” think about which ingredients make sense for your particular routine.


    The Main Types of Skincare Ingredients

    For a beginner, it helps to group ingredients according to their general role.

    Hydrating ingredients

    These are commonly included in products designed to increase or support skin hydration.

    Examples include:

    • Hyaluronic acid
    • Glycerin
    • Panthenol

    Barrier-supporting ingredients

    These are commonly found in products designed around skin barrier care.

    Examples include:

    • Ceramides
    • Panthenol

    Skin-conditioning and soothing-focused ingredients

    Examples include:

    • Centella asiatica
    • Panthenol

    Treatment-focused ingredients

    Depending on the product and formulation, ingredients such as niacinamide and retinoids may be used in treatment-focused routines.

    Skin-conditioning ingredients

    Peptides and snail mucin are examples of ingredients frequently used in modern skincare formulas for conditioning, hydration, and other cosmetic purposes.

    The exact role depends on the complete product formula.


    1. Hyaluronic Acid

    Hyaluronic acid is one of the most recognizable ingredients in hydration-focused skincare.

    It is commonly found in:

    • Serums
    • Essences
    • Moisturizers
    • Masks

    If your routine focuses on hydration, you will likely encounter it frequently.

    Read the complete beginner’s guide:

    What Is Hyaluronic Acid? A Beginner’s Guide to Hydrated-Looking Skin

    Where does it fit?

    If you are using a hyaluronic acid serum, it generally fits into the serum step:

    Cleanser → Hyaluronic Acid Serum → Moisturizer → Sunscreen

    The exact application instructions depend on the product.


    2. Glycerin

    Glycerin is another common ingredient in moisturizing skincare products.

    You may find it in:

    • Cleansers
    • Serums
    • Moisturizers
    • Creams
    • Lotions

    One reason glycerin is so common is that it can be incorporated into many different types of formulas.

    You can learn more here:

    What Is Glycerin? A Beginner’s Guide to This Hydrating Skincare Ingredient

    Where does it fit?

    There is no separate “glycerin step.”

    Instead, glycerin is often already part of another product.

    For example:

    Cleanser → Glycerin-containing Serum → Moisturizer → Sunscreen


    3. Panthenol

    Panthenol is another ingredient you may see in hydration and skin-comfort-focused products.

    It can appear in:

    • Serums
    • Essences
    • Creams
    • Moisturizers
    • Other leave-on skincare products

    Read:

    What Is Panthenol? A Beginner’s Guide

    Where does panthenol fit?

    Like glycerin, panthenol does not require its own separate routine step.

    Its position depends on the product containing it.

    A panthenol serum could be used during the serum step, while a panthenol moisturizer would be used during the moisturizing step.


    4. Ceramides

    Ceramides are naturally occurring lipids found in the skin.

    They are frequently used in products focused on moisturizing and supporting the skin barrier.

    You may find them in:

    • Moisturizers
    • Creams
    • Lotions
    • Cleansers
    • Barrier-care products

    Learn more:

    What Are Ceramides? A Beginner’s Guide to Skin Barrier Care

    Where do ceramides fit?

    Ceramides are often found in moisturizers.

    A simple routine could therefore look like:

    Cleanser → Hydrating Serum → Ceramide Moisturizer → Sunscreen

    You do not necessarily need a separate ceramide serum if your moisturizer already contains ceramides.


    5. Niacinamide

    Niacinamide is a form of vitamin B3 commonly used in skincare.

    It can be found in:

    • Serums
    • Moisturizers
    • Toners
    • Other skincare formulas

    Rather than focusing only on the ingredient name, consider the concentration, complete formula, product instructions, and how the product fits into your routine.

    Read the full guide:

    What Is Niacinamide? A Beginner’s Guide to Vitamin B3 for Skin

    Where does niacinamide fit?

    If you use a niacinamide serum:

    Cleanser → Niacinamide Serum → Moisturizer → Sunscreen

    If it is already included in your moisturizer, there is no reason to add another separate niacinamide step simply because the ingredient is popular.


    6. Peptides

    Peptides are another group of ingredients frequently found in skincare products.

    They can appear in:

    • Serums
    • Moisturizers
    • Eye products
    • Other treatment-oriented formulas

    Read:

    What Are Peptides in Skincare? A Beginner’s Guide to Peptide Serums

    Where do peptides fit?

    A peptide serum generally fits into the serum or treatment step.

    For example:

    Cleanser → Peptide Serum → Moisturizer → Sunscreen

    The product’s directions should take priority over a generic routine chart.


    7. Centella Asiatica

    Centella asiatica is often called cica in skincare.

    It is particularly common in K-beauty products and can appear in many different product types.

    You may see centella in:

    • Toners
    • Essences
    • Serums
    • Creams
    • Moisturizers

    Read:

    What Is Centella Asiatica? A Beginner’s Skincare Guide

    Where does centella fit?

    The answer depends on the product.

    A centella toner goes after cleansing.

    A centella serum goes during the serum step.

    A centella moisturizer goes after your serum or treatment.

    The ingredient itself does not determine the routine position.


    8. Snail Mucin

    Snail mucin has become a familiar ingredient in K-beauty skincare.

    It is commonly found in:

    • Essences
    • Serums
    • Creams

    One of the better-known examples is COSRX Advanced Snail 96 Mucin Power Essence.

    Read:

    COSRX Snail Mucin: What It Is, How to Use It & Where It Fits in Your Routine

    Where does snail mucin fit?

    If you are using a snail mucin essence, a simple routine may look like:

    Cleanser → Snail Mucin Essence → Moisturizer → Sunscreen

    If you use other serums, the exact order can depend on the products and their textures.


    9. PDRN

    PDRN is another ingredient you may encounter in newer skincare products.

    It is particularly common in products marketed around hydration, skin conditioning, and skin-recovery-focused routines.

    However, PDRN products can vary significantly in formulation and product type.

    Read:

    What Is PDRN in Skincare? A Beginner’s Guide

    You can also compare it with another well-known hydration ingredient:

    PDRN vs. Hyaluronic Acid: What’s the Difference?

    Where does PDRN fit?

    There is no universal PDRN step.

    A PDRN serum would generally be used during the serum/treatment portion of a routine.

    A PDRN cream would be used later, during the moisturizing step.

    Always check the instructions for the specific product.


    10. What About Vichy Minéral 89?

    Vichy Minéral 89 is an example of why looking at the complete formula can be more useful than focusing on one ingredient.

    The product is a hydrating serum rather than simply a single-ingredient hyaluronic acid product.

    Read:

    Vichy Minéral 89 vs. Hyaluronic Acid Serums: What’s the Difference?

    You can also read:

    Vichy Minéral 89 Hydrating & Plumping Daily Booster: A Practical Guide

    If you use it as your hydrating serum:

    Cleanser → Vichy Minéral 89 → Moisturizer → Sunscreen


    Ingredients vs. Products: An Important Difference

    This is one of the most useful things for beginners to understand.

    An ingredient is not the same thing as a product.

    For example:

    Hyaluronic acid = ingredient

    Hyaluronic acid serum = product containing that ingredient

    Ceramides = ingredients

    Ceramide moisturizer = product containing those ingredients

    Centella asiatica = ingredient

    Centella essence = product containing that ingredient

    This distinction helps you avoid creating unnecessary routine steps.


    You Don’t Need One Product for Every Ingredient

    Imagine your routine contains:

    • Hyaluronic acid serum
    • Glycerin serum
    • Panthenol serum
    • Ceramide serum
    • Niacinamide serum
    • Peptide serum
    • Centella essence
    • Snail mucin essence

    You could technically have many products, but that does not mean you need all of them.

    In fact, layering too many products can make your routine unnecessarily complicated.

    A simpler approach is to look at the overall formula and decide whether the product serves a purpose you actually need.

    For example, one hydrating serum may already contain several hydration-supporting ingredients.


    A Simple Ingredient-Focused Routine

    You can build a routine without turning every ingredient into a separate step.

    Morning

    Cleanser

    ↓

    Hydrating serum

    ↓

    Moisturizer

    ↓

    Sunscreen

    Night

    Cleanser

    ↓

    Treatment or hydrating serum

    ↓

    Moisturizer

    This is enough for many beginners to start understanding how products fit together.

    For a more detailed explanation, read:

    How to Layer Skincare Products: A Simple Beginner’s Guide


    How Ingredients Fit Into a Hydrating Routine

    If hydration is your main focus, you may come across several complementary ingredients.

    A simple example is:

    Cleanser → Hydrating Serum → Moisturizer → Sunscreen

    Your hydrating serum might contain ingredients such as:

    • Hyaluronic acid
    • Glycerin
    • Panthenol

    Your moisturizer might contain:

    • Ceramides
    • Glycerin
    • Other moisturizing ingredients

    This means you can address several parts of a hydration-focused routine without buying a separate product for every ingredient.

    For more guidance:

    How to Build a Simple Hydrating Skincare Routine

    And:

    How to Choose the Best Hydrating Serum for Dry-Looking Skin


    How Ingredients Relate to Your Skin Barrier

    A healthy-looking skincare routine is not only about adding ingredients.

    It is also about avoiding unnecessary irritation.

    Your skin barrier is part of the outermost layer of your skin and plays an important role in keeping skin protected and hydrated.

    Read:

    What Is the Skin Barrier? A Beginner’s Guide to Healthy-Looking Skin

    When building your routine, consider both what you want to add and what you may need to reduce.


    How to Read a Skincare Product Label

    You do not have to understand every ingredient listed on the package.

    Start with a few practical questions.

    What is the product?

    Is it a:

    • Cleanser?
    • Toner?
    • Essence?
    • Serum?
    • Moisturizer?
    • Sunscreen?

    What is its main purpose?

    Look at the product description and directions.

    What ingredients are highlighted?

    These can tell you what the product is designed around, but remember that the complete formula matters.

    How do you use it?

    Follow the manufacturer’s directions.

    Does it duplicate something you already own?

    If you already have a hydrating serum, buying another product with a very similar purpose may not be necessary.


    Don’t Choose an Ingredient Based Only on a Trend

    Skincare trends can introduce useful ingredients to a wider audience, but popularity alone does not mean you need a particular product.

    Before buying a trending ingredient, ask:

    What am I hoping this product will add to my routine?

    If you cannot answer that question, you may not need it yet.

    A simple routine that you understand is often easier to manage than a collection of products chosen because they are currently popular.


    Common Beginner Mistakes With Skincare Ingredients

    1. Treating every ingredient as a separate step

    You don’t need a separate serum for every ingredient.

    2. Buying products before identifying your goal

    Start with what you want your routine to accomplish.

    3. Introducing several new products simultaneously

    If irritation occurs, it becomes harder to identify the cause.

    4. Ignoring product texture

    Two products with similar ingredients can feel very different on the skin.

    5. Forgetting sunscreen

    A good morning routine should finish with sun protection.

    6. Assuming stronger means better

    A more complicated or concentrated formula is not automatically more appropriate for your skin.

    7. Replacing your entire routine whenever a new ingredient becomes popular

    Give your existing routine a chance to work before constantly changing it.


    A Beginner’s Ingredient Cheat Sheet

    IngredientCommon roleCommon product types
    Hyaluronic acidHydration-focusedSerums, essences, moisturizers
    GlycerinMoisturizing/hydrationCleansers, serums, creams
    PanthenolHydration and skin comfortSerums, essences, moisturizers
    CeramidesBarrier-focused moisturizingCreams, lotions, moisturizers
    NiacinamideMultifunctional skincare ingredientSerums, toners, moisturizers
    PeptidesSkin-conditioning/treatment-focusedSerums, creams
    Centella asiaticaSkin-comfort-focusedToners, essences, serums, creams
    Snail mucinHydration/skin-conditioningEssences, serums, creams
    PDRNProduct-dependent skincare ingredientSerums, creams, other leave-on products

    The table is a starting point, not a complete description of everything each ingredient can do. The complete formula and product instructions matter.


    A Simple Way to Build Your Routine

    Instead of starting with ingredients, start with steps.

    Step 1: Cleanse

    Choose a cleanser that feels comfortable and suits your skin.

    Step 2: Hydrate or Treat

    Choose one serum or essence based on your main goal.

    Step 3: Moisturize

    Use a moisturizer appropriate for your skin and preferred texture.

    Step 4: Protect

    Use sunscreen during the day.

    Then, if needed, add additional products gradually.

    This approach prevents your routine from becoming an ingredient checklist.


    Final Thoughts

    Skincare ingredients can look complicated, but you don’t need to become an expert in every ingredient to build a useful routine.

    Start with the basics.

    Understand your skin.

    Choose products according to a clear purpose.

    Look at the complete formula rather than one ingredient alone.

    And remember that ingredients such as hyaluronic acid, glycerin, panthenol, ceramides, niacinamide, peptides, centella asiatica, snail mucin, and PDRN can appear in very different product types.

    The most useful question is not simply:

    “What is the best skincare ingredient?”

    Instead, ask:

    “What does my routine need, and which product can fill that role?”

    That simple change can make skincare shopping much easier.


    Save This for Later

    Save this guide as a quick reference when you’re reading skincare labels or shopping for new products.

    Ingredient → Purpose → Product type → Routine step

    For more practical skincare education, explore the Skincare & K-Beauty category.


    Affiliate Disclosure

    #ad Affiliate link — I may earn a commission from qualifying purchases. As an Amazon Associate I earn from qualifying purchases. Product availability, price and details may change on Amazon. Product sizes, ingredients, packaging, availability, sellers, and delivery information can change. Check current Amazon listing before purchasing.


  • How to Exfoliate Your Skin Safely: A Simple Beginner’s Guide

    How to Exfoliate Your Skin Safely: A Simple Beginner’s Guide

    Exfoliation is often presented as an essential part of skincare, but using exfoliating products correctly matters more than simply adding them to your routine.

    When used appropriately, exfoliation can help remove dead skin cells from the surface of the skin and leave it feeling smoother. But exfoliating too frequently or using products that are too irritating can leave skin feeling dry, sensitive, or uncomfortable.

    For beginners, the goal is not to exfoliate as much as possible. It is to understand what exfoliation does, which type may suit your routine, how often to use it, and when to skip it.

    This guide explains the basics and shows how exfoliation can fit into a simple skincare routine.


    What Is Exfoliation?

    Exfoliation is the process of removing dead skin cells from the surface of the skin.

    There are two main types:

    • Physical exfoliation
    • Chemical exfoliation

    Physical exfoliation uses something that manually removes surface cells, such as a scrub or exfoliating tool.

    Chemical exfoliation uses ingredients that help loosen or remove dead skin cells.

    Both approaches can be useful, but neither needs to be aggressive.


    Why Do People Exfoliate?

    People may exfoliate because their skin feels:

    • Rough
    • Dull-looking
    • Uneven in texture
    • Congested
    • Flaky

    However, exfoliation is not automatically necessary for everyone.

    If your skin already feels comfortable and your routine is working well, you may not need to add an exfoliating product simply because it is popular.

    Your basic routine should come first.

    For a refresher, see:

    How to Choose Skincare Products for Your Skin Type: A Simple Beginner’s Guide


    Physical vs. Chemical Exfoliation

    Understanding the difference is important before choosing a product.

    Physical Exfoliation

    Physical exfoliation involves manually removing surface cells.

    Examples include:

    • Face scrubs
    • Exfoliating cloths
    • Brushes
    • Other textured tools

    The amount of pressure you use matters.

    Scrubbing harder does not necessarily produce better results.

    If a product leaves your skin feeling raw, burning, or unusually uncomfortable, it is not a sign that the exfoliation is working better.


    Chemical Exfoliation

    Chemical exfoliation uses specific ingredients rather than physical scrubbing.

    Common categories include:

    • AHAs
    • BHAs
    • PHAs

    The right choice depends on the product, your skin, and what you are trying to address.

    AHAs

    Alpha hydroxy acids are commonly used in products designed to exfoliate the skin’s surface.

    Examples include ingredients such as glycolic acid and lactic acid.

    BHAs

    Beta hydroxy acids are commonly used in products designed for exfoliation and are particularly familiar in products aimed at oily or congested-looking skin.

    Salicylic acid is the best-known example.

    PHAs

    Polyhydroxy acids are another category of exfoliating ingredients.

    They are often discussed as an option for people looking for a gentler exfoliating approach, although the experience still depends on the individual product and skin.


    How Often Should You Exfoliate?

    There is no single number of times per week that works for everyone.

    The appropriate frequency depends on:

    • The exfoliating ingredient
    • Product strength
    • Your skin
    • Other products in your routine
    • How your skin responds

    A beginner should generally avoid starting with frequent exfoliation.

    Instead, follow the product’s directions and give your skin time to show you how it responds.

    If your skin becomes persistently irritated, reduce or stop the exfoliating product.


    Start Slowly

    If you have never used an exfoliating product before, avoid introducing it alongside several other new products.

    For example, don’t start a new:

    • Exfoliating acid
    • Retinoid
    • Strong treatment serum
    • Scrub
    • Mask

    all at the same time.

    If irritation develops, you will have difficulty identifying which product caused it.

    Introducing one new product at a time makes your routine easier to understand.


    Where Does Exfoliation Go in Your Routine?

    Exfoliation is generally performed after cleansing and before the rest of your leave-on skincare, depending on the product instructions.

    A simple evening routine might look like:

    Cleanser → Exfoliating Product → Moisturizer

    If you use a leave-on chemical exfoliant, follow the manufacturer’s instructions carefully.

    You do not need to add multiple exfoliating products together.

    For a broader explanation of product order, see:

    How to Layer Skincare Products: A Simple Beginner’s Guide


    Should You Exfoliate Every Day?

    For many people, daily exfoliation is unnecessary.

    Exfoliating more often does not automatically produce better-looking skin.

    If your skin becomes:

    • Dry
    • Tight
    • Red
    • Burning
    • Stinging
    • Unusually sensitive

    your routine may be too aggressive.

    This is a good reason to step back rather than adding another product to solve the problem.


    Exfoliation and the Skin Barrier

    Your skin barrier is important when thinking about exfoliation.

    The outer layer of your skin helps protect it and contributes to maintaining moisture.

    Using too many potentially irritating products can make skin feel uncomfortable.

    Learn more:

    What Is the Skin Barrier? A Beginner’s Guide to Healthy-Looking Skin

    A barrier-conscious routine should focus on balance rather than trying to remove as much from the skin as possible.


    What Should You Use After Exfoliating?

    After exfoliation, keep the rest of your routine simple.

    A basic approach is:

    Exfoliate → Moisturize

    If your skin tolerates your normal hydrating serum, you may continue using it according to the product directions.

    Hydrating ingredients you may already use include:

    • Hyaluronic acid
    • Glycerin
    • Panthenol

    Learn more:

    What Is Hyaluronic Acid? A Beginner’s Guide to Hydrated-Looking Skin

    What Is Glycerin? A Beginner’s Guide to This Hydrating Skincare Ingredient

    What Is Panthenol? A Beginner’s Guide


    What About Ceramides?

    Ceramides are commonly found in moisturizers and barrier-focused products.

    If your skin feels dry after using an exfoliating product, a straightforward moisturizer may be more useful than adding another active ingredient.

    Read:

    What Are Ceramides? A Beginner’s Guide to Skin Barrier Care

    A simple post-exfoliation routine can therefore be:

    Cleanser → Exfoliant → Ceramide-containing Moisturizer


    Do You Need a Hydrating Serum?

    Not necessarily.

    A hydrating serum can be useful if you already enjoy using one, but it is not a mandatory exfoliation step.

    For example, a simple hydration-focused routine might be:

    Cleanser → Hydrating Serum → Moisturizer

    On an exfoliation night, the routine might become:

    Cleanser → Exfoliant → Hydrating Serum → Moisturizer

    But only continue with the serum if your skin tolerates the combination and the product directions allow it.

    For more information:

    How to Build a Simple Hydrating Skincare Routine


    Can You Use Niacinamide With Exfoliants?

    Niacinamide and exfoliating acids can appear in the same overall skincare routine, but whether you should layer specific products together depends on the individual formulas and your skin’s tolerance.

    If you are new to exfoliation, keeping the routine simple can make things easier.

    You can use niacinamide on non-exfoliation days if you prefer.

    Read:

    What Is Niacinamide? A Beginner’s Guide to Vitamin B3 for Skin


    What About Retinoids?

    Retinoids are different from exfoliating acids, even though they are both often discussed as active skincare ingredients.

    If you already use a retinoid, be careful about adding frequent exfoliation to the same routine.

    Using several potentially irritating products together can increase the chance of discomfort.

    If you are using a prescription retinoid or another prescribed treatment, follow your healthcare professional’s instructions.


    Should You Exfoliate Dry Skin?

    If your skin is visibly dry, flaky, irritated, or uncomfortable, exfoliation may not be the first thing to reach for.

    Instead, consider simplifying your routine and focusing on gentle cleansing and moisturizing.

    Dry-looking skin may benefit more from improving hydration and reducing irritation than from aggressively removing surface cells.

    For hydration-focused skincare:

    How to Choose the Best Hydrating Serum for Dry-Looking Skin


    Should You Exfoliate Oily Skin?

    Oily skin does not automatically mean you need frequent exfoliation.

    If your skin is oily or prone to congestion, an exfoliating product may be part of your routine, but the product and frequency still matter.

    Start gradually and monitor how your skin responds.

    You can learn more about choosing products according to skin type here:

    How to Choose Skincare Products for Your Skin Type: A Simple Beginner’s Guide


    Exfoliation and Sunscreen

    Sunscreen is especially important as part of a daytime skincare routine when you are using exfoliating products.

    Finish your morning routine with broad-spectrum sunscreen with SPF 30 or higher.

    A basic daytime routine is:

    Cleanser → Hydrating/Treatment Product → Moisturizer → Sunscreen

    If you exfoliate at night, sunscreen remains part of your morning routine.


    Common Exfoliation Mistakes

    1. Exfoliating too frequently

    More frequent use does not necessarily mean better results.

    2. Scrubbing aggressively

    Pressure is not a substitute for an appropriate exfoliating product.

    3. Using multiple exfoliants together

    Combining several exfoliating products can make your routine unnecessarily irritating.

    4. Adding an exfoliant to an already complicated routine

    Simplify before adding more.

    5. Exfoliating irritated skin

    If your skin is already uncomfortable, adding another active product may not be helpful.

    6. Forgetting moisturizer

    Moisturizing can help keep your routine comfortable.

    7. Forgetting daytime sunscreen

    Sunscreen should remain part of your morning routine.


    Signs You May Be Over-Exfoliating

    Your skin may be telling you that your routine is too aggressive if you notice:

    • Persistent dryness
    • Burning
    • Stinging
    • Increased sensitivity
    • Redness
    • Tightness
    • Flaking
    • General discomfort

    These symptoms are not something you need to push through.

    If your skin becomes irritated, stop or reduce the suspected product and return to a simpler routine.

    If symptoms are severe, persistent, or concerning, seek advice from a healthcare professional.


    A Simple Beginner Exfoliation Routine

    If you want to introduce exfoliation, keep the rest of your routine uncomplicated.

    Exfoliation Night

    1. Cleanser

    Gently cleanse your skin.

    2. Exfoliating product

    Use the product according to its directions.

    3. Moisturizer

    Finish with a comfortable moisturizer.

    The Next Morning

    1. Cleanser

    2. Moisturizer

    3. Sunscreen

    You can add your normal hydrating serum if your skin tolerates it.


    A Simple Weekly Approach

    Instead of creating a complicated calendar, think in terms of regular routine days and exfoliation days.

    Regular night

    Cleanser → Hydrating/Treatment Serum → Moisturizer

    Exfoliation night

    Cleanser → Exfoliant → Moisturizer

    This gives you a simple framework without assuming that everyone needs the same exfoliation frequency.


    What If You Already Use Several Active Ingredients?

    Take a look at your entire routine.

    You may already be using:

    • Niacinamide
    • Vitamin C
    • Retinoid
    • Exfoliating acid
    • Acne treatment
    • Other active products

    Adding another exfoliant without considering the complete routine can make it harder to manage irritation.

    The better question is:

    Does my routine actually need another active product?

    If the answer is unclear, keeping your routine simple is reasonable.


    Physical Scrub vs. Chemical Exfoliant

    FeaturePhysical exfoliationChemical exfoliation
    How it worksManual removalExfoliating ingredients
    Common examplesScrubs, toolsAHA, BHA, PHA products
    Main considerationPressure/frictionProduct strength and frequency
    Beginner approachUse gentlyFollow product directions
    Common mistakeScrubbing too hardUsing too frequently

    Neither category is automatically right for everyone.

    Your skin, product, and routine all matter.


    Quick Exfoliation Checklist

    Before using an exfoliating product, ask:

    ✓ Do I actually need exfoliation?

    ✓ What type of exfoliant am I using?

    ✓ What are the product directions?

    ✓ Am I already using other active products?

    ✓ Have I introduced too many products recently?

    ✓ Is my skin currently comfortable?

    ✓ Do I have a simple moisturizer ready?

    ✓ Am I using sunscreen during the day?

    If several answers raise concerns, simplify your routine before adding another active.


    Final Thoughts

    Exfoliation can be a useful part of skincare, but it does not need to dominate your routine.

    Start slowly.

    Choose one exfoliating approach.

    Follow the product directions.

    Avoid aggressive scrubbing.

    Pay attention to how your skin responds.

    And remember that hydration, moisturizing, barrier care, and sunscreen remain important parts of a balanced skincare routine.

    A simple routine is often easier to understand than one filled with multiple active ingredients.

    For more beginner-friendly skincare guidance, explore the Skincare & K-Beauty category.


    Save This for Later

    Save this guide as a quick reference before adding an exfoliating product to your routine.

    Cleanse → Exfoliate → Moisturize

    And during the day:

    Moisturize → Sunscreen


    Affiliate Disclosure

    #ad Affiliate link — I may earn a commission from qualifying purchases. As an Amazon Associate I earn from qualifying purchases. Product availability, price and details may change on Amazon. Product sizes, ingredients, packaging, availability, sellers, and delivery information can change. Check current Amazon listing before purchasing.