Tag: skincare

  • Medicube PDRN Pink Collagen Volume Multi Balm: How to Use This Korean Skincare Stick

    Medicube PDRN Pink Collagen Volume Multi Balm: How to Use This Korean Skincare Stick

    If you’re looking for a convenient way to add targeted hydration and a dewy finish to your skincare routine, a balm stick can be an interesting option.

    The medicube PDRN Pink Collagen Volume Multi Balm is a multi-use face and body balm designed for areas such as the under-eyes, cheeks, lips, smile lines, forehead, and neck. Medicube describes the formula as a smooth, non-sticky balm that glides onto the skin and is designed for convenient touch-ups.

    Unlike a traditional jar moisturizer, the stick format makes it easy to apply the balm directly where you want it without using your fingers.

    Beauty Glow Guide tip: Think of a multi balm as a targeted addition to your skincare routine—not a replacement for cleansing, moisturizing, or daily sunscreen.


    ✨ What Is the Medicube PDRN Pink Collagen Volume Multi Balm?

    Medicube PDRN Pink Collagen Volume Multi Balm is a Korean skincare balm in a portable stick format.

    Medicube positions the product for line care, hydration, radiance, and the appearance of plumper-looking skin. The brand lists key ingredients including Volufiline, PDRN, NAD, and caffeine.

    The product is intended for multiple areas rather than just one part of the face.

    Areas Medicube highlights include:

    • Under-eyes
    • Cheeks
    • Lips
    • Smile lines
    • Forehead
    • Neck
    • Other dry areas

    This makes it particularly interesting for people who prefer a targeted, on-the-go skincare product.


    💗 What Makes a Balm Stick Different?

    A balm stick has a different texture and application method from a serum or cream.

    Instead of dispensing a liquid or cream into your hands, you can glide the stick directly across the desired area.

    That can make it convenient for:

    • Quick hydration touch-ups
    • Dry-looking areas
    • Adding a dewy finish
    • Targeted skincare application
    • Keeping in a handbag or travel pouch

    Medicube describes this particular formula as a melting, non-sticky balm designed for quick application and reapplication.


    🌸 Key Ingredients in the Formula

    Medicube lists several notable ingredients in this product.

    PDRN

    PDRN, or sodium DNA, is included in the formula and is one of the ingredients emphasized in medicube’s PDRN skincare line.

    For Beauty Glow Guide content, it’s better to describe PDRN as a featured skincare ingredient rather than promising that it will repair wrinkles, reverse aging, or produce a particular clinical result.

    Volufiline

    Volufiline is another ingredient highlighted by medicube.

    The brand positions it around the appearance of fuller, plumper-looking skin in areas such as the under-eyes, cheeks, and smile lines.

    Caffeine

    Caffeine is included in the formula and is associated with the product’s positioning around the appearance of puffiness and dark circles.

    Collagen and Peptides

    The formula also contains collagen and several peptides.

    These ingredients contribute to the product’s overall skincare positioning around hydration, elasticity, and a smoother-looking complexion.

    Retinol

    The ingredient list provided by medicube also includes retinol.

    Because retinol can be an active skincare ingredient, introduce this product gradually if you’re new to retinol-containing products.

    If you are pregnant, trying to become pregnant, or breastfeeding, consider asking your healthcare professional whether a retinol-containing skincare product is appropriate for you.


    👀 Where Can You Use the Multi Balm?

    One of the product’s distinguishing features is its multi-area application.

    Under-Eyes

    Medicube positions the balm for the appearance of dark circles, puffiness, and under-eye hollowness.

    Use a light touch around the orbital area and avoid getting the product directly into your eyes.

    Cheeks

    The product can be used on areas where skin looks dry or where you want a more moisturized, dewy appearance.

    Lips

    The balm can also be applied to the lips and lip-line area according to the product’s intended uses.

    Smile Lines

    Medicube specifically lists smile lines among the areas targeted by the product.

    Forehead

    The stick can also be applied to the forehead where the product’s line-care positioning is relevant.

    Neck

    The neck is another area highlighted by the brand.

    This can make the product useful for people who want to extend their skincare routine beyond the face.


    🧴 How to Use Medicube PDRN Pink Collagen Volume Multi Balm

    Medicube’s instructions are straightforward:

    Step 1 — Twist Up

    Twist the bottom of the stick to raise a small amount of product.

    Step 2 — Glide

    Gently glide the balm across clean, dry areas where you want to apply it.

    Step 3 — Blend if Needed

    Use clean fingertips to lightly spread the product if you want a more even finish.

    Step 4 — Reapply as Needed

    Medicube describes the product as suitable for quick touch-ups throughout the day.

    Simple application:

    Twist → Glide → Blend → Reapply

    You don’t need to apply a thick layer. Start with a small amount and see how your skin feels.


    ☀️ How to Add It to Your Morning Routine

    The balm can fit into a simple morning skincare routine.

    A practical order is:

    Cleanse → Hydrate → Moisturize → Multi Balm → Sunscreen

    If you’re wearing makeup, you may prefer using a small amount of balm before makeup or using it only on selected areas where you want additional hydration.

    Because skincare preferences and formulas vary, test the layering combination on your skin before using it with a full makeup routine.


    🌙 How to Add It to Your Night Routine

    At night, the balm can be used as a targeted step after cleansing and other lightweight skincare products.

    A simple routine could be:

    Cleanse → Hydrate → Moisturize → Targeted Multi Balm

    If you’re using multiple active ingredients in your routine, introduce products gradually rather than adding everything at once.


    💡 Who Might Like a Multi Balm?

    This type of product may be interesting if you prefer:

    • Portable skincare
    • Stick-format products
    • Targeted application
    • Dewy-looking skin
    • Hydration touch-ups
    • Multi-use skincare
    • Korean beauty products
    • Minimal-mess application

    It may be less appealing if you prefer very lightweight watery serums or dislike balm textures.


    🔍 What to Know Before Buying

    A few things are worth considering before adding it to your routine.

    1. It’s a targeted product

    You don’t need to replace your entire skincare routine with a balm stick.

    Think of it as an additional targeted step.

    2. Start with a small amount

    A little product can be enough for targeted areas.

    3. Introduce active ingredients gradually

    The formula includes retinol, so people who are new to retinol may want to introduce the product cautiously.

    4. Skin can respond differently

    Skincare results and tolerability vary between individuals. Patch testing a new product can be a sensible precaution.

    5. Check the current listing

    Product ingredients, packaging, pricing, sellers, availability, and delivery information can change.


    🛍️ Quick Product Box

    Medicube PDRN Pink Collagen Volume Multi Balm — Face & Body Balm

    Product information, ingredients, packaging, price, availability, sellers, and delivery information may change. Check the current Amazon listing for the most up-to-date information before purchasing.


    Affiliate Disclosure

    #ad Affiliate link — I may earn a commission from qualifying purchases. As an Amazon Associate I earn from qualifying purchases.

    Product availability, price, details, sizes, ingredients, packaging, sellers, and delivery information may change. Check the current Amazon listing for the most up-to-date information before purchasing.


    ✨ Final Thoughts

    The Medicube PDRN Pink Collagen Volume Multi Balm is designed as a convenient, targeted skincare stick for areas such as the under-eyes, cheeks, lips, smile lines, forehead, and neck.

    Its combination of a portable balm format and ingredients such as PDRN, Volufiline, caffeine, collagen, peptides, and retinol makes it an interesting addition to a targeted Korean skincare routine.

    The best way to approach it is to keep your overall routine simple:

    Cleanse → Hydrate → Moisturize → Target → Protect

    Start with a small amount, introduce it gradually, and pay attention to how your skin responds.


    💗 Save This Guide

    Interested in Korean skincare and easy targeted beauty routines?

    Save this guide to Pinterest so you can come back to the application steps and product information later.


  • Best Glass Skin Routine: A Simple 4-Step Guide for Healthy, Hydrated Skin

    Best Glass Skin Routine: A Simple 4-Step Guide for Healthy, Hydrated Skin

    If you’re aiming for a fresh, dewy, healthy-looking complexion, your routine doesn’t need to be complicated. A few well-chosen steps can create a simple foundation for keeping skin cleansed, hydrated, moisturized, and protected.

    The glass-skin approach is less about collecting products and more about building a routine you can comfortably follow every day.

    Beauty Glow Guide tip: Glass skin is a beauty goal, not a promise of perfect skin. Focus on keeping your skin comfortable, hydrated, and well cared for.


    ✨ What Does “Glass Skin” Mean?

    “Glass skin” is a beauty term often used for skin that appears smooth, hydrated, luminous, and fresh.

    You don’t need to achieve a perfectly poreless complexion to enjoy this skincare approach. Instead, focus on hydration, moisturization, gentle cleansing, and daily sun protection.

    Simple routines are often easier to maintain—and consistency matters.


    🌿 4 Simple Steps for a Glass-Skin-Inspired Routine

    1. Start With a Gentle Cleanser

    A clean base is the first step in your routine.

    Cleansing can help remove excess oil, sweat, sunscreen, makeup, and daily buildup. The goal is to clean the skin without leaving it feeling unnecessarily dry or tight.

    Our Product Pick

    CeraVe Hydrating Facial Cleanser — 16 fl oz

    This cleanser contains ceramides and hyaluronic acid and is designed for normal-to-dry skin.

    Simple Tip

    After cleansing, pay attention to how your skin feels. If it regularly feels tight or uncomfortable, consider whether your cleanser or cleansing frequency may be too drying for your skin.


    💧 2. Add a Hydrating Step

    Once your skin is clean, focus on hydration.

    Ingredients such as hyaluronic acid, glycerin, and other humectants are commonly used in skincare to help attract and retain moisture.

    Our Product Pick

    COSRX Advanced Snail 96 Mucin Power Essence — 3.38 fl oz / 100 mL

    This lightweight essence contains 96.3% snail secretion filtrate and is designed to provide hydration while helping skin look smooth and healthy.

    How to Layer It

    A simple order is:

    Cleanse → Hydrating essence → Moisturize

    Apply the product according to its directions and let it settle before applying the next step.

    Tip: You don’t need several hydrating products at once. Start with one and see how your skin responds.


    🧴 3. Moisturize to Support Your Skin Barrier

    After hydration, apply a moisturizer.

    Moisturizing helps reduce moisture loss and supports the skin’s moisture barrier, helping skin feel softer and more comfortable.

    Our Product Pick

    CeraVe Moisturizing Cream — 19 oz / 539 g

    This fragrance-free, non-comedogenic cream contains three essential ceramides and hyaluronic acid and can be used on the face and body.

    Choose a Texture You Like

    Skincare doesn’t have to feel heavy or complicated. Depending on your skin and preference, you may prefer:

    • Gel: Lightweight and fresh-feeling
    • Lotion: Comfortable everyday texture
    • Cream: Richer and more moisturizing

    If you’re trying a new product, adding it one at a time makes it easier to see how your skin responds.


    ☀️ 4. Finish Your Morning Routine With Sunscreen

    Sunscreen is the final skincare step in your morning routine, before makeup if you’re wearing it.

    Look for a broad-spectrum sunscreen with SPF 30 or higher and follow the product’s instructions for application and reapplication.

    Our Product Pick

    La Roche-Posay Anthelios SPF 50 Mineral Sunscreen Gentle Lotion — 4.05 fl oz / 120 mL

    This is a 100% mineral sunscreen formulated with zinc oxide and titanium dioxide and provides broad-spectrum SPF 50 protection. It is also listed as water resistant for up to 80 minutes.

    One Thing to Know

    Mineral sunscreens can sometimes leave a visible cast depending on the formula and individual skin tone. If you’re concerned about this, test the product on a small area first to see how it looks and feels on your skin.


    🌸 Your Simple Morning Routine

    Here’s the entire routine at a glance:

    1️⃣ Cleanse

    CeraVe Hydrating Facial Cleanser

    ↓

    2️⃣ Hydrate

    COSRX Advanced Snail 96 Mucin Power Essence

    ↓

    3️⃣ Moisturize

    CeraVe Moisturizing Cream

    ↓

    4️⃣ Protect

    La Roche-Posay Anthelios SPF 50 Mineral Sunscreen

    That’s it.

    You don’t need to add multiple products simply because they’re popular or trending.


    🌙 A Simple Nighttime Routine

    Your nighttime routine can be even shorter.

    Step 1 — Cleanse

    Remove makeup, sunscreen, excess oil, sweat, and daily buildup.

    Step 2 — Hydrate

    Apply your hydrating essence if it works well for your skin.

    Step 3 — Moisturize

    Finish with your moisturizer to help keep your skin comfortable overnight.

    Your Night Routine

    Cleanse → Hydrate → Moisturize

    Sunscreen is generally a daytime skincare step, so it isn’t needed as part of your nighttime routine.


    📅 Easy Weekly Skincare Plan

    WhenRoutine
    MorningCleanse → Hydrate → Moisturize → SPF
    NightCleanse → Hydrate → Moisturize
    Every dayKeep your routine consistent
    When adding productsIntroduce them gradually
    When exfoliatingAvoid excessive exfoliation

    💡 5 Simple Tips for a Healthy-Looking Glow

    1. Keep Your Routine Simple

    A longer product list doesn’t automatically mean better skincare. Start with the basics and build from there if needed.

    2. Avoid Over-Exfoliating

    Exfoliation can be useful for some routines, but doing too much can leave skin feeling irritated or uncomfortable.

    3. Prioritize Hydration

    Hydration is one of the main focuses of a glass-skin-inspired routine. Choose products that help your skin feel comfortable and hydrated.

    4. Give Your Routine Time

    Changing products constantly can make it difficult to understand what works for your skin. Give your routine some consistency before making unnecessary changes.

    5. Make Sun Protection a Daily Habit

    Daily sun protection is an important part of a morning skincare routine. Choose a sunscreen you can comfortably apply as directed.


    🛍️ Quick Product Box

    CeraVe Hydrating Facial Cleanser — 16 fl oz

    COSRX Advanced Snail 96 Mucin Power Essence — 3.38 fl oz / 100 mL

    CeraVe Moisturizing Cream — 19 oz / 539 g

    La Roche-Posay Anthelios SPF 50 Mineral Sunscreen Gentle Lotion — 4.05 fl oz / 120 mL


    Affiliate Disclosure

    #ad Affiliate link — I may earn a commission from qualifying purchases. As an Amazon Associate I earn from qualifying purchases.

    Product availability, price, details, sizes, ingredients, packaging, sellers, and delivery information may change. Check the current Amazon listing for the most up-to-date information before purchasing.


    ✨ Final Thoughts

    A glass-skin-inspired routine doesn’t require a shelf full of products.

    Start with four simple steps:

    Cleanse → Hydrate → Moisturize → Protect

    Choose products that feel comfortable for your skin, introduce new products gradually, and focus on building a routine you can maintain.

    The goal isn’t perfect skin. It’s creating a simple, consistent routine that helps your skin look and feel healthy, hydrated, and cared for.


    💗 Save This Routine

    Want an easy skincare routine you can return to whenever you need it?

    Save this guide to Pinterest and use this four-step checklist:

    CLEANSE • HYDRATE • MOISTURIZE • PROTECT

  • The Science of Shade Matching: L’Oréal Paris True Match Foundation Guide

    The Science of Shade Matching: L’Oréal Paris True Match Foundation Guide

    A beautiful foundation finish starts with a shade that works naturally with your complexion. Even a good formula can look less natural when the depth or undertone is not right.

    The L’Oréal Paris True Match Super-Blendable Liquid Foundation is a useful product to explore when learning the basics of foundation shade matching.

    In this guide, we’ll look at skin depth, undertone, lighting, jawline testing, and simple application tips to help you make a more informed shade choice.

    Depth vs. Undertone

    Two important parts of foundation matching are skin depth and undertone.

    Depth describes how light or deep your complexion appears.

    Undertone describes the underlying tone of your skin, commonly described as:

    • Warm
    • Neutral
    • Cool

    Two people can have a similar skin depth but different undertones. That’s why a foundation shade that looks right on someone else may not look the same on you.

    Why Jawline Testing Helps

    The jawline can be a useful place to test foundation because it sits between your face and neck.

    A shade that blends naturally across this area is less likely to create an obvious line between the two.

    When possible, test foundation in natural daylight and give the formula a moment to settle before making your final judgment.

    Lighting Changes Everything

    The same foundation can appear different depending on the lighting.

    Indoor yellow lighting, bathroom LEDs, phone cameras, and outdoor daylight can all affect how a shade looks.

    For an important shade decision, compare the foundation in more than one lighting environment.

    Natural daylight is particularly useful because it gives you a better idea of how the shade actually looks on your skin.

    How to Compare Foundation Shades

    If you’re choosing between two shades, comparing them side by side can be more helpful than testing them hours apart.

    Look for the shade that blends most naturally into your skin rather than automatically choosing the one that looks brightest or most flattering immediately after application.

    Pay attention to both:

    • Skin depth
    • Undertone

    A shade that matches both can create a more seamless-looking base.

    Don’t Match Only Your Hand

    Your hands and face can have different coloring.

    That’s why choosing foundation simply by holding the bottle or testing a shade on your hand may not give you the most accurate match.

    When possible, test the foundation closer to the jawline and compare it with your neck and face.

    Application Matters Too

    Shade matching is only part of the finished look.

    The amount of foundation you apply, your skin preparation, and how well you blend can all affect the final appearance.

    Start with a thin layer and blend it evenly.

    If you need more coverage in certain areas, build gradually rather than applying a heavy layer everywhere.

    This can also help you see the actual foundation shade more clearly.

    Common Foundation Shade-Matching Mistakes

    Choosing Only by Bottle Appearance

    The color of a foundation bottle or packaging isn’t a reliable way to determine whether the product matches your skin.

    Relying Completely on Online Photos

    Online images and swatches can be useful references, but screens display colors differently.

    Whenever possible, compare the manufacturer’s current shade information and swatches with your own complexion.

    Ignoring Undertone

    A foundation can have a similar depth but still look noticeably different if the undertone doesn’t work with your skin.

    Testing in Only One Light

    A shade that looks perfect under warm indoor lighting may look different outdoors.

    Try to check your shade in natural daylight before making your final decision.

    Matching Only Your Face

    Your face, neck, and hands may not have exactly the same coloring.

    Consider how the foundation looks across the face and jawline rather than matching one small area.

    A Simple Shade-Matching Routine

    Use this process when choosing a foundation:

    1. Determine your approximate skin depth.
    2. Consider whether your undertone is warm, neutral, or cool.
    3. Compare the available True Match shade information.
    4. Test your closest options near the jawline.
    5. Check the shade in natural daylight.
    6. Allow the foundation to settle.
    7. Compare the result with your neck.
    8. Choose the shade that blends most naturally.

    This approach can make online and in-store foundation shopping less confusing.

    How to Get a Natural-Looking Foundation Finish

    Once you’ve selected your shade, keep the application simple.

    Start with a small amount of foundation and blend it across the face.

    Add another thin layer only where you want additional coverage.

    Pay particular attention to the edges around the jawline, hairline, and nose so the foundation transitions smoothly.

    The goal isn’t necessarily to apply more product. It’s to create an even base while keeping the application controlled.

    Is L’Oréal Paris True Match Right for You?

    The L’Oréal Paris True Match Super-Blendable Liquid Foundation can be a useful option if you’re looking for a foundation around which to build a shade-matching routine.

    It may be worth considering if you want to focus on:

    • Finding a closer shade match
    • Understanding undertones
    • Comparing foundation shades
    • Creating a natural-looking base
    • Building coverage gradually
    • Learning better foundation application habits

    Remember that shade availability and product variations can change, so check the current listing before purchasing.


    Quick Product Box

    L’Oréal Paris True Match Super-Blendable Liquid Foundation

    View on Amazon

    Product shades, ingredients, packaging, price, availability, sellers, and delivery information can change. Check the current Amazon listing before purchasing.

    Affiliate Disclosure

    Affiliate Disclosure: This article contains affiliate links. As an Amazon Associate I earn from qualifying purchases.

    Final Thoughts

    Finding the right foundation shade is about more than choosing a color that looks close in the bottle.

    Pay attention to skin depth, undertone, lighting, and where you test the foundation.

    With L’Oréal Paris True Match, use the available shade information as a starting point, compare shades carefully, and check your final choice in natural light.

    A little extra time spent on shade matching can make the rest of your makeup routine much easier.

    Save This for Later

    The Ultimate Foundation Shade-Matching Guide 💕

    Save this guide to your Beauty Glow Guide Pinterest board so you can return to these foundation shade-matching tips whenever you’re shopping for makeup.

  • Is the e.l.f. Halo Glow Liquid Filter Worth the Hype? A Practical Review

    Is the e.l.f. Halo Glow Liquid Filter Worth the Hype? A Practical Review

    If you like makeup that gives your complexion a luminous, fresh-looking finish, you’ve probably seen the e.l.f. Halo Glow Liquid Filter everywhere.

    This multi-use complexion product can be worn alone, under or over makeup, mixed with foundation, or used on selected areas as a highlighter. e.l.f. describes it as a light-coverage, buildable product with a luminous finish.

    But how should you actually use it, and how do you choose the right shade? This guide breaks down the basics so you can decide whether the e.l.f. Halo Glow Liquid Filter fits into your everyday makeup routine.

    What You’ll Learn

    • How the e.l.f. Halo Glow Liquid Filter works on different skin types
    • 4 versatile ways to apply and layer it
    • How to find your correct shade and undertone
    • Step-by-step everyday application routine

    What Is e.l.f. Halo Glow Liquid Filter?

    The e.l.f. Halo Glow Liquid Filter is a liquid complexion booster designed to add a luminous, soft-focus appearance to the skin.

    Rather than functioning like a traditional full-coverage foundation, it can be used in several different ways depending on the makeup look you want to achieve.

    According to e.l.f., the product can be worn alone, under or over makeup, mixed with foundation, or applied as a highlighter to the high points of the face. That versatility is one of the main reasons it fits so easily into different makeup routines.

    What Kind of Finish Does It Give?

    Halo Glow Liquid Filter is designed for a luminous, glowy finish rather than a traditional matte finish.

    The product provides light, buildable coverage, so it can be used when you want some complexion enhancement without creating a heavy foundation layer.

    If you prefer a soft, subtle glow, you can use a smaller amount. If you want more noticeable luminosity, you can build the product gradually in thin layers.

    Four Ways to Use Halo Glow Liquid Filter

    One of the most useful things about this product is that you don’t have to use it in only one way.

    1. Wear It Alone

    For a simple makeup look, apply a small amount across the face and blend it evenly. This creates a lightweight, luminous appearance without adding a traditional full-coverage foundation layer. If you prefer minimal makeup, this is an easy way to add natural radiance.

    2. Wear It Under Foundation

    Halo Glow Liquid Filter can also be used underneath foundation as a luminous base. Apply a thin layer first, blend it evenly, and then apply your foundation as usual. This approach works particularly well when you want your foundation to have a more radiant, lit-from-within appearance.

    3. Mix It With Foundation

    Another option is mixing a small amount of Halo Glow Liquid Filter directly with your liquid foundation. This gives your foundation a more luminous appearance while allowing you to maintain your usual coverage level. Start with a small amount and adjust the ratio according to the finish you prefer.

    4. Use It as a Highlighter

    You can also apply a small amount to areas where you want to emphasize natural light. Try the cheekbones, brow bones, bridge of the nose, or cupid’s bow. Blend the edges carefully so the glow looks soft and intentional rather than overly concentrated.

    How to Choose Your Halo Glow Shade

    Shade selection is important because Halo Glow Liquid Filter is available across multiple shade families and undertones.

    The current e.l.f. listing features 15 flexible shades covering fair, light, medium, deep, and rich skin tones, with cool, neutral, and warm undertone options.

    When choosing your shade, consider:

    • Your overall skin-depth range
    • Your undertone (warm, cool, or neutral)
    • Whether you want the product to blend naturally across your full face
    • Whether you plan to use it as an all-over glow or mainly as a targeted highlighter

    If you’re unsure between two shades, compare product swatches on the retailer listing before purchasing.

    Warm, Cool, or Neutral Undertone?

    Understanding your undertone can help narrow down your choices:

    • Warm Undertones: Skin often appears more golden, peach, or yellow.
    • Cool Undertones: Skin often appears more pink, rosy, or blue-leaning.
    • Neutral Undertones: A balance between warm and cool tones.

    Natural lighting and comparing several shade options will give you the best idea of which shade family is most suitable for your skin.

    How Much Halo Glow Should You Use?

    You don’t need to start with a large amount. Begin with a small dot, blend it out, and then decide whether you want additional glow.

    This is especially important when applying the product all over the face.

    Beauty Glow Guide Tip: Start with less product and build the glow gradually. It’s much easier to add another thin layer than to correct an overly luminous application.

    Combining Halo Glow With Other Beauty Favorites

    If you already have a liquid foundation or liquid blush that you love, you don’t need to replace them.

    Try combining a small amount of Halo Glow Liquid Filter with your foundation to transform its finish. You can also pair it with high-impact cheek products like the e.l.f. Camo Liquid Blush Review: How to Use High-Pigment Liquid Blush

    .

    For additional affordable complexion items, explore our roundup of 5 Drugstore Makeup Must-Haves Under $40 to Try in 2026

    .

    Halo Glow for Everyday Makeup

    For a simple, radiant everyday routine, follow this step-by-step process:

    1. Skincare: Apply your daily moisturizer and sunscreen, allowing them to absorb completely. For step-by-step morning prep, see our Simple Morning Skincare Routine for Beginners: 5 Easy Steps.
    2. Glow Booster: Apply a small amount of Halo Glow Liquid Filter.
    3. Blend: Spread evenly using your fingertips, a brush, or a damp sponge.
    4. Conceal: Add concealer where extra coverage is needed.
    5. Foundation (Optional): Apply foundation if you prefer a higher coverage level.
    6. Blush & Finish: Add blush and set selected areas with powder as desired.
    7. Evening Removal: At the end of the day, melt away long-wear glow products using a double-cleansing method with a product like the BANILA CO Clean It Zero Original Cleansing Balm Review.

    Is e.l.f. Halo Glow Liquid Filter Right for You?

    This type of complexion product may appeal to you if you enjoy:

    • Luminous, radiant makeup finishes
    • Lightweight complexion products
    • Customizable, buildable coverage
    • Multi-use makeup tools
    • Glowy everyday makeup looks

    If you strongly prefer a completely matte finish, a luminous liquid filter may not be the formula for you.

    Related Beauty Glow Guide Articles

    Final Thoughts

    The e.l.f. Halo Glow Liquid Filter is designed to give you flexibility rather than locking you into one particular makeup routine.

    You can wear it alone, use it under or over makeup, mix it with foundation, or apply it selectively as a highlighter. The easiest approach is to start with a small amount and build the glow gradually.

    If you’re interested in trying it, take your time with shade selection and consider how you want to use the product before choosing your shade.

    Save This for Later

    e.l.f. Halo Glow Liquid Filter Guide ✨

    Save this guide to your beauty essentials or Makeup ideas Pinterest board so you can return to these glow, shade, and application tips whenever you need them!

    Featured Product & Disclosure

    #ad Affiliate Disclosure: As an Amazon Associate, Beauty Glow Guide earns from qualifying purchases. This article contains affiliate links. Product shades, ingredients, packaging, price, and availability can change. Check current retailer listings before purchasing.

    Quick Product Box

    e.l.f. Halo Glow Liquid Filter

    A multi-use, light-coverage liquid complexion booster infused with squalane and hyaluronic acid for a soft-focus, radiant finish.

    View on Amazon


  • e.l.f. Camo Liquid Blush Review: How to Use High-Pigment Liquid Blush

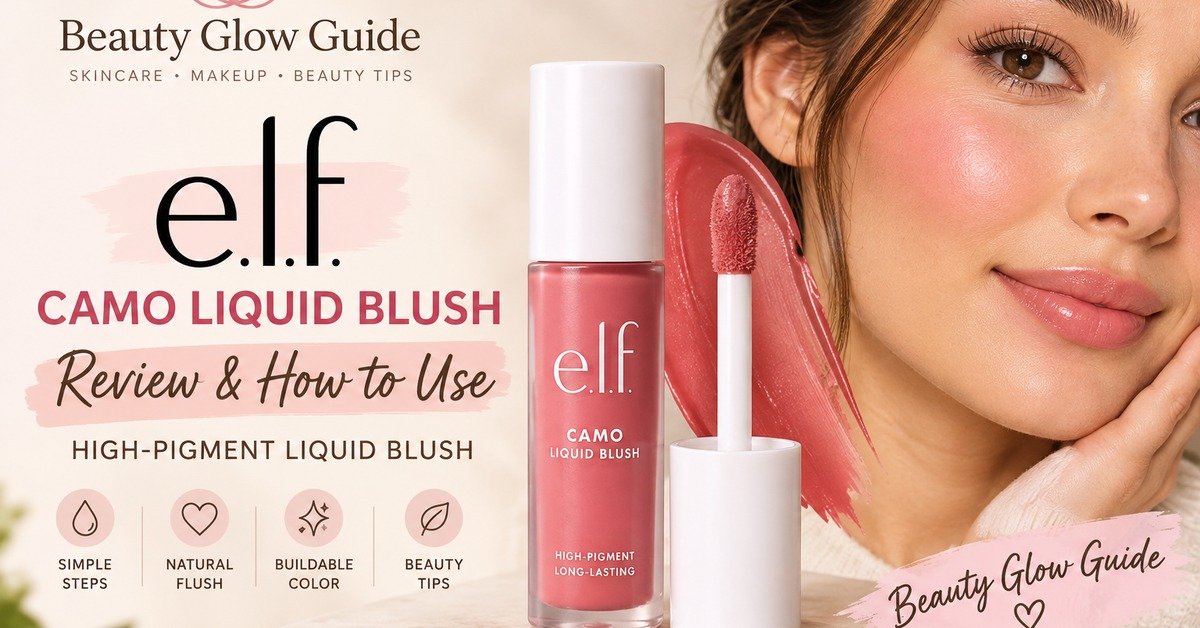
    e.l.f. Camo Liquid Blush Review: How to Use High-Pigment Liquid Blush

    Liquid blush can give your makeup a fresh, natural-looking flush, but highly pigmented formulas can be easy to overapply.

    The key is simple: start with a tiny amount, blend quickly, and build the color gradually.

    The e.l.f. Camo Liquid Blush is designed to add noticeable cheek color with a lightweight, blendable application. In this guide, we’ll look at how to use it without applying too much product.

    What You’ll Learn

    • How high-pigment liquid blush works
    • Simple blending techniques for an even application
    • Ideal placement for different face shapes and styles
    • Common liquid blush mistakes to avoid

    What Is e.l.f. Camo Liquid Blush?

    e.l.f. Camo Liquid Blush is a liquid blush designed to add vivid color to the cheeks. Its liquid format makes it easy to spread and blend, while its high pigmentation allows you to build intensity according to your preferred makeup look.

    Because liquid blush spreads across the skin quickly, you generally don’t need a large amount to create visible color.

    Start With a Tiny Amount

    This is the most important tip when working with a highly pigmented liquid blush.

    Start with one or two small dots on the cheek. Blend those dots completely before deciding whether you need more product.

    Applying a large amount immediately can make the blush difficult to diffuse evenly. Starting with less gives you much more control over the final result.

    Beauty Glow Guide Tip: You can always add more color, but removing excess blush can disturb the makeup underneath.

    How to Blend Liquid Blush

    Once you’ve placed the blush, blend it gently outward from the original application point.

    You can use:

    • A makeup brush for controlled blending
    • Your fingertips for a quick, natural-looking application
    • A damp makeup sponge for a softer finish

    Whichever tool you choose, avoid rubbing aggressively. Gentle tapping and blending can help keep the makeup underneath looking even.

    Build the Color Gradually

    If your first layer looks too subtle, don’t immediately apply a large amount. Instead, blend the first layer and then add another small dot if needed.

    This gives you better control over the final intensity and helps prevent an overly strong application.

    For everyday makeup, a lighter first layer creates a softer flush. If you want more noticeable color for photos or events, gradually add another thin layer.

    Where Should You Apply Liquid Blush?

    Blush placement can change the overall appearance of your face:

    • Lifted Look: Try positioning the blush slightly higher on the cheekbones and blending outward toward the temples.
    • Classic Fresh Flush: Place color closer to the apples of the cheeks and blend the edges softly.

    There isn’t one placement that works for everyone. Your preferred makeup style and face shape can help guide where you apply the product.

    Liquid Blush Over Foundation

    When using liquid blush over foundation or concealer, avoid applying too much pressure during blending.

    Place a small amount of blush where you want the color and gently blend it into the surrounding makeup. If you’re using a makeup sponge, tapping rather than dragging helps reduce disruption to the base layer.

    For more budget-friendly beauty recommendations to pair with your liquid blush, explore our guide on 5 Drugstore Makeup Must-Haves Under $40 to Try in 2026

    .

    How to Avoid Applying Too Much

    If you’re new to highly pigmented liquid blush, follow this simple checklist:

    1. Start with one or two small dots.
    2. Blend immediately after applying.
    3. Check the color in natural light before adding more.
    4. Build the intensity in thin layers.
    5. Keep the edges soft and diffused.
    6. Use less product near the center of the face.
    7. Stop once you’ve reached your desired intensity.

    The goal isn’t to use a lot of blush—it’s to control where the color goes and how strong it looks.

    Is e.l.f. Camo Liquid Blush Right for You?

    This type of liquid blush may appeal to you if you enjoy:

    • Noticeable, high-impact cheek color
    • Lightweight liquid makeup formulas
    • Customizable, buildable application
    • Experimenting with different blush placement techniques

    If you prefer extremely subtle makeup, starting with a micro-dot is especially important. To prepare your skin before applying cheek products, see our Simple Morning Skincare Routine for Beginners: 5 Easy Steps

    .

    Related Beauty Glow Guide Articles

    Final Thoughts

    The biggest lesson when using a highly pigmented liquid blush is to start small.

    With e.l.f. Camo Liquid Blush, begin with a tiny amount, blend it immediately, and add more only when necessary. This approach gives you greater control over intensity and placement.

    A little patience during application makes it much easier to create the exact cheek color you want.

    Save This for Later

    The High-Pigment Drugstore Liquid Blush Guide 💕

    Save this guide to your Makeup ideas or beauty essentials Pinterest board so you can return to these liquid blush application tips whenever you need them!

    Featured Product & Disclosure

    #ad Affiliate Disclosure: As an Amazon Associate, Beauty Glow Guide earns from qualifying purchases. This article contains affiliate links. Product shades, ingredients, packaging, price, and availability can change. Check current retailer listings before purchasing.

    Quick Product Box

    e.l.f. Camo Liquid Blush

    A lightweight, high-pigment liquid blush designed to deliver buildable, long-lasting cheek color.View on Amazon

  • “The Ultimate Beauty Glow Guide: A Simple Vitamin C Routine for a Radiant-Looking Complexion”

    “The Ultimate Beauty Glow Guide: A Simple Vitamin C Routine for a Radiant-Looking Complexion”

    Skincare Disclaimer: This article is for general educational purposes and is not medical advice. Skincare products can affect people differently. If you have persistent irritation, allergies, or a diagnosed skin condition, consult a qualified healthcare professional or dermatologist.

    A radiant-looking complexion does not require a complicated skincare routine.

    The foundation is simple: gentle cleansing, hydration, targeted skincare, moisturizer, and daily sun protection.

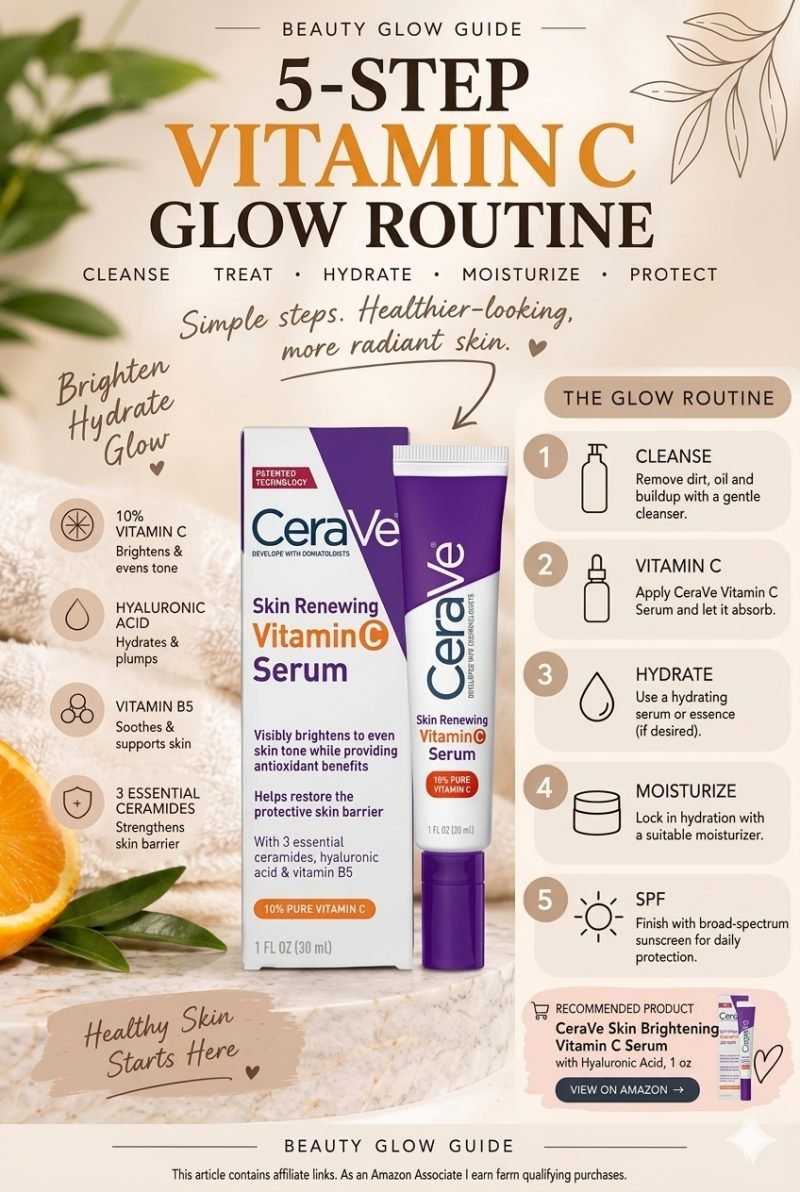
    One ingredient often featured in brightening routines is vitamin C. When combined with hydrating ingredients such as hyaluronic acid and barrier-supportive ingredients such as ceramides, it can fit naturally into a simple morning skincare routine.

    In this Beauty Glow Guide, we’ll walk through a practical routine and take a closer look at CeraVe Skin Brightening Vitamin C Serum with Hyaluronic Acid.


    Step 1: Start With a Gentle Cleanse

    A glow-focused routine begins with clean skin.

    The goal is to remove excess oil, dirt, makeup, and other buildup without making your skin feel unnecessarily dry or uncomfortable.

    Use lukewarm water and a gentle facial cleanser. Avoid aggressive scrubbing, especially if your skin is sensitive.

    Why Cleansing Matters

    Your skincare products are easier to incorporate into a routine when your skin has been properly cleansed.

    However, “squeaky clean” is not the goal.

    A simple approach is:

    1. Wet your face with lukewarm water.
    2. Apply a gentle cleanser.
    3. Massage gently with your fingertips.
    4. Rinse thoroughly.
    5. Pat your skin dry.

    After cleansing, move on to your treatment step.


    Step 2: Add a Vitamin C Serum

    This is where the CeraVe Skin Brightening Vitamin C Serum fits into our routine.

    The product information you provided describes it as a facial serum formulated with 10% L-ascorbic acid, hyaluronic acid, vitamin B5, and three essential ceramides.

    It also has a lightweight gel texture.

    Why Vitamin C Is Popular in Glow Routines

    Vitamin C is widely used in skincare routines focused on a brighter, more even-looking complexion.

    CeraVe’s product information states that its formula uses 10% pure vitamin C (L-ascorbic acid) and is designed to help brighten and even the appearance of skin tone.

    Vitamin C is also an antioxidant ingredient, making it a popular choice for morning skincare routines.


    Recommended Product: CeraVe Skin Brightening Vitamin C Serum

    CeraVe Skin Brightening Vitamin C Serum for Face with Hyaluronic Acid, 1 oz

    Why We Chose It

    This serum fits naturally into a glow-focused routine because the formula combines several ingredients already relevant to our skincare guide.

    Key Ingredients

    • 10% L-ascorbic acid (Vitamin C)
    • Hyaluronic acid
    • Vitamin B5
    • Three essential ceramides

    According to the product information, the formula is also fragrance-free, paraben-free, non-comedogenic, and allergy tested.

    Product Texture

    The product is described as having a lightweight gel texture with a non-greasy feel.

    CeraVe’s product directions indicate applying a thin layer and allowing the serum to absorb before applying additional skincare products.

    View CeraVe Vitamin C Serum on Amazon

    As an Amazon Associate I earn from qualifying purchases.


    Step 3: Follow With Hydration

    Vitamin C does not have to be the only focus of a glow routine.

    Hydration is another important part of creating a comfortable, healthy-looking complexion.

    The CeraVe serum contains hyaluronic acid, which is commonly used in skincare formulas designed to support hydration.

    Why Hyaluronic Acid Is Popular

    Hyaluronic acid is a humectant commonly found in hydrating skincare products.

    It is often paired with other ingredients in serums and moisturizers to create a hydration-focused routine.

    If your skin feels dry or tight, a suitable moisturizer can help complete this part of your routine.


    Step 4: Support the Skin Barrier

    A good glow routine should not focus only on brightening.

    Your skin barrier matters too.

    The CeraVe serum contains three essential ceramides: 1, 3, and 6-II, according to the product information you provided.

    Ceramides are naturally occurring lipids found in the skin and are commonly used in skincare products designed to support the skin barrier.

    Keep Your Routine Simple

    You don’t need to use multiple strong treatments at the same time.

    A straightforward routine can be:

    Cleanse → Vitamin C Serum → Moisturizer → Sunscreen

    This keeps the routine easy to understand and easier to maintain.


    Step 5: Moisturize

    After your serum has absorbed, apply a moisturizer suitable for your skin type.

    Moisturizer can help provide hydration and make the skin feel more comfortable.

    Look for formulas that complement the rest of your routine rather than adding unnecessary complexity.

    Ingredients You May See in Hydrating Moisturizers

    Depending on the formula, you may come across:

    • Ceramides
    • Hyaluronic acid
    • Glycerin
    • Dimethicone

    Your ideal moisturizer depends on your skin type, texture preference, and how your skin responds to the formula.


    Step 6: Finish With Sunscreen

    For a morning routine, sunscreen is the final step.

    Use a broad-spectrum sunscreen appropriate for your skin and follow the product’s application instructions.

    This is particularly important when your routine includes products designed around brightening and improving the appearance of uneven tone.

    A simple morning sequence is:

    1. Cleanse
    2. Vitamin C serum
    3. Moisturizer
    4. Sunscreen

    That’s it.

    You don’t need ten different products to create a useful morning routine.


    How to Use the CeraVe Vitamin C Serum

    If you’re adding the product to your routine, keep the process simple.

    Morning Routine

    Step 1: Cleanse your face.

    Step 2: Apply a thin layer of CeraVe Vitamin C Serum.

    Step 3: Allow the serum to absorb.

    Step 4: Apply your facial moisturizer.

    Step 5: Finish with sunscreen.

    Always follow the current instructions on the product packaging.


    Who Might Like a Vitamin C Serum?

    Vitamin C products are commonly chosen by people who want to build a routine around:

    • A brighter-looking complexion
    • More even-looking skin tone
    • Antioxidant skincare
    • Lightweight hydration
    • A simple morning routine

    However, skincare is personal.

    A product that works comfortably for one person may not feel the same for someone else.

    If you’re introducing a new product, consider introducing it gradually and paying attention to how your skin responds.


    Vitamin C + Hyaluronic Acid: Why This Combination Makes Sense

    Vitamin C and hyaluronic acid serve different purposes in a skincare formula.

    Vitamin C is commonly used in routines focused on antioxidant care and a brighter-looking complexion.

    Hyaluronic acid is commonly used for hydration.

    That makes the combination appealing for someone looking for a hydrating glow routine without adding several separate products.

    The CeraVe formula combines both in one serum.


    Don’t Overcomplicate Your Glow Routine

    A common skincare mistake is adding too many products too quickly.

    If you introduce several new serums, exfoliants, masks, and treatments simultaneously, it becomes difficult to know which product is responsible if your skin becomes irritated.

    Instead, build your routine gradually.

    Start with the basics:

    Cleanser + Serum + Moisturizer + Sunscreen

    Then adjust according to your skin’s needs.


    Simple Morning Glow Checklist

    Save this five-step routine:

    1. Cleanse

    Start with a gentle cleanser.

    2. Apply Vitamin C

    Use your CeraVe Vitamin C Serum according to the product directions.

    3. Hydrate

    Allow the serum to absorb before continuing.

    4. Moisturize

    Apply a moisturizer suited to your skin.

    5. Protect

    Finish with broad-spectrum sunscreen.

    Simple routine. Consistent routine. Beauty Glow Guide.


    What About a Glass Skin Routine?

    The term glass skin is often used to describe a smooth, hydrated, luminous-looking complexion.

    You don’t need to follow an extremely complicated routine to create a similar beauty aesthetic.

    Instead, focus on the fundamentals:

    • Gentle cleansing
    • Hydration
    • A suitable treatment
    • Moisturizer
    • Sunscreen
    • Consistency

    The goal should be healthy-looking, comfortable skin—not perfection.


    Common Glow Routine Mistakes

    Using Too Many Actives

    Adding multiple active ingredients at once can make a routine difficult to manage.

    Introduce products gradually.

    Skipping Moisturizer

    Even when you’re focused on brightening, hydration still matters.

    Choose a moisturizer appropriate for your skin type.

    Forgetting Sunscreen

    A brightening-focused morning routine should include sun protection.

    Applying Too Many Layers

    More layers don’t automatically create better results.

    Keep your routine practical.

    Ignoring Your Skin’s Response

    If a product causes persistent irritation or discomfort, stop using it and seek appropriate professional advice when needed.


    Final Thoughts: Keep Your Glow Routine Simple

    A beautiful skincare routine doesn’t have to be complicated.

    For a straightforward morning glow routine, start with:

    Cleanse → CeraVe Vitamin C Serum → Moisturizer → Sunscreen

    The CeraVe Skin Brightening Vitamin C Serum we featured contains 10% L-ascorbic acid, hyaluronic acid, vitamin B5, and three essential ceramides, making it a natural product to feature in this vitamin C and hydration-focused guide.

    Check the CeraVe Vitamin C Serum on Amazon

    As an Amazon Associate I earn from qualifying purchases.

    Product information, availability, packaging, and ingredients can change. Always check the current Amazon product page and product packaging before purchasing or using a product.