Tag: Makeup

  • 15-Minute Easy Halloween Makeup: Step-by-Step Glam Clown Tutorial

    Creating a memorable, eye-catching Halloween aesthetic does not require professional stage painting skills or hours in front of a mirror. With just three everyday cosmetics—red lipstick, black eyeliner, and white eyeshadow—you can map out a classic glam clown motif in 15 minutes.

    This guide breaks down the full application process into manageable steps while prioritizing skin health. By focusing on proper preparation and clean linework, you can achieve a polished, long-wearing costume look that feels comfortable on the skin all evening.

    Editorial Note:This content is for informational and educational purposes only and does not constitute medical or dermatological advice. If you have sensitive skin or existing skin conditions, perform a patch test prior to applying cosmetic products.

    Quick Take

    • Time Required: Approximately 15 Minutes
    • Core Cosmetics: Lightweight moisturizer, hydrating serum, matte white eyeshadow, black liquid or gel eyeliner, classic red lipstick
    • Skill Level: Absolute Beginner
    • Main Takeaway: Thorough skincare preparation prevents dark cosmetics from clinging to dry patches, while simple geometric linework creates an elegant clown motif without complex theatrical shading.

    What Is It?

    The 15-minute glam clown is a modern adaptation of classic circus and theatrical face art. Instead of relying on heavy grease paint or thick costume creams, this approach uses standard beauty products to create structured, striking features.

    Traditional stage paints can often block pores and feel heavy during extended wear. By replacing heavy costume pigments with breathable everyday makeup, you maintain a fresh appearance while keeping your skin barrier balanced and comfortable.

    This technique is ideal for last-minute events, minimalist beauty routines, or anyone who prefers a lightweight alternative to full-face character paint.

    Key Benefits

    • Minimal Product Requirements: Leverages versatile makeup items you likely already have in your beauty collection.
    • Protects Skin Barrier Health: Replaces dense, pore-clogging theatrical paints with breathable, familiar cosmetics.
    • Beginner-Friendly Technique: Relies on basic geometric lines and dabbing motions rather than complex artistic shading.
    • Customizable Aesthetic: Allows you to easily adjust line thickness, color intensity, or wing angles to match your personal style.
    • Time-Efficient Application: Designed to be completed smoothly in 15 minutes without requiring specialized tools.

    Detailed Step-by-Step Application Tutorial

    Step 1: Prepare and Hydrate the Skin Canvas

    Before applying high-pigment cosmetics, start with a thoroughly cleansed and hydrated base. Following a simple morning skincare routine

    ensures your skin remains comfortable under cosmetics.

    Apply a gentle hydrating serum containing ingredients like hyaluronic acid or glycerin to plump the skin surface. Follow immediately with a lightweight moisturizer to lock in moisture and smooth out dry texture.

    Allowing your skincare products to absorb completely for two to three minutes prevents eyeliner from skipping or dragging during application. If you are unsure of the correct product sequence, review this guide on how to layer skincare products

    .

    Step 2: Brighten and Prime the Eye Area

    Apply a thin layer of matte white eyeshadow across the entire upper eyelid, blending softly upward toward the brow bone. Use a flat shading brush and gentle pressing motions to build even opacity across the lid.

    This bright white base serves two vital purposes: it neutralizes natural lid redness and creates a high-contrast canvas that makes the black eyeliner linework pop.

    Step 3: Map Out the Vertical Eye Accents

    Take a fine-tip liquid eyeliner and locate the exact center of your upper lash line. Draw a clean, vertical line extending straight upward from the center of your brow, forming a slim, elongated triangle.

    Mirror this shape on the lower lash line by drawing an inverted triangle extending downward toward the top of your cheekbone. Repeat this process on the opposite eye, taking care to keep the lines symmetrical.

    #ad Affiliate link — I may earn a commission from qualifying purchases. As an Amazon Associate I earn from qualifying purchases. Product availability, price and details may change on Amazon. Product sizes, ingredients, packaging, availability, sellers, and delivery information can change. Check current Amazon listing before purchasing.

    Quick Product Box

    L’Oreal Paris Haute Precision Waterproof Liquid Eyeliner (010 Black Silk)View on Amazon

    Step 4: Define the Lips and Extended Smile Lines

    Apply a rich red lipstick to the lips, slightly exaggerating the center of the Cupid’s bow to establish a classic vintage shape. Blot gently with a tissue to remove excess oils.

    If your lips tend to dry out under bold pigments, preparing them beforehand with a hydrating lip product

    can improve smoothness. Using your black eyeliner, carefully extend a subtle, upward-curving line outward from each corner of the mouth to create the traditional clown smile motif.

    Quick Product Box

    REVLON Super Lustrous Lipstick (775 Super Red)View on Amazon

    Step 5: Add Final Character Details and Set

    Dab a small amount of the same red lipstick onto the tip of your nose, forming a small, soft circle. Use the pad of a clean finger or a small blending sponge to gently soften the outer edges.

    To ensure your work stays crisp throughout the night, lightly dust the cream-covered areas with a translucent setting powder or a matching red eyeshadow powder.

    Where It Fits in a Skincare Routine

    Pre-Makeup Skincare Preparation

    Skincare preparation is essential whenever you intend to wear long-wearing or dark pigments. Applying cosmetics directly over dry or unmoisturized skin can lead to patchy color payoff and premature fading.

    Focus on layering lightweight hydration during your morning or early evening routine. Avoid heavy occlusive oils immediately before makeup, as they can cause liquid eyeliners to smudge or bleed line details.

    Post-Event Deep Cleansing Routine

    Dark liquid eyeliners and long-wear red lip pigments require structured double cleansing at the end of the night. Following a structured overnight K-beauty routine

    ensures all pigment is cleared without clogging pores.

    Begin your night routine with an oil-based cleansing balm to break down stubborn waxes and waterproof polymers. Follow with a gentle hydrating gel or milk cleanser to wash away remaining residues without stripping natural skin moisture.

    Quick Product Box

    BANILA CO Clean It Zero Original Cleansing BalmView on Amazon

    What Can You Combine It With?

    Compatible Product Pairings

    • Pore-Smoothing Primers: Applying a silicone-free smoothing primer to the center of the face helps create an even surface for detailed linework.
    • Affordable Base Makeup: Building your look on top of accessible base products—such as those featured in our roundup of drugstore makeup must-haves under $40—keeps your costume budget-friendly.
    • Volumizing Mascaras: Adding two coats of black mascara or lightweight false lashes enhances the dramatic contrast of the eye triangles.

    Product Combinations to Use With Care

    • Alcohol-Based Setting Sprays: High-alcohol fixative sprays can strip skin moisture and cause stinging around sensitive eye areas; opt for hydrating mist formulas instead.
    • Strong Exfoliating Acids: Avoid using potent AHA, BHA, or retinoid treatments on the same day as heavy makeup application to prevent potential skin stinging or redness.

    What Should You Be Careful About?

    • Patch Testing New Formulas: Always test new cosmetic products or eyeliners on a small area, such as your inner wrist, 24 hours before applying them near your eyes.
    • Precision Near the Delicate Eye Area: Keep liquid eyeliners on the outer skin tissue and avoid applying non-waterline-approved liners directly into the rim of the eye.
    • Avoiding Friction During Removal: Avoid aggressive scrubbing with dry cotton pads. Allow your oil cleanser time to break down pigment before rinsing gently with lukewarm water.
    • Mindful Product Expiration: Ensure long-stored eyeliners or cream lipsticks are clean and within their expiration period before applying them to sensitive facial skin.

    Who May Like This Look?

    • Makeup Beginners: Ideal for individuals who want a complete, recognizable costume look without needing advanced blending or face painting skills.
    • Minimalist Beauty Enthusiasts: Perfect for people who prefer repurposing their core beauty products rather than buying single-use costume palettes.
    • Sensitive Complexions: A great alternative for skin types that react poorly to heavy stage grease paints, theatrical latex, or low-cost costume face paint kits.
    • Last-Minute Event Attendees: Excellent for anyone who needs a quick, elegant transformation that can be completed shortly before heading out.

    Simple Skincare Routine for Pre and Post Makeup

    Pre-Makeup Preparation Routine

    1. Hydrating Cleanser: Wash face with a gentle, non-stripping cleanser.
    2. Soothing Essence / Toner: Press a hydrating toner into the skin to boost moisture levels.
    3. Barrier Moisturizer: Apply a smooth, fast-absorbing moisturizer.
    4. Daily SPF: Apply a broad-spectrum sunscreen if your event takes place during daylight hours.

    Post-Event Cleanse Routine

    1. Cleansing Oil / Balm: Massage an oil cleanser over dry skin for 60 seconds to dissolve liner and lipstick.
    2. Gentle Second Cleanser: Follow with a foaming or milk cleanser to remove all remaining impurities.
    3. Restorative Moisture Cream: Apply a rich night cream to nourish and recover the skin barrier overnight.

    Complete Summary Overview

    Application StepTechnique FocusRecommended Product TypeCore Purpose
    1. PreparationDeep hydrationLightweight MoisturizerCreates a smooth, plump base
    2. Eye BaseLid brighteningMatte White EyeshadowProvides color contrast for linework
    3. Eye AccentsGeometric lineworkLiquid Eyeliner PenMaps out upper and lower triangles
    4. Lip ShapingExaggerated outlineClassic Red Cream LipstickDefines vintage mouth and smile lines
    5. Nose DetailSoft dabbing motionRed Lipstick & Translucent PowderCompletes the focal clown detail
    6. Night CleanseGentle double cleansingCleansing Balm & Gentle CleanserProtects long-term skin health

    Frequently Asked Questions

    How do I stop red lipstick from smudging off my lips and face?

    To prevent red lipstick from transferring, blot the lips with a clean tissue after your initial application and dust a thin layer of translucent setting powder over the area through a single-ply tissue.

    Can I substitute liquid eyeliner with a gel or pencil eyeliner?

    Yes, gel eyeliners with a fine detail brush offer great control and rich opacity. Pencils can also be used if you prefer a softer, slightly smudged aesthetic rather than sharp, graphic lines.

    What is the safest way to remove black liquid eyeliner without damaging eyelashes?

    Saturate a soft cotton pad with a dedicated dual-phase makeup remover or cleansing oil. Press the pad gently over your closed eye for 15 seconds to allow the oil to melt the liner before softly wiping outward.

    Can I use white concealer instead of white eyeshadow for the eye base?

    White cream concealer works well for brightening, but it must be thoroughly set with translucent or white powder to prevent liquid eyeliner from smudging or creasing during wear.

    Final Thoughts

    Achieving a dramatic Halloween look does not require complicated techniques or heavy costume face paints. By utilizing simple linework with everyday red lipstick, black liner, and white eyeshadow, you can craft a polished glam clown look in 15 minutes while keeping your skin comfortable.

    Save this guide to your Pinterest board for quick reference during your next routine refresh.

  • Truly Beauty Hydrating Lip Gloss Review: Is It Worth Trying for Dry Lips?

    If you like your lip products to combine glossy shine with a more comfortable, moisturizing feel, Truly Beauty Hydrating Lip Gloss is designed to sit somewhere between traditional makeup and lip care.

    The formula combines hyaluronic acid, jojoba oil, and shea butter and is designed to give lips a sheer wash of rosy-pink color with a high-shine finish. The Soft Serve shade is described by Truly as rosy pink, semi-sheer, and strawberry scented. (Truly Beauty)

    But does a hydrating lip gloss actually make sense for dry lips, and is this one worth adding to your makeup bag?

    Here is a practical look at the formula, finish, ingredients, application, pros and cons, and who may want to try it.

    Quick Take

    Truly Beauty Hydrating Lip Gloss is a tinted, high-shine gloss designed to make lips look glossy while helping them feel softer and more hydrated.

    The Soft Serve shade has a sheer rosy-pink tint and a strawberry scent. Its formula features hyaluronic acid, jojoba oil, and shea butter, while the full ingredient list also includes fragrance and fragrance allergens. (Truly Beauty)

    Best for:

    • Sheer everyday lip color
    • High-shine makeup looks
    • People who prefer a glossy finish
    • Lips that feel dry and need a more conditioning-feeling lip product
    • Layering over lipstick
    • Minimal, low-effort makeup

    Keep in mind:

    • It is still a lip gloss, not a treatment for severely dry or damaged lips.
    • The Soft Serve shade is semi-sheer rather than opaque.
    • It contains fragrance, so it may not be the best choice if your lips are sensitive to fragranced products. (Truly Beauty)

    What Is Truly Beauty Hydrating Lip Gloss?

    Truly Beauty Hydrating Lip Gloss is a tinted lip gloss designed to combine high shine, a sheer hint of color, and conditioning ingredients.

    The brand describes the formula as a skincare-grade lip gloss powered by hyaluronic acid, jojoba oil, and shea butter. It is designed to leave lips looking glossy and feeling soft and smooth. (Truly Beauty)

    For the Soft Serve shade, Truly describes the color as a rosy pink with a semi-sheer, high-shine finish and strawberry scent. (Truly Beauty)

    That makes it more of an everyday glossy tint than a bold statement lip color.

    What Does Soft Serve Look Like?

    Soft Serve is designed as a sheer rosy-pink shade.

    Because the color is semi-sheer, your natural lip tone will still influence the final result. That can make it an easy option for everyday makeup when you want a little color without the look of a full-coverage lipstick.

    The high-shine finish is the main visual feature.

    Think:

    sheer pink + glossy finish + comfortable-looking lips

    rather than:

    opaque lipstick + strong color payoff.

    Key Ingredients

    Hyaluronic Acid

    Hyaluronic acid is included as one of the formula’s highlighted ingredients.

    Truly positions it as a hydrating ingredient that helps lips look and feel more moisturized. The formula actually lists sodium hyaluronate, a form of hyaluronic acid, among its ingredients. (Truly Beauty)

    In this product, it is part of a broader conditioning formula rather than something that should be viewed as a stand-alone treatment for severely dry lips.

    Jojoba Oil

    Jojoba seed oil is another highlighted ingredient.

    It is included to help condition and soften the lips. The official ingredient list identifies Simmondsia Chinensis (Jojoba) Seed Oil. (Truly Beauty)

    This makes sense for a gloss intended to provide more than just shine.

    Shea Butter

    Shea butter is also featured in the formula.

    Truly describes it as a conditioning ingredient intended to soothe and soften dry-feeling lips. The ingredient list includes Butyrospermum Parkii (Shea) Butter. (Truly Beauty)

    Together, these ingredients give the gloss its lip-care positioning.

    Does It Actually Hydrate Dry Lips?

    This is where expectations matter.

    Truly markets the gloss as a hydrating product for dry and chapped lips and says it provides lasting hydration and an immediate soothing feel. Those are brand claims, not a guarantee that the gloss will solve persistent or severe lip dryness. (Truly Beauty)

    For ordinary everyday dryness, a glossy formula containing conditioning ingredients can make lips feel more comfortable and give them a smoother-looking appearance.

    However, if your lips are extremely dry, cracked, painful, or repeatedly irritated, a dedicated fragrance-free lip balm or ointment may be a better first step than relying on a cosmetic gloss.

    Is Truly Beauty Lip Gloss Sticky?

    The product is marketed as having a silky, non-sticky finish. (Truly Beauty)

    Of course, how a gloss feels can vary from person to person.

    If you normally dislike thick, tacky lip glosses, this product’s lightweight/non-sticky positioning may be appealing.

    If you prefer completely weightless lip products with no noticeable coating, however, even a non-sticky gloss may feel different from a lip balm or lip oil.

    Does It Make Lips Look Plumper?

    Truly positions the product as helping create a fuller, plumper-looking appearance by locking in moisture and enhancing the look of the lips. (Truly Beauty)

    That should be understood as a cosmetic appearance effect.

    The gloss can make lips look more dimensional because of:

    • reflective shine
    • smoother-looking texture
    • moisture-related surface fullness
    • sheer color
    • the glossy finish

    That is different from permanently increasing lip volume.

    Finish, Color & Scent

    For the Soft Serve shade, the main characteristics are:

    Color: Rosy pink
    Coverage: Semi-sheer
    Finish: High shine / semi-glossy
    Scent: Strawberry (Truly Beauty)

    The combination makes it particularly suited to casual daytime makeup, fresh beauty looks, and minimal makeup routines.

    You can also wear it over lipstick when you want additional shine. Truly specifically recommends wearing it alone or layering it over lipstick. (Truly Beauty)

    How to Use Truly Beauty Hydrating Lip Gloss

    The application is simple.

    1. Apply directly to bare lips

    Use the applicator to spread a thin layer across the lips.

    This gives you the sheer color and glossy finish.

    2. Build the shine

    If you want a more noticeable glossy appearance, add another layer rather than applying a very thick amount at once.

    3. Layer it over lipstick

    The gloss can also be used over lipstick to add reflective shine.

    Truly recommends both wearing it alone and layering it over lipstick. (Truly Beauty)

    4. Reapply when needed

    Gloss naturally wears down with eating, drinking, and normal lip movement, so reapplication is expected.

    Who May Like It?

    Truly Beauty Hydrating Lip Gloss may be a good fit if you enjoy:

    • Glossy lips rather than matte lipstick
    • Sheer pink color
    • Minimal everyday makeup
    • High-shine finishes
    • Lip products with conditioning ingredients
    • Layering gloss over lipstick
    • A sweet strawberry scent
    • Makeup products that combine color and lip-care positioning

    It could also work nicely in a simple “no-makeup makeup” routine where the goal is fresh-looking lips rather than a bold lip.

    Who May Want to Skip It?

    This may not be the best choice if you:

    • Prefer matte lip products
    • Want opaque color
    • Dislike scented lip products
    • Are sensitive to fragrance
    • Want a dedicated treatment for severely cracked lips
    • Prefer completely bare, lightweight lip balm textures

    The fragrance point is worth noting because the official ingredient list includes Fragrance (Parfum) as well as fragrance allergens including benzyl salicylate, citronellol, hexyl cinnamal, and linalool. (Truly Beauty)

    If your lips are easily irritated, checking the current ingredient list before purchasing is sensible.

    Pros & Cons

    Pros

    • High-shine finish
    • Sheer rosy-pink tint
    • Contains hyaluronic acid
    • Contains jojoba oil
    • Contains shea butter
    • Designed to feel non-sticky
    • Can be worn alone or over lipstick
    • Easy everyday shade
    • Combines makeup and conditioning ingredients

    Cons

    • Soft Serve is semi-sheer rather than full coverage
    • Contains fragrance
    • Strawberry scent may not suit everyone
    • Gloss needs reapplication
    • Not a substitute for a dedicated lip treatment when lips are severely dry or cracked
    • Premium-priced compared with many basic drugstore glosses

    Truly Beauty Hydrating Lip Gloss vs. Regular Lip Gloss

    The biggest difference is the way Truly positions this product.

    A traditional lip gloss may primarily focus on:

    color + shine

    Truly’s Hydrating Lip Gloss adds a stronger:

    color + shine + conditioning

    approach.

    The formula contains jojoba oil, shea butter, and sodium hyaluronate alongside the ingredients responsible for its gloss texture, color, and fragrance. (Truly Beauty)

    That doesn’t automatically make it better than every other gloss.

    It simply makes it more interesting for someone who wants their lip makeup to feel more like a combination of beauty and lip care.

    Current Amazon Information

    The Amazon listing provided for this review currently shows:

    • Brand: Truly
    • Shade: Soft Serve
    • Finish: Semi-glossy
    • Product benefits: Hydrating, high shine, smoothing, nourishing, non-sticky
    • Customer rating: 4.2 out of 5 stars
    • Customer reviews: 131
    • Amazon Choice
    • 1K+ bought in the past month

    Amazon information can change, including price, availability, ratings, review counts, badges, and sales indicators, so check the current listing before purchasing.

    Quick Product Box

    Truly Beauty Hydrating Lip Gloss — Soft Serve

    A sheer rosy-pink lip gloss with a high-shine finish and a formula featuring hyaluronic acid, jojoba oil, and shea butter.

    View on Amazon

    #ad Affiliate link — I may earn a commission from qualifying purchases. As an Amazon Associate I earn from qualifying purchases. Product availability, price and details may change on Amazon. Product sizes, ingredients, packaging, availability, sellers, and delivery information can change. Check current Amazon listing before purchasing.

    Is Truly Beauty Hydrating Lip Gloss Worth Trying?

    If your ideal lip product is sheer, glossy, pink, and comfortable-looking, Truly Beauty Hydrating Lip Gloss is an interesting option.

    The Soft Serve shade is particularly easy to imagine as an everyday lip product because it combines a subtle rosy tint with a reflective finish rather than delivering a dramatic color payoff.

    The ingredient profile also gives it more of a conditioning angle than a basic shine-only gloss, with hyaluronic acid, jojoba oil, and shea butter highlighted by the brand. (Truly Beauty)

    The biggest consideration is fragrance.

    Because this gloss contains fragrance and several fragrance allergens, people with easily irritated lips may prefer a simpler fragrance-free lip product.

    Final Thoughts

    Truly Beauty Hydrating Lip Gloss is best thought of as a glossy tinted lip product with added conditioning ingredients, rather than a replacement for a dedicated lip balm or treatment.

    For the Soft Serve shade, expect a sheer rosy-pink tint, high shine, and a strawberry scent.

    If you like fresh, glossy makeup and want a lip product that feels more conditioning than a basic gloss, it may be worth considering.

    Just keep your expectations realistic: the product can enhance the appearance and feel of your lips, but it should not be treated as a guaranteed solution for persistent or severely dry lips.

    Beauty Glow Guide tip: For a simple everyday beauty look, pair a sheer rosy gloss like Soft Serve with brushed brows, curled lashes, and a lightweight complexion product for an effortless finish.

    Save This for Later

    Looking for an easy everyday lip product with sheer pink color and high shine?

    Save this guide to Pinterest so you can come back to the ingredient breakdown, finish, pros and cons, and application tips before deciding whether Truly Beauty Hydrating Lip Gloss belongs in your makeup bag.

  • 5 Drugstore Makeup Must-Haves Under $40 to Try in 2026

    Building an everyday makeup routine does not have to mean spending a lot on individual products. These five drugstore picks cover foundation, mascara, makeup application, lipstick, and blush, giving you a simple selection of makeup essentials for under $40 based on the prices available when this article was prepared.

    From a medium-coverage foundation to a purple mascara and an everyday mauve lipstick, these products offer different ways to create a simple, wearable makeup look without a large beauty budget.

    Price note: Amazon prices, availability, shades, packaging, and sellers can change. The prices below were based on the information available when this article was prepared. Check the current Amazon listing before purchasing.

    1. Maybelline Fit Me Matte + Poreless Foundation — 228 Soft Tan

    Maybelline Fit Me Matte + Poreless Liquid Oil-Free Foundation is a liquid foundation in shade 228 Soft Tan.

    According to the current Amazon listing you supplied, the formula is oil-free, offers medium coverage, and has a matte finish. The listing also positions the foundation for normal-to-oily skin and describes it as available in 40 shades.

    The 228 Soft Tan shade is the specific variant covered in this article, so shoppers should check the current shade selection before ordering.

    Product details:

    • Shade: 228 Soft Tan
    • Size: 1 fl oz
    • Form: Liquid
    • Coverage: Medium
    • Finish: Matte
    • Oil-free
    • Recommended use: Face

    Price used for this article: $7.63

    View on Amazon:
    Maybelline Fit Me Matte + Poreless Foundation – 228 Soft Tan

    Availability note: The Amazon listing you supplied currently showed this specific product as temporarily out of stock, so availability may change.


    2. essence Lash Princess False Lash Effect Mascara — Purple

    If you want to add a little color to an everyday makeup routine, the essence Lash Princess False Lash Effect Mascara in Purple offers a more noticeable alternative to traditional black mascara.

    The current Amazon listing describes a conical fiber brush designed to capture lashes from root to tip and provide a fanned-out, clump-free appearance. It is listed as lengthening and volumizing.

    The listing also identifies the product as vegan and cruelty-free and states that it is not water resistant.

    Product details:

    • Color: Purple
    • Size: 0.4 fl oz
    • Brush: Conical fiber brush
    • Benefits listed: Lengthening and volumizing
    • Formula claim: Vegan
    • Cruelty-free claim
    • Water resistance: Not water resistant

    Price used for this article: $3.32

    View on Amazon:
    essence Lash Princess False Lash Effect Mascara – Purple


    3. Real Techniques Miracle Complexion Sponge — 4-Pack

    A good makeup sponge can make a difference in how liquid and cream products are applied.

    The Real Techniques Miracle Complexion Sponge 4-Pack uses a three-point design with a flat edge, rounded sides, and a precision tip. According to the Amazon listing, the flat edge can be used for application and coverage, the rounded side for blending, and the tip for smaller areas around the eyes and nose.

    The sponge can be used damp for a more skin-like finish or dry for fuller, buildable coverage.

    Product details:

    • Quantity: 4 sponges
    • Material: Foam
    • Latex-free
    • Three-point design
    • Suitable for foundation and concealer
    • Can also be used with cream and liquid makeup
    • Vegan and cruelty-free claims in the listing

    Price used for this article: $12.99

    View on Amazon:
    Real Techniques Miracle Complexion Sponge – 4-Pack


    4. Revlon Super Lustrous Lipstick — 764 On the Mauve

    For an everyday lip color, Revlon Super Lustrous Lipstick in 764 On the Mauve offers a classic mauve option.

    The Amazon listing describes the lipstick as having a creamy formula with microfine pigments. It also states that the formula contains 80% conditioning ingredients and is designed to provide a lightweight feel.

    The shade is On the Mauve (764), so make sure the selected shade matches what you want before purchasing.

    Product details:

    • Shade: 764 On the Mauve
    • Size: 0.15 oz
    • Formula: Cream
    • Finish: Cream
    • Microfine pigments
    • Conditioning ingredients
    • Lightweight feel

    Price used for this article: $9.99

    View on Amazon:
    Revlon Super Lustrous Lipstick – 764 On the Mauve


    5. wet n wild Color Icon Blush — Bed of Roses

    The wet n wild Color Icon Blush in Bed of Roses is a powder blush designed for adding color to the cheeks.

    The Amazon listing identifies the product as a powder and highlights jojoba oil in the product title. It is also listed as cruelty-free and vegan.

    Because blush shades can look different depending on lighting, skin tone, and application, checking the current product images and shade information before ordering is a good idea.

    Product details:

    • Shade: Bed of Roses
    • Form: Powder
    • Quantity: 1
    • Jojoba oil highlighted in listing
    • Cruelty-free and vegan claims in listing

    Price used for this article: $4.98

    View on Amazon:
    wet n wild Color Icon Blush – Bed of Roses


    What You Get for Under $40

    Using the prices listed when this article was prepared:

    ProductPrice
    Maybelline Fit Me Foundation$7.63
    essence Lash Princess Mascara$3.32
    Real Techniques Sponge 4-Pack$12.99
    Revlon Super Lustrous Lipstick$9.99
    wet n wild Color Icon Blush$4.98
    Total$38.91

    That puts the five products at $38.91 before any applicable tax or other charges, based on the prices supplied for this article.

    Since Amazon pricing can change, the total may be different when you visit the listings.

    A Simple Makeup Routine With These Products

    You can use these five products to build a straightforward makeup routine:

    Step 1 — Foundation
    Apply Maybelline Fit Me Matte + Poreless Foundation and build coverage gradually where needed.

    Step 2 — Blend
    Use the Real Techniques Miracle Complexion Sponge to blend your foundation for an even-looking finish.

    Step 3 — Add Mascara
    Apply the essence Lash Princess Purple Mascara if you want a more colorful eye look.

    Step 4 — Add Blush
    Apply wet n wild Bed of Roses to the cheeks and build gradually.

    Step 5 — Finish With Lipstick
    Complete the look with Revlon Super Lustrous Lipstick in 764 On the Mauve.

    You do not necessarily need to use all five products together. Each can also be incorporated into a makeup routine you already have.

    Things to Check Before Buying

    Before ordering any of these products from Amazon:

    • Check the current price.
    • Confirm the shade or color.
    • Check current availability.
    • Review the current product listing for any changes.
    • Make sure the selected variant is the one described in this article.
    • Remember that packaging can change.

    Final Thoughts

    These five drugstore makeup picks cover several basic parts of an everyday makeup routine without requiring a large individual-product budget.

    The selection includes a foundation, mascara, makeup sponge, lipstick, and blush, with the listed prices adding up to $38.91 when this article was prepared.

    Prices and availability can change, so check the current Amazon listings before purchasing.

    Save This for Later

    Looking for affordable makeup ideas? Save this guide to Pinterest so you can come back when you’re planning your next drugstore makeup haul.

    Pin it, save it, and compare the current prices before you buy.

    Affiliate Disclosure

    #ad Affiliate link — I may earn a commission from qualifying purchases. As an Amazon Associate I earn from qualifying purchases. Product availability, price and details may change on Amazon. Product sizes, ingredients, packaging, availability, sellers, and delivery information can change. Check current Amazon listing before purchasing.


  • NYX Bare With Me Concealer Serum Review: Texture, Coverage & How to Apply

    Concealer can help brighten the under-eye area and even out the appearance of redness, blemishes, and other areas where you want additional coverage. However, applying too much product can sometimes make makeup look heavy or emphasize visible texture.

    The NYX Professional Makeup Bare With Me Concealer Serum is a liquid concealer with a serum-inspired texture. According to the current Amazon product listing, it offers medium coverage, a natural finish, a lightweight feel, and up to 24-hour hydration.

    In this guide, we’ll look at its texture, coverage, application, under-eye use, setting options, and simple ways to include it in an everyday makeup routine.

    What Is NYX Bare With Me Concealer Serum?

    NYX Bare With Me Concealer Serum is a liquid concealer designed for use on the under-eye area, face, and body.

    The current Amazon listing describes it as a serum concealer with a lightweight feel, natural finish, and medium coverage. It is listed for uses including the appearance of dark circles, blemishes, redness, and dry patches.

    The product listing also identifies tremella mushroom, cica, and green tea among the ingredients highlighted for the formula.

    According to the listing, it is suitable for all skin types.

    Because product formulations, shades, and packaging can change, check the current product listing before purchasing.

    What Does the Concealer Feel Like?

    The product is presented as a liquid concealer with a lightweight feel rather than a traditional heavy cream concealer.

    Its serum-inspired format may appeal to people who prefer makeup that feels less heavy during everyday wear.

    The current listing describes the finish as natural and the coverage as medium.

    That makes it worth considering if you want more coverage than a sheer complexion product while still preferring a relatively natural-looking makeup finish.

    What Coverage Does NYX Bare With Me Concealer Serum Provide?

    The current product listing describes the concealer as providing medium coverage.

    Medium coverage can be useful when you want to cover or reduce the appearance of:

    • Dark circles
    • Redness
    • Blemishes
    • Uneven-looking areas
    • Dry-looking patches

    You do not necessarily need to apply a large amount to the entire area.

    For a more natural result, start with a small amount and build coverage only where it is needed.

    Start With a Small Amount

    One of the easiest ways to get more control over concealer application is to start with less product.

    Instead of immediately covering the entire under-eye area, place a small amount where you want coverage.

    Then blend it outward.

    If you still need more coverage, add another thin layer.

    Beauty Glow Guide Tip

    Start with a thin layer and build gradually.

    This gives you more control over the final appearance and can help prevent unnecessary layers of makeup.

    How to Apply NYX Bare With Me Concealer Under the Eyes

    For a simple everyday under-eye application:

    1. Start with your normal skincare and makeup base.
    2. Apply a small amount of concealer where coverage is needed.
    3. Gently tap the product into the skin.
    4. Blend the edges outward.
    5. Add a second thin layer if additional coverage is needed.
    6. Decide whether you want to set the area with powder.

    You can use a makeup sponge, concealer brush, or clean fingertips depending on the type of application you prefer.

    A damp makeup sponge can create a softer blended appearance, while a small brush can provide more precise application.

    How to Cover Redness and Blemishes

    The concealer can also be used on areas where you want additional coverage.

    Rather than spreading a large amount over the entire area, apply a small amount directly where coverage is needed.

    Allow the product to sit briefly, then gently blend the edges.

    Keeping the center of the application slightly more concentrated can help maintain coverage without making the surrounding makeup unnecessarily heavy.

    How to Apply Concealer Over Dry-Looking Areas

    If an area looks dry or textured, applying more concealer is not always the best solution.

    Start with a well-prepared makeup base.

    Then:

    • Use a small amount of concealer.
    • Tap rather than aggressively rubbing.
    • Blend the edges carefully.
    • Build coverage slowly.
    • Avoid excessive powder.

    The Amazon listing describes the product as providing up to 24-hour hydration, but individual makeup results can vary. Your skincare routine, skin condition, environment, and amount of product applied can all affect how concealer looks throughout the day.

    Should You Set NYX Bare With Me Concealer With Powder?

    Not necessarily.

    Whether you need powder depends on your preferred finish and how the concealer behaves on your skin.

    If you prefer a softer, more natural-looking finish, you may use little or no powder.

    If your concealer tends to move or crease, apply a small amount of finely milled setting powder where needed.

    Avoid applying a thick layer of powder under the eyes if you prefer a more skin-like appearance.

    For a natural finish

    Try:

    Concealer → Blend → Let it settle → Powder only where needed

    This gives you more control than automatically applying powder over the entire under-eye area.

    How to Get a Natural-Looking Concealer Finish

    For an everyday makeup look:

    • Start with a small amount.
    • Apply product only where coverage is needed.
    • Blend the edges carefully.
    • Build coverage gradually.
    • Avoid unnecessary layers.
    • Use powder selectively.
    • Check the finished makeup in natural lighting.

    The goal is not necessarily to hide every trace of natural skin texture.

    A lighter application can allow some natural texture to remain visible while still providing the coverage you want.

    Can You Use NYX Bare With Me Concealer as Foundation?

    The current Amazon listing identifies the product as a concealer and lists uses including foundation and concealing.

    However, the product is still primarily positioned as a concealer, and its medium coverage makes it more practical for targeted application than automatically applying a large amount over the entire face.

    If you want a more minimal makeup routine, you could use it selectively on areas that need additional coverage and leave the rest of the complexion lighter.

    This can create a more natural-looking everyday makeup style.

    Is NYX Bare With Me Concealer Good for Everyday Makeup?

    The product may appeal to people who prefer:

    • A lightweight-feeling concealer
    • Medium coverage
    • A natural finish
    • Buildable application
    • Serum-inspired makeup textures
    • Targeted coverage
    • A simpler everyday makeup routine

    If you prefer very full-coverage makeup, you may need additional layers or another complexion product depending on your desired result.

    What Ingredients Does the Product Highlight?

    The current Amazon listing specifically highlights:

    • Tremella mushroom
    • Cica
    • Green tea

    The listing describes the product as a concealer with hydration benefits and a smooth, natural-looking finish.

    Ingredient lists and formulas can change, so if you have a particular ingredient sensitivity or want to check the complete INCI list, review the current packaging or Amazon listing before purchasing.

    NYX Bare With Me Concealer and Skincare

    Although the product is described as a serum concealer, it is still a makeup product.

    The word “serum” in the product name should not automatically be interpreted as meaning that it replaces a dedicated skincare serum.

    A simple makeup-prep routine can be:

    Cleanse → Hydrate → Moisturize → Makeup

    If your skin tends to look dry under makeup, proper preparation may be more useful than simply adding more concealer.

    For more skincare guidance, see our simple hydrating skincare routine.

    You can also read our guide to choosing a hydrating serum for dry-looking skin if you are building a hydration-focused routine.

    How to Make Concealer Look Better on Dry-Looking Skin

    If concealer frequently looks dry, review your makeup preparation before adding more product.

    A simple approach is:

    1. Start with comfortable, prepared skin

    Use your normal moisturizer and allow it to settle before applying makeup.

    2. Avoid excessive product

    More concealer does not always mean better coverage.

    3. Build gradually

    Apply a thin layer first and add coverage only where necessary.

    4. Be selective with powder

    Powder can help control movement, but too much may make an area appear drier.

    5. Check your makeup in natural light

    Indoor lighting can make it harder to judge how much product you have applied.

    How to Use It for Redness

    If you want to reduce the appearance of redness, targeted application can be more effective than applying a thick layer everywhere.

    Try:

    Small amount → Tap into the area → Blend edges → Add another thin layer if needed

    This keeps the application focused.

    You can then apply the rest of your complexion makeup around the area without unnecessarily building up product.

    How to Use It for Blemishes

    For blemishes, a small brush can provide more control.

    Apply a small amount directly to the area and gently blend around the edges.

    Avoid repeatedly rubbing the center of the blemish because this can remove the coverage you just applied.

    If more coverage is necessary, let the first layer settle and add another small amount.

    Common Concealer Mistakes

    Applying too much at once

    A large amount can be harder to blend and may create a heavier appearance.

    Covering the entire under-eye area

    You may only need coverage in specific areas.

    Using too much powder

    A heavy layer of powder can change the appearance of a natural finish.

    Rubbing instead of tapping

    Aggressive rubbing can move the product instead of building even coverage.

    Judging the finish immediately

    Give your makeup a little time to settle before deciding whether you need another layer.

    Ignoring your makeup base

    If your skin feels very dry before makeup application, adding more concealer may not solve the underlying issue.

    A Simple Everyday Makeup Routine

    If you prefer a low-effort makeup routine, try this structure:

    1. Skincare

    Cleanse and use your normal moisturizer.

    2. Base

    Apply your preferred skin tint, foundation, or other complexion product if you use one.

    3. Concealer

    Apply NYX Bare With Me Concealer Serum only where additional coverage is needed.

    4. Blush

    Add your preferred blush.

    5. Powder

    Set only the areas that need additional staying power.

    6. Finish

    Complete your look with your preferred eye, lip, or setting products.

    The exact order can vary depending on the products you use.

    Quick Product Comparison

    FeatureNYX Bare With Me Concealer Serum
    Product typeLiquid concealer
    CoverageMedium
    FinishNatural
    FeelLightweight
    Skin type listedAll
    Highlighted ingredientsTremella mushroom, cica, green tea
    Listed useUnder-eyes, face and body
    Hydration claimUp to 24 hours
    Size0.32 fl oz / 9.6 mL
    Shade referenced02 Light

    Product information can change, so check the current listing for the latest shade, formula, size, and availability information.

    Quick Product Box

    NYX Professional Makeup Bare With Me Concealer Serum

    A liquid serum-inspired concealer with medium coverage, a natural finish, and a lightweight feel. The current product listing describes up to 24-hour hydration and highlights tremella mushroom, cica, and green tea in the formula.

    Shade: 02 Light
    Size: 0.32 fl oz / 9.6 mL
    Finish: Natural
    Coverage: Medium
    Skin Type: All
    Item Form: Liquid

    View on Amazon: NYX Bare With Me Concealer Serum

    Final Thoughts

    NYX Bare With Me Concealer Serum is an option to consider if you prefer a lightweight-feeling concealer with medium coverage and a natural finish.

    The most straightforward way to use it is to start with a small amount, apply it only where coverage is needed, and build gradually.

    For under-eyes, redness, and blemishes, targeted application can help you control how much makeup you use. Powder can then be added selectively if you need additional setting.

    If you prefer everyday makeup that still allows some natural skin texture to remain visible, this type of application can be a practical approach.

    Save This for Later

    NYX Bare With Me Concealer Serum Guide

    Save this guide to your Beauty Glow Guide Pinterest board so you can return to these concealer application tips whenever you need them.

    For more practical beauty guidance, explore our Makeup & Beauty articles and Skincare & K-Beauty guides.

    Affiliate Disclosure

    #ad Affiliate link — I may earn a commission from qualifying purchases. As an Amazon Associate I earn from qualifying purchases. Product availability, price and details may change on Amazon. Product sizes, ingredients, packaging, availability, sellers, and delivery information can change. Check current Amazon listing before purchasing.

  • The Science of Shade Matching: L’Oréal Paris True Match Foundation Guide

    The Science of Shade Matching: L’Oréal Paris True Match Foundation Guide

    A beautiful foundation finish starts with a shade that works naturally with your complexion. Even a good formula can look less natural when the depth or undertone is not right.

    The L’Oréal Paris True Match Super-Blendable Liquid Foundation is a useful product to explore when learning the basics of foundation shade matching.

    In this guide, we’ll look at skin depth, undertone, lighting, jawline testing, and simple application tips to help you make a more informed shade choice.

    Depth vs. Undertone

    Two important parts of foundation matching are skin depth and undertone.

    Depth describes how light or deep your complexion appears.

    Undertone describes the underlying tone of your skin, commonly described as:

    • Warm
    • Neutral
    • Cool

    Two people can have a similar skin depth but different undertones. That’s why a foundation shade that looks right on someone else may not look the same on you.

    Why Jawline Testing Helps

    The jawline can be a useful place to test foundation because it sits between your face and neck.

    A shade that blends naturally across this area is less likely to create an obvious line between the two.

    When possible, test foundation in natural daylight and give the formula a moment to settle before making your final judgment.

    Lighting Changes Everything

    The same foundation can appear different depending on the lighting.

    Indoor yellow lighting, bathroom LEDs, phone cameras, and outdoor daylight can all affect how a shade looks.

    For an important shade decision, compare the foundation in more than one lighting environment.

    Natural daylight is particularly useful because it gives you a better idea of how the shade actually looks on your skin.

    How to Compare Foundation Shades

    If you’re choosing between two shades, comparing them side by side can be more helpful than testing them hours apart.

    Look for the shade that blends most naturally into your skin rather than automatically choosing the one that looks brightest or most flattering immediately after application.

    Pay attention to both:

    • Skin depth
    • Undertone

    A shade that matches both can create a more seamless-looking base.

    Don’t Match Only Your Hand

    Your hands and face can have different coloring.

    That’s why choosing foundation simply by holding the bottle or testing a shade on your hand may not give you the most accurate match.

    When possible, test the foundation closer to the jawline and compare it with your neck and face.

    Application Matters Too

    Shade matching is only part of the finished look.

    The amount of foundation you apply, your skin preparation, and how well you blend can all affect the final appearance.

    Start with a thin layer and blend it evenly.

    If you need more coverage in certain areas, build gradually rather than applying a heavy layer everywhere.

    This can also help you see the actual foundation shade more clearly.

    Common Foundation Shade-Matching Mistakes

    Choosing Only by Bottle Appearance

    The color of a foundation bottle or packaging isn’t a reliable way to determine whether the product matches your skin.

    Relying Completely on Online Photos

    Online images and swatches can be useful references, but screens display colors differently.

    Whenever possible, compare the manufacturer’s current shade information and swatches with your own complexion.

    Ignoring Undertone

    A foundation can have a similar depth but still look noticeably different if the undertone doesn’t work with your skin.

    Testing in Only One Light

    A shade that looks perfect under warm indoor lighting may look different outdoors.

    Try to check your shade in natural daylight before making your final decision.

    Matching Only Your Face

    Your face, neck, and hands may not have exactly the same coloring.

    Consider how the foundation looks across the face and jawline rather than matching one small area.

    A Simple Shade-Matching Routine

    Use this process when choosing a foundation:

    1. Determine your approximate skin depth.
    2. Consider whether your undertone is warm, neutral, or cool.
    3. Compare the available True Match shade information.
    4. Test your closest options near the jawline.
    5. Check the shade in natural daylight.
    6. Allow the foundation to settle.
    7. Compare the result with your neck.
    8. Choose the shade that blends most naturally.

    This approach can make online and in-store foundation shopping less confusing.

    How to Get a Natural-Looking Foundation Finish

    Once you’ve selected your shade, keep the application simple.

    Start with a small amount of foundation and blend it across the face.

    Add another thin layer only where you want additional coverage.

    Pay particular attention to the edges around the jawline, hairline, and nose so the foundation transitions smoothly.

    The goal isn’t necessarily to apply more product. It’s to create an even base while keeping the application controlled.

    Is L’Oréal Paris True Match Right for You?

    The L’Oréal Paris True Match Super-Blendable Liquid Foundation can be a useful option if you’re looking for a foundation around which to build a shade-matching routine.

    It may be worth considering if you want to focus on:

    • Finding a closer shade match
    • Understanding undertones
    • Comparing foundation shades
    • Creating a natural-looking base
    • Building coverage gradually
    • Learning better foundation application habits

    Remember that shade availability and product variations can change, so check the current listing before purchasing.


    Quick Product Box

    L’Oréal Paris True Match Super-Blendable Liquid Foundation

    View on Amazon

    Product shades, ingredients, packaging, price, availability, sellers, and delivery information can change. Check the current Amazon listing before purchasing.

    Affiliate Disclosure

    Affiliate Disclosure: This article contains affiliate links. As an Amazon Associate I earn from qualifying purchases.

    Final Thoughts

    Finding the right foundation shade is about more than choosing a color that looks close in the bottle.

    Pay attention to skin depth, undertone, lighting, and where you test the foundation.

    With L’Oréal Paris True Match, use the available shade information as a starting point, compare shades carefully, and check your final choice in natural light.

    A little extra time spent on shade matching can make the rest of your makeup routine much easier.

    Save This for Later

    The Ultimate Foundation Shade-Matching Guide 💕

    Save this guide to your Beauty Glow Guide Pinterest board so you can return to these foundation shade-matching tips whenever you’re shopping for makeup.

  • Is the e.l.f. Halo Glow Liquid Filter Worth the Hype? A Practical Review

    Is the e.l.f. Halo Glow Liquid Filter Worth the Hype? A Practical Review

    If you like makeup that gives your complexion a luminous, fresh-looking finish, you’ve probably seen the e.l.f. Halo Glow Liquid Filter everywhere.

    This multi-use complexion product can be worn alone, under or over makeup, mixed with foundation, or used on selected areas as a highlighter. e.l.f. describes it as a light-coverage, buildable product with a luminous finish.

    But how should you actually use it, and how do you choose the right shade? This guide breaks down the basics so you can decide whether the e.l.f. Halo Glow Liquid Filter fits into your everyday makeup routine.

    What You’ll Learn

    • How the e.l.f. Halo Glow Liquid Filter works on different skin types
    • 4 versatile ways to apply and layer it
    • How to find your correct shade and undertone
    • Step-by-step everyday application routine

    What Is e.l.f. Halo Glow Liquid Filter?

    The e.l.f. Halo Glow Liquid Filter is a liquid complexion booster designed to add a luminous, soft-focus appearance to the skin.

    Rather than functioning like a traditional full-coverage foundation, it can be used in several different ways depending on the makeup look you want to achieve.

    According to e.l.f., the product can be worn alone, under or over makeup, mixed with foundation, or applied as a highlighter to the high points of the face. That versatility is one of the main reasons it fits so easily into different makeup routines.

    What Kind of Finish Does It Give?

    Halo Glow Liquid Filter is designed for a luminous, glowy finish rather than a traditional matte finish.

    The product provides light, buildable coverage, so it can be used when you want some complexion enhancement without creating a heavy foundation layer.

    If you prefer a soft, subtle glow, you can use a smaller amount. If you want more noticeable luminosity, you can build the product gradually in thin layers.

    Four Ways to Use Halo Glow Liquid Filter

    One of the most useful things about this product is that you don’t have to use it in only one way.

    1. Wear It Alone

    For a simple makeup look, apply a small amount across the face and blend it evenly. This creates a lightweight, luminous appearance without adding a traditional full-coverage foundation layer. If you prefer minimal makeup, this is an easy way to add natural radiance.

    2. Wear It Under Foundation

    Halo Glow Liquid Filter can also be used underneath foundation as a luminous base. Apply a thin layer first, blend it evenly, and then apply your foundation as usual. This approach works particularly well when you want your foundation to have a more radiant, lit-from-within appearance.

    3. Mix It With Foundation

    Another option is mixing a small amount of Halo Glow Liquid Filter directly with your liquid foundation. This gives your foundation a more luminous appearance while allowing you to maintain your usual coverage level. Start with a small amount and adjust the ratio according to the finish you prefer.

    4. Use It as a Highlighter

    You can also apply a small amount to areas where you want to emphasize natural light. Try the cheekbones, brow bones, bridge of the nose, or cupid’s bow. Blend the edges carefully so the glow looks soft and intentional rather than overly concentrated.

    How to Choose Your Halo Glow Shade

    Shade selection is important because Halo Glow Liquid Filter is available across multiple shade families and undertones.

    The current e.l.f. listing features 15 flexible shades covering fair, light, medium, deep, and rich skin tones, with cool, neutral, and warm undertone options.

    When choosing your shade, consider:

    • Your overall skin-depth range
    • Your undertone (warm, cool, or neutral)
    • Whether you want the product to blend naturally across your full face
    • Whether you plan to use it as an all-over glow or mainly as a targeted highlighter

    If you’re unsure between two shades, compare product swatches on the retailer listing before purchasing.

    Warm, Cool, or Neutral Undertone?

    Understanding your undertone can help narrow down your choices:

    • Warm Undertones: Skin often appears more golden, peach, or yellow.
    • Cool Undertones: Skin often appears more pink, rosy, or blue-leaning.
    • Neutral Undertones: A balance between warm and cool tones.

    Natural lighting and comparing several shade options will give you the best idea of which shade family is most suitable for your skin.

    How Much Halo Glow Should You Use?

    You don’t need to start with a large amount. Begin with a small dot, blend it out, and then decide whether you want additional glow.

    This is especially important when applying the product all over the face.

    Beauty Glow Guide 2 Tip: Start with less product and build the glow gradually. It’s much easier to add another thin layer than to correct an overly luminous application.

    Combining Halo Glow With Other Beauty Favorites

    If you already have a liquid foundation or liquid blush that you love, you don’t need to replace them.

    Try combining a small amount of Halo Glow Liquid Filter with your foundation to transform its finish. You can also pair it with high-impact cheek products like the e.l.f. Camo Liquid Blush Review: How to Use High-Pigment Liquid Blush

    .

    For additional affordable complexion items, explore our roundup of 5 Drugstore Makeup Must-Haves Under $40 to Try in 2026

    .

    Halo Glow for Everyday Makeup

    For a simple, radiant everyday routine, follow this step-by-step process:

    1. Skincare: Apply your daily moisturizer and sunscreen, allowing them to absorb completely. For step-by-step morning prep, see our Simple Morning Skincare Routine for Beginners: 5 Easy Steps.
    2. Glow Booster: Apply a small amount of Halo Glow Liquid Filter.
    3. Blend: Spread evenly using your fingertips, a brush, or a damp sponge.
    4. Conceal: Add concealer where extra coverage is needed.
    5. Foundation (Optional): Apply foundation if you prefer a higher coverage level.
    6. Blush & Finish: Add blush and set selected areas with powder as desired.
    7. Evening Removal: At the end of the day, melt away long-wear glow products using a double-cleansing method with a product like the BANILA CO Clean It Zero Original Cleansing Balm Review.

    Is e.l.f. Halo Glow Liquid Filter Right for You?

    This type of complexion product may appeal to you if you enjoy:

    • Luminous, radiant makeup finishes
    • Lightweight complexion products
    • Customizable, buildable coverage
    • Multi-use makeup tools
    • Glowy everyday makeup looks

    If you strongly prefer a completely matte finish, a luminous liquid filter may not be the formula for you.

    Related BEAUTY GLOW GUIDE 2 Articles

    Final Thoughts

    The e.l.f. Halo Glow Liquid Filter is designed to give you flexibility rather than locking you into one particular makeup routine.

    You can wear it alone, use it under or over makeup, mix it with foundation, or apply it selectively as a highlighter. The easiest approach is to start with a small amount and build the glow gradually.

    If you’re interested in trying it, take your time with shade selection and consider how you want to use the product before choosing your shade.

    Save This for Later

    e.l.f. Halo Glow Liquid Filter Guide ✨

    Save this guide to your beauty essentials or Makeup ideas Pinterest board so you can return to these glow, shade, and application tips whenever you need them!

    Featured Product & Disclosure

    #ad Affiliate Disclosure: As an Amazon Associate, Beauty Glow Guide 2 earns from qualifying purchases. This article contains affiliate links. Product shades, ingredients, packaging, price, and availability can change. Check current retailer listings before purchasing.

    Quick Product Box

    e.l.f. Halo Glow Liquid Filter

    A multi-use, light-coverage liquid complexion booster infused with squalane and hyaluronic acid for a soft-focus, radiant finish.

    View on Amazon


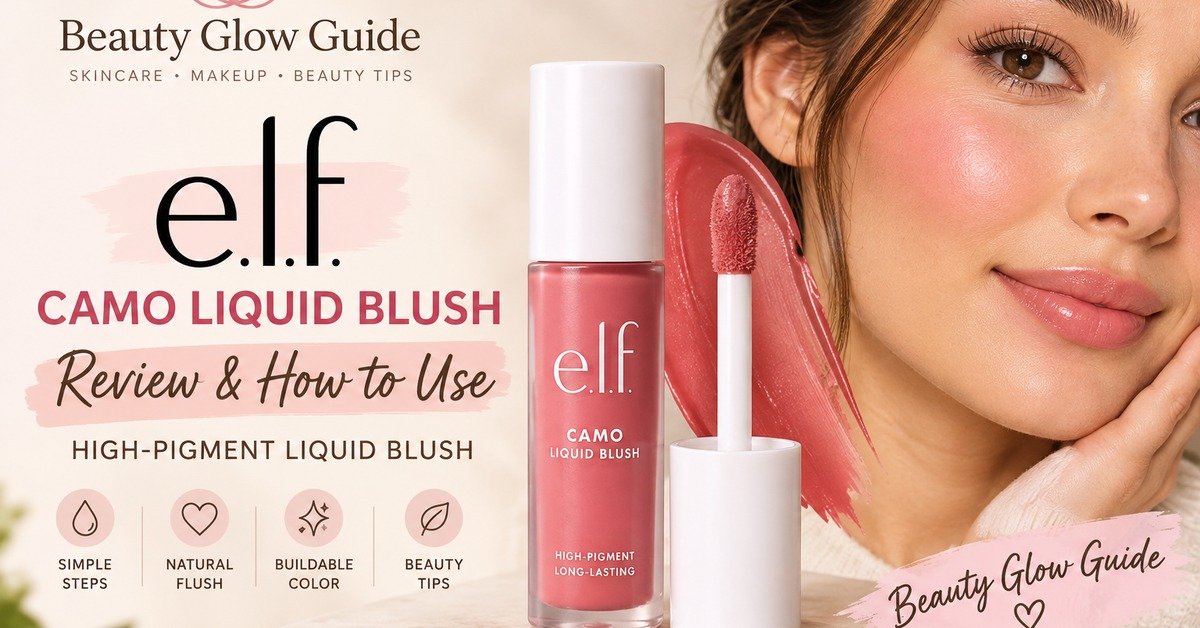
  • e.l.f. Camo Liquid Blush Review: How to Use High-Pigment Liquid Blush

    e.l.f. Camo Liquid Blush Review: How to Use High-Pigment Liquid Blush

    Liquid blush can give your makeup a fresh, natural-looking flush, but highly pigmented formulas can be easy to overapply.

    The key is simple: start with a tiny amount, blend quickly, and build the color gradually.

    The e.l.f. Camo Liquid Blush is designed to add noticeable cheek color with a lightweight, blendable application. In this guide, we’ll look at how to use it without applying too much product.

    What You’ll Learn

    • How high-pigment liquid blush works
    • Simple blending techniques for an even application
    • Ideal placement for different face shapes and styles
    • Common liquid blush mistakes to avoid

    What Is e.l.f. Camo Liquid Blush?

    e.l.f. Camo Liquid Blush is a liquid blush designed to add vivid color to the cheeks. Its liquid format makes it easy to spread and blend, while its high pigmentation allows you to build intensity according to your preferred makeup look.

    Because liquid blush spreads across the skin quickly, you generally don’t need a large amount to create visible color.

    Start With a Tiny Amount

    This is the most important tip when working with a highly pigmented liquid blush.

    Start with one or two small dots on the cheek. Blend those dots completely before deciding whether you need more product.

    Applying a large amount immediately can make the blush difficult to diffuse evenly. Starting with less gives you much more control over the final result.

    Beauty Glow Guide 2 Tip: You can always add more color, but removing excess blush can disturb the makeup underneath.

    How to Blend Liquid Blush

    Once you’ve placed the blush, blend it gently outward from the original application point.

    You can use:

    • A makeup brush for controlled blending
    • Your fingertips for a quick, natural-looking application
    • A damp makeup sponge for a softer finish

    Whichever tool you choose, avoid rubbing aggressively. Gentle tapping and blending can help keep the makeup underneath looking even.

    Build the Color Gradually

    If your first layer looks too subtle, don’t immediately apply a large amount. Instead, blend the first layer and then add another small dot if needed.

    This gives you better control over the final intensity and helps prevent an overly strong application.

    For everyday makeup, a lighter first layer creates a softer flush. If you want more noticeable color for photos or events, gradually add another thin layer.

    Where Should You Apply Liquid Blush?

    Blush placement can change the overall appearance of your face:

    • Lifted Look: Try positioning the blush slightly higher on the cheekbones and blending outward toward the temples.
    • Classic Fresh Flush: Place color closer to the apples of the cheeks and blend the edges softly.

    There isn’t one placement that works for everyone. Your preferred makeup style and face shape can help guide where you apply the product.

    Liquid Blush Over Foundation

    When using liquid blush over foundation or concealer, avoid applying too much pressure during blending.

    Place a small amount of blush where you want the color and gently blend it into the surrounding makeup. If you’re using a makeup sponge, tapping rather than dragging helps reduce disruption to the base layer.

    For more budget-friendly beauty recommendations to pair with your liquid blush, explore our guide on 5 Drugstore Makeup Must-Haves Under $40 to Try in 2026

    .

    How to Avoid Applying Too Much

    If you’re new to highly pigmented liquid blush, follow this simple checklist:

    1. Start with one or two small dots.
    2. Blend immediately after applying.
    3. Check the color in natural light before adding more.
    4. Build the intensity in thin layers.
    5. Keep the edges soft and diffused.
    6. Use less product near the center of the face.
    7. Stop once you’ve reached your desired intensity.

    The goal isn’t to use a lot of blush—it’s to control where the color goes and how strong it looks.

    Is e.l.f. Camo Liquid Blush Right for You?

    This type of liquid blush may appeal to you if you enjoy:

    • Noticeable, high-impact cheek color
    • Lightweight liquid makeup formulas
    • Customizable, buildable application
    • Experimenting with different blush placement techniques

    If you prefer extremely subtle makeup, starting with a micro-dot is especially important. To prepare your skin before applying cheek products, see our Simple Morning Skincare Routine for Beginners: 5 Easy Steps

    .

    Related BEAUTY GLOW GUIDE 2 Articles

    Final Thoughts

    The biggest lesson when using a highly pigmented liquid blush is to start small.

    With e.l.f. Camo Liquid Blush, begin with a tiny amount, blend it immediately, and add more only when necessary. This approach gives you greater control over intensity and placement.

    A little patience during application makes it much easier to create the exact cheek color you want.

    Save This for Later

    The High-Pigment Drugstore Liquid Blush Guide 💕

    Save this guide to your Makeup ideas or beauty essentials Pinterest board so you can return to these liquid blush application tips whenever you need them!

    Featured Product & Disclosure

    #ad Affiliate Disclosure: As an Amazon Associate, Beauty Glow Guide 2 earns from qualifying purchases. This article contains affiliate links. Product shades, ingredients, packaging, price, and availability can change. Check current retailer listings before purchasing.

    Quick Product Box

    e.l.f. Camo Liquid Blush

    A lightweight, high-pigment liquid blush designed to deliver buildable, long-lasting cheek color.View on Amazon